Blog
5 Amazing Winter Art Projects for Adapted Art Class
Check out this list of 5 amazing winter art projects that are perfect for your Adapted art class! Full of sensory exploration, process based goodness, and lots of opportunity for creative expression and fun!
Learn moreScarf Selfie Winter Art Lesson!
Meet one of your new favorite art lessons for kids! Students will create a scarf selfie (or "scarfie") art project with a focus on line, shape and pattern all will using one of the most fun art techniques called scratch art. This lesson is perfect for elementary students of all ages and can be modified and adjusted with ease.
Learn moreHome For the Holidays Art Lesson
My students have been on a BIG winter homes kick per our last Winter Village lesson. So I decided to encourage them to take their imaginations a step further and give them the opportunity to create the interior of a winter home all decorated for the holidays. Now, in full disclosure, I actually came up with this lesson as a sub-plan because of some unexpected child care issues that popped up for us (eh hem- gotta love those 10 day exposure quarantines). ANYWAY- I created this lesson while I was prepping to be out, and the students did such an amazing job that I decided to keep going on when I returned to school! The lesson is super easy and incredibly engaging for students of all ages! Let me share with you how we made these adorable, cozy and interactive homes! Before starting the actual project, I recommend reading a book talking about different and diverse family traditions. I love this blog by Brightly sharing tons of different book recommendations. I also would recommend the book Windows by Julia Denos or Home by Carson Ellis. Ask your students about what holidays they celebrate in their home and what kind of traditions they have surrounding those holidays. Materials: Construction paper (11 x 17 if you’d like a bigger house or 9 x 12 for a smaller version). I used Astrobrite paper for my example shown, but my students used Tru Ray construction paper A pencil and washable markers to draw with. (Washable is important here because you do not want your marker to bleed through the paper). I used Posca paint pens to draw my example while home Construction paper crayons or high quality colored pencils (Prismacolor shows up amazing on darker paper) Winter Village Drawing Guide and Interior Spaces Reference sheet. Both are available on my website or TPT store. Step 1: paper in half horizontally. This helps to find the middle of the paper. Then fold each side into the centerline. Step 2: Cut off the corners of the folds for the roof. Step 3: Draw the outside of the house using a washable black marker. For ideas and inspiration, provide students with Winter Village Drawing Guide. Step 4: Open “doors” of the house and begin drawing the inside of the house! Students can choose to draw the inside of their home as one large room or they can divide it up into multiple rooms. Students can draw elements of their real home or create a new space of their own… their DREAM house! If this lesson is being done around the holidays encourage students to add a bit of their holiday celebrations and traditions to their homes as well. This was one of my examples in which I left for my students. This example showed what a house could look like if you chose to divide it up until many rooms. Step 5: Color in construction paper crayons or Prismacolor pencils. Higher quality colored pencils like Prismacolor show up incredibly opaque and bright on construction paper- but they are a bit pricey. So I highly recommend construction paper crayons as a cheaper alternative! This lesson is so fun and easy and the perfect project to get us through the last few days til winter break! I hope you and your students enjoy! Have fun! Happy Creating!
Learn moreCharming Winter Village Drawings
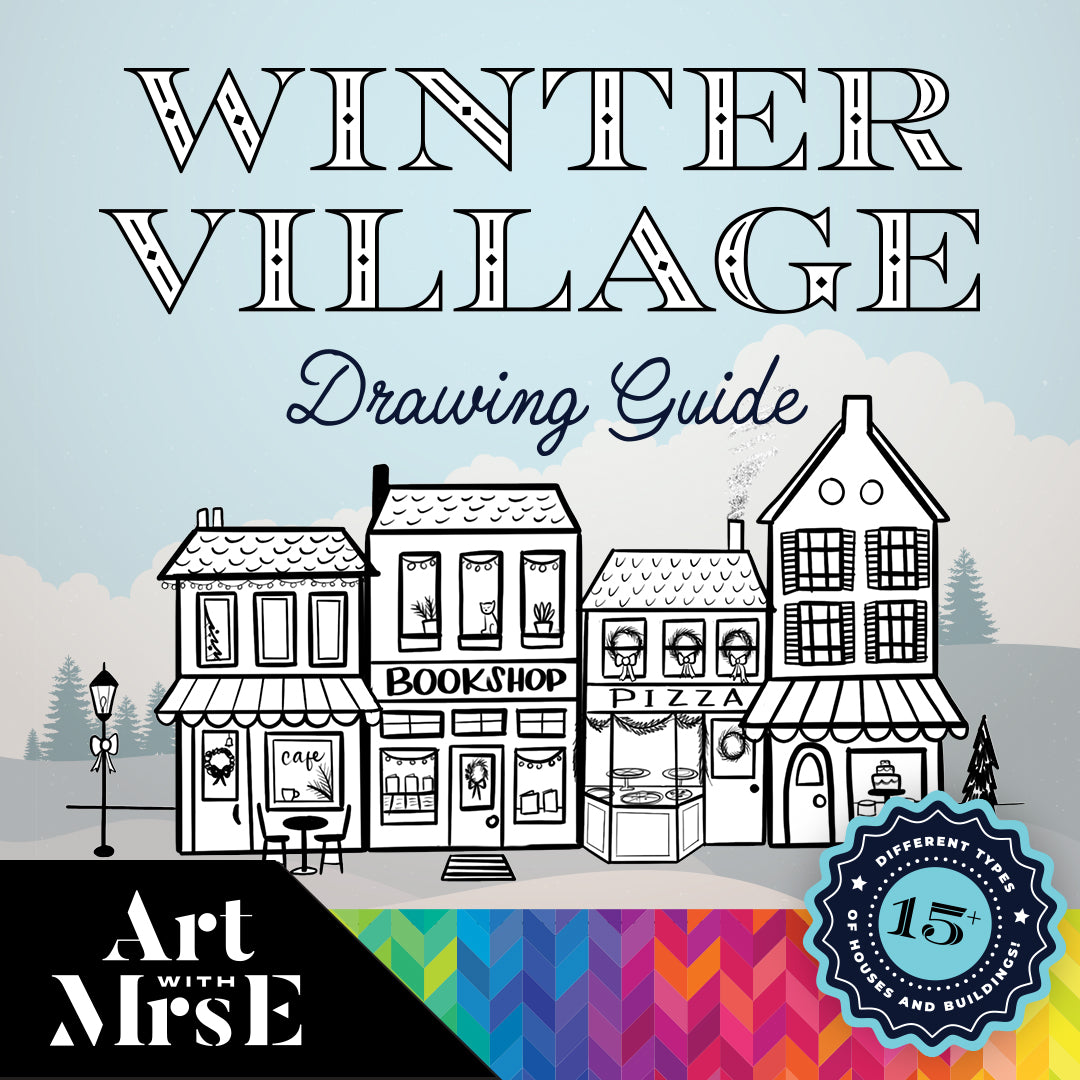
Have I mentioned lately that I am obsessed with all things charming and cozy?? Oh I haven’t? Well let me share something with you: I love CHARM! Growing up in the suburbs of Pittsburgh, we never really had anywhere that I could walk or ride my bike to- and fantasized about “life in a small town” more often than I can count. As a result of my endless desire, I ended up spending the majority of my adult life living in a city that oozed charm from every corner: Charleston, SC *swoooon*. To continue this narrative, my husband and I decided to bypass the beach and spent our honeymoon in the English countryside at a perfect little Bed and Breakfast called The Three Daggers . We were in absolute heaven and often fantasize about moving to the English Countryside when we’re retired. So why am I blabbing on with my personal backstory about my love of all things charming?? Well, when I moved back to Pittsburgh a few years back, I missed the dreamy elements of living in such a quaint and lovely city. I had a hard time combatting the grey skies and long winters, so I turned to my sketchbook. Thankfully, art provides such a powerful and productive outlet for me to release my feelings of stress, and I knew I needed to make my sketchbook time a priority. As I spent more and more time working in my sketchbook, I started seeing a few reoccurring themes: Plants, dogs, and houses. There is something so therapeutic about drawing a house or building, and after filling pages upon pages of charming little houses in my sketchbooks, I decided to try and bring the charm to others by creating this Winter Village Drawing Guide! I decided to create a simple and fun lesson for my students during the month of December that they will stay engaged with and excited about as we get closer and closer to the holidays and winter break. Beginning with the story Windows by Julia Denos, we talked in great detail about buildings, and about how we draw a house as a small child (square and a triangle) vs. how different all kinds of houses and buildings can look. Two other great books for this project are Home by Carson Ellis and Snow by Uri Shulevitz. Then, using black or blue 18 x 6” construction paper and white Prismacolor pencils (the Rolls Royce of colored pencils IMO), we started the drawing! Beginning with a bumpy(ish) line towards the bottom of the page for the soft snow, my students then used my Winter Village drawing guide for their houses and towns. Yall. They completely soared- so gorgeous in every way! I loved watching them work and add their own personal special touches to (something I strongly encouraged to my students as they were working.) These villages took about a class and a half to complete and I decided at the last moment to go ahead and add some glitter to the snow or lights. I may not be super into glitter but when I do decide to break it out- you know it’s going to be good! If you’re looking for an easy peasy art project that your students are sure to LOVE, be sure to grab my Winter Village Drawing Guide and give this lesson a whirl! While you’re at it- you can also use this guide to paint the windows around your school! Have fun!
Learn moreWinter Village Window Painting
Spread joy around your school by painting a simple winter village on the windows! It’s the most wonderful time of the year… window painting season! Or at least that’s what I say! This has been a little tradition I started all the way back my first year teaching in 2008 (😳). For me, painting the windows is such an easy way to spread joy to others. Not only is it incredibly relaxing to do as an artist, but be prepared to hear the “Ooos and Ahhs” as students and staff walk by admiring your window painting. I’ll never forget one of my students coming up to me at the end of the day and saying “Mrs. Edington, I was watching you paint those houses from my classroom and it was the joy of my day” 🥺❤️😭 Are you kidding me?? That right there is our way yall- to give kids the joy in their day! Let’s Get Started! Supplies: White tempera paint (I use Crayola Premier Tempera) Liquid hand soap (to be added to paint) Paintbrushes (soft bristle/ synthetic are best) Winter Village Drawing Guide (available in my TpT store) Adding soap to your paint can help with application and clean up! Add a bit of soap to your paint. This step is totally optional but when I shared these windows on my Instagram, the number one question I received was “WILL IT COME OFF??” Yessss yall- tempera paint is water-based and wipes right off! Sure you will have to spray and wipe a few times but it is far from permanent. Another option is to add a few pumps of soap to your paint and mix it in. This thins out your paint a bit and can make it appear a little more transparent, but when clean up comes around getting the paint off is a sinch! All you need is a straight razor blade and the paint with soap in it scrapes right off! It’s very satisfying if I do say so myself. Gather your brushes. I like using a variety of flat and round brushes of varying sized depending on the area I’m painting and the small details there are. My favorite classroom brushes are the Class Pack from Royal Langnickle (the green handles!) Print your Drawing guide and get started! Ok you guys- confession time. I have been obsessed with doodling cozy homes for years and years- just check my sketchbooks and you’ll see! So after spending the weekend in a quaint little town near us, I decided to capture the charm of the town and bring it to my students and my resources. Taking photos of all of the cute shops and homes in the town, I turned them into step by step drawing for artists of all ages to follow! You can download this guide here! Begin by painting the snow at the bottom of the window (a bumpy line) and then start painting your buildings! The more charm the better- consider adding lights, street lamps, trees, fences, feet prints and more! Whether you’re planning on painting this village in your classroom, around the school or even at home, I know that you and your little ones are sure to love it! Have fun!
Learn moreOversized Symmetrical Sugar Skulls (Part 1)
Let's learn about the Mexican holiday, Dia de los Muertos by creating an oversized symmetrical sugar skull in art class! This lesson is hands on, fun and has the perfect books to accompany it!
Learn moreInteractive Haunted House Art Lesson
Allow me to introduce you to one of my students’ favorite halloween/ fall themed lessons! This interactive haunted house project has been one of my tride and true lessons over the last 15 years as an art teacher, and my students never cease to amaze me with their creativity! First, to create this haunted house (or fall house for any students who do not celebrate Halloween), students will need my Haunted House Drawing Guide that can be found in my Teachers Pay Teachers store. This drawing guide easily breaks down how students can use line and shapes to create an old creaky and run-down haunted house. Students are able to follow along with this guide both in person or it’s perfect for remote learning! There were even several times last year that my Smartboard wasn’t working, so my students pulled up these guides from their ipads and followed along without missing a beat! Once students have finished drawing their haunted house, they are able to add several signature creepy halloween characters to their houses (also provided in the guide)- but don’t add them all YET because the best part is yet to come! After drawing, have your student trace their pencil lines in varying-sized Sharpies (fine for the larger shapes of the house and an ultra-fine Sharpie for the small details and textures around the house. Have students color their haunted houses in materials of their choice (I usually do crayon, construction paper crayons or colored pencils). Once the Haunted Houses are colored in, using a Xacto blade, carefully cut open the window flaps or door to the house leaving one seem open and tape a small piece of paper behind the windows on the back. Have students add more funny/ creepy characters in the windows for added fun. I love giving my students the prompt of “What would be the weirdest/ silliest thing you would never expect to see in a haunted house?” A ghost singing in the shower? Dracula cooking garlic soup? You will be pleasantly shocked and in awe of the creative ideas your students come up with for this project! If you decide to do this lesson with your students be sure to tag me on Instagram so I can see (@artwithmrs.e ). Have fun and Happy Halloween!
Learn more