Spring has sprung, and what better way to celebrate the season of growth and renewal than by indulging in some adorable spring chick art crafts? These feathered friends are the perfect symbol of new beginnings and the fresh start that springtime represents. With their soft, fluffy feathers and sweet chirps, it's no wonder that chicks are a beloved icon of the season. So, let's grab our paint, paper, and our clean toilet bowl brush (wait, what?!) and get ready to create some fun and festive spring chick art crafts that will brighten up any room and bring a smile to your face!
1. Gather your Supplies!
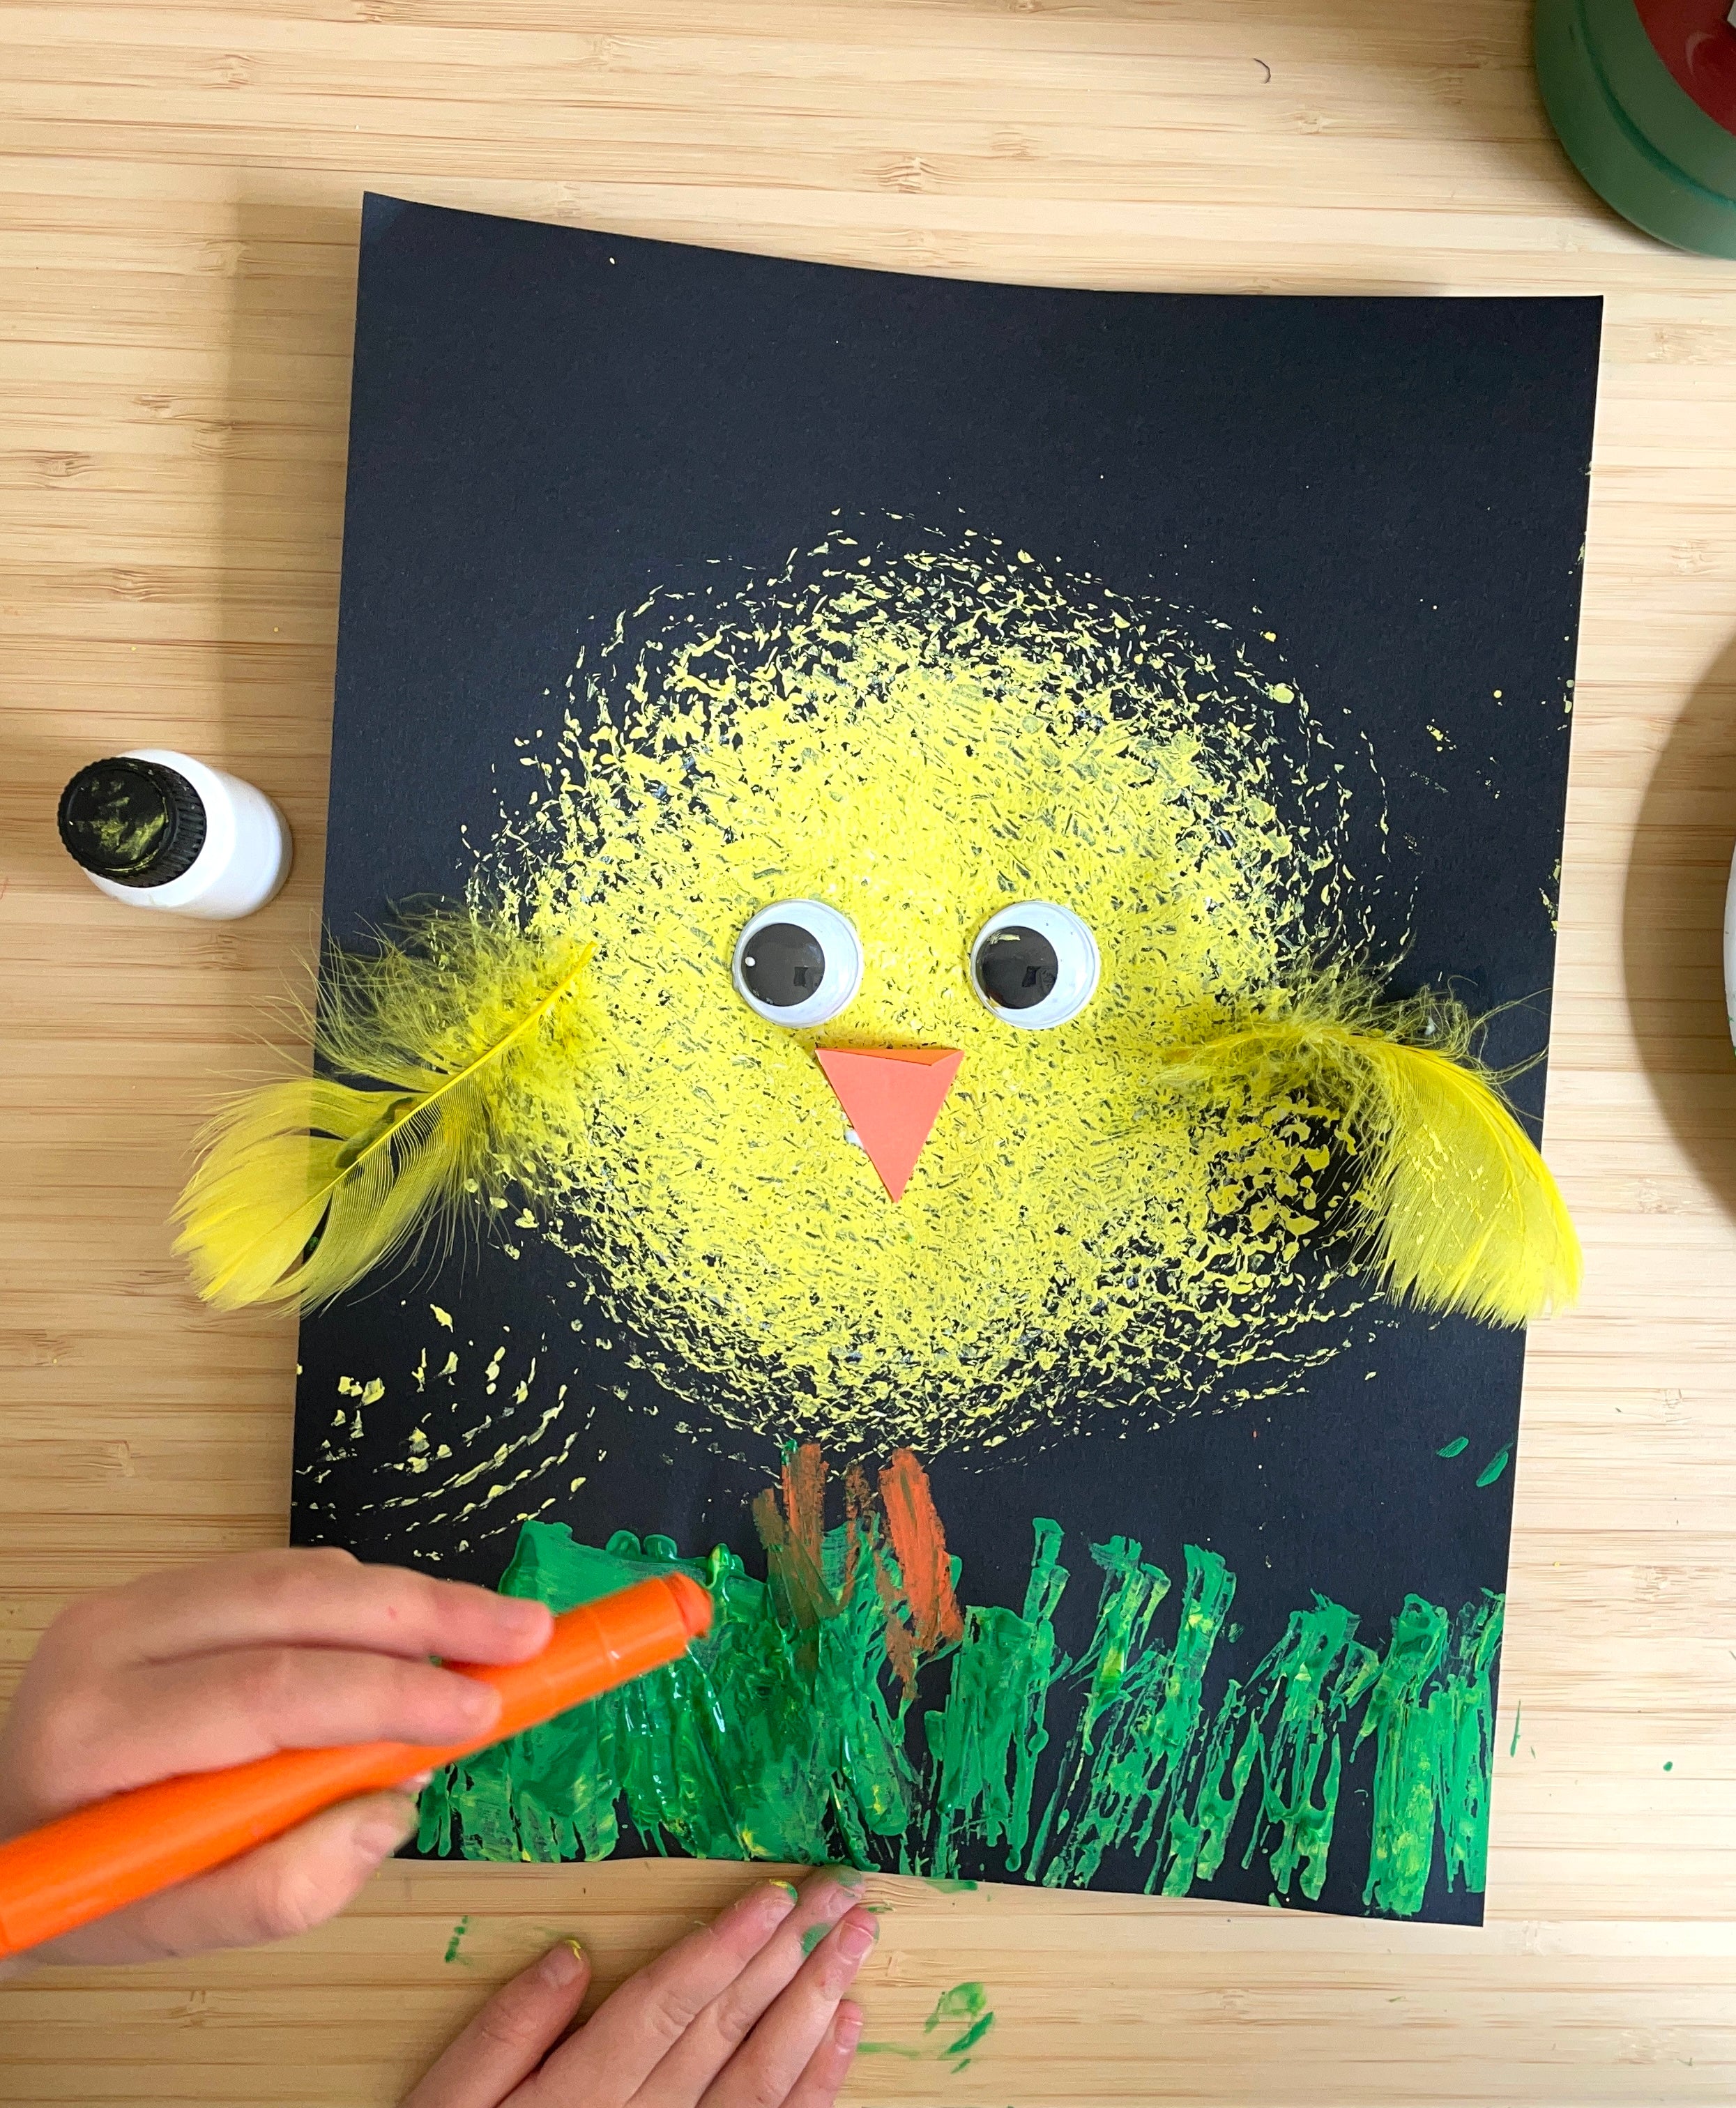
For this project you will need black paper (I love Tru Ray), smallish paper plates, google eyes, a small square piece of cardboard, orange paper for beaks, and yellow, green and white tempera paint. Optional: pink paint for cheeks, yellow feathers for wings.
2. Trace A Circle

3. Use a rough textured brush for stamping
Call me crazy but when I was at the dollar tree and saw these toilet brush cleaners I thought, these would be perfect for littles to dip in stamp for their chick texture! Another option is a hand sponge with a handle. It's great for little hands to grip. Tip if you use a toilet brush- be sure to have your little one place their hand really low down on a handle for more control when stamping. Add a bit of white to your yellow plate to make it more opaque and then dip and stamp like crazy until the whole circle has been covered


4. Use Cardboard Pieces to stamp as grass
Using the edge of the cardboard square, dip the side into green paint (again with a bit of white to make it pop on the black) and stamp the cardboard vertically along the bottom of the paper. Kids naturally want to draggggggg their cardboard (which is ok) but try to use an auditory cue to get them to stamp. I always just say "dab! dab! dab!"


5. Glue Down Eyes and Beak and Wings
It's a good idea to pre-cut the beaks before hand. Just fold orange paper in half and on the fold, cut little triangles out so make it look like the beak is open. Have your little glue down one side of the beak under the eyes. Add too lines of glue to either side of the body to glue down two yellow feathers for wings. Or if you don't have feathers, kiddos can just paint wings on the sides, or not at all!


6. Draw Two Lines for Legs in Orange (oil pastel of paint sticks work best)
Optional: Using a Q-tip dip end in pink paint to dab on as cheeks for your chick


7. Cut and Glue Plate as Egg
Pre draw a zig zag line across the plate and cut out. One plate can act as the shell for two different kids' projects. Allow kiddos to decide if they want the egg on the bottom, like the chick is popping out.. or on the chick's head. Add a line of glue to the rim of the plate and glue down. Hold for 10 seconds.


Let Dry and Enjoy!!!

I hope your littles enjoy this project! Be sure to tag me on social media if you create it, I'd love to see how they turn out!!
Happy Making!
xo-Kaitlyn


