A super fun and easy way to add a statement to your art show is by creating a water fall or pond (if it makes sense as part of your theme of course!)
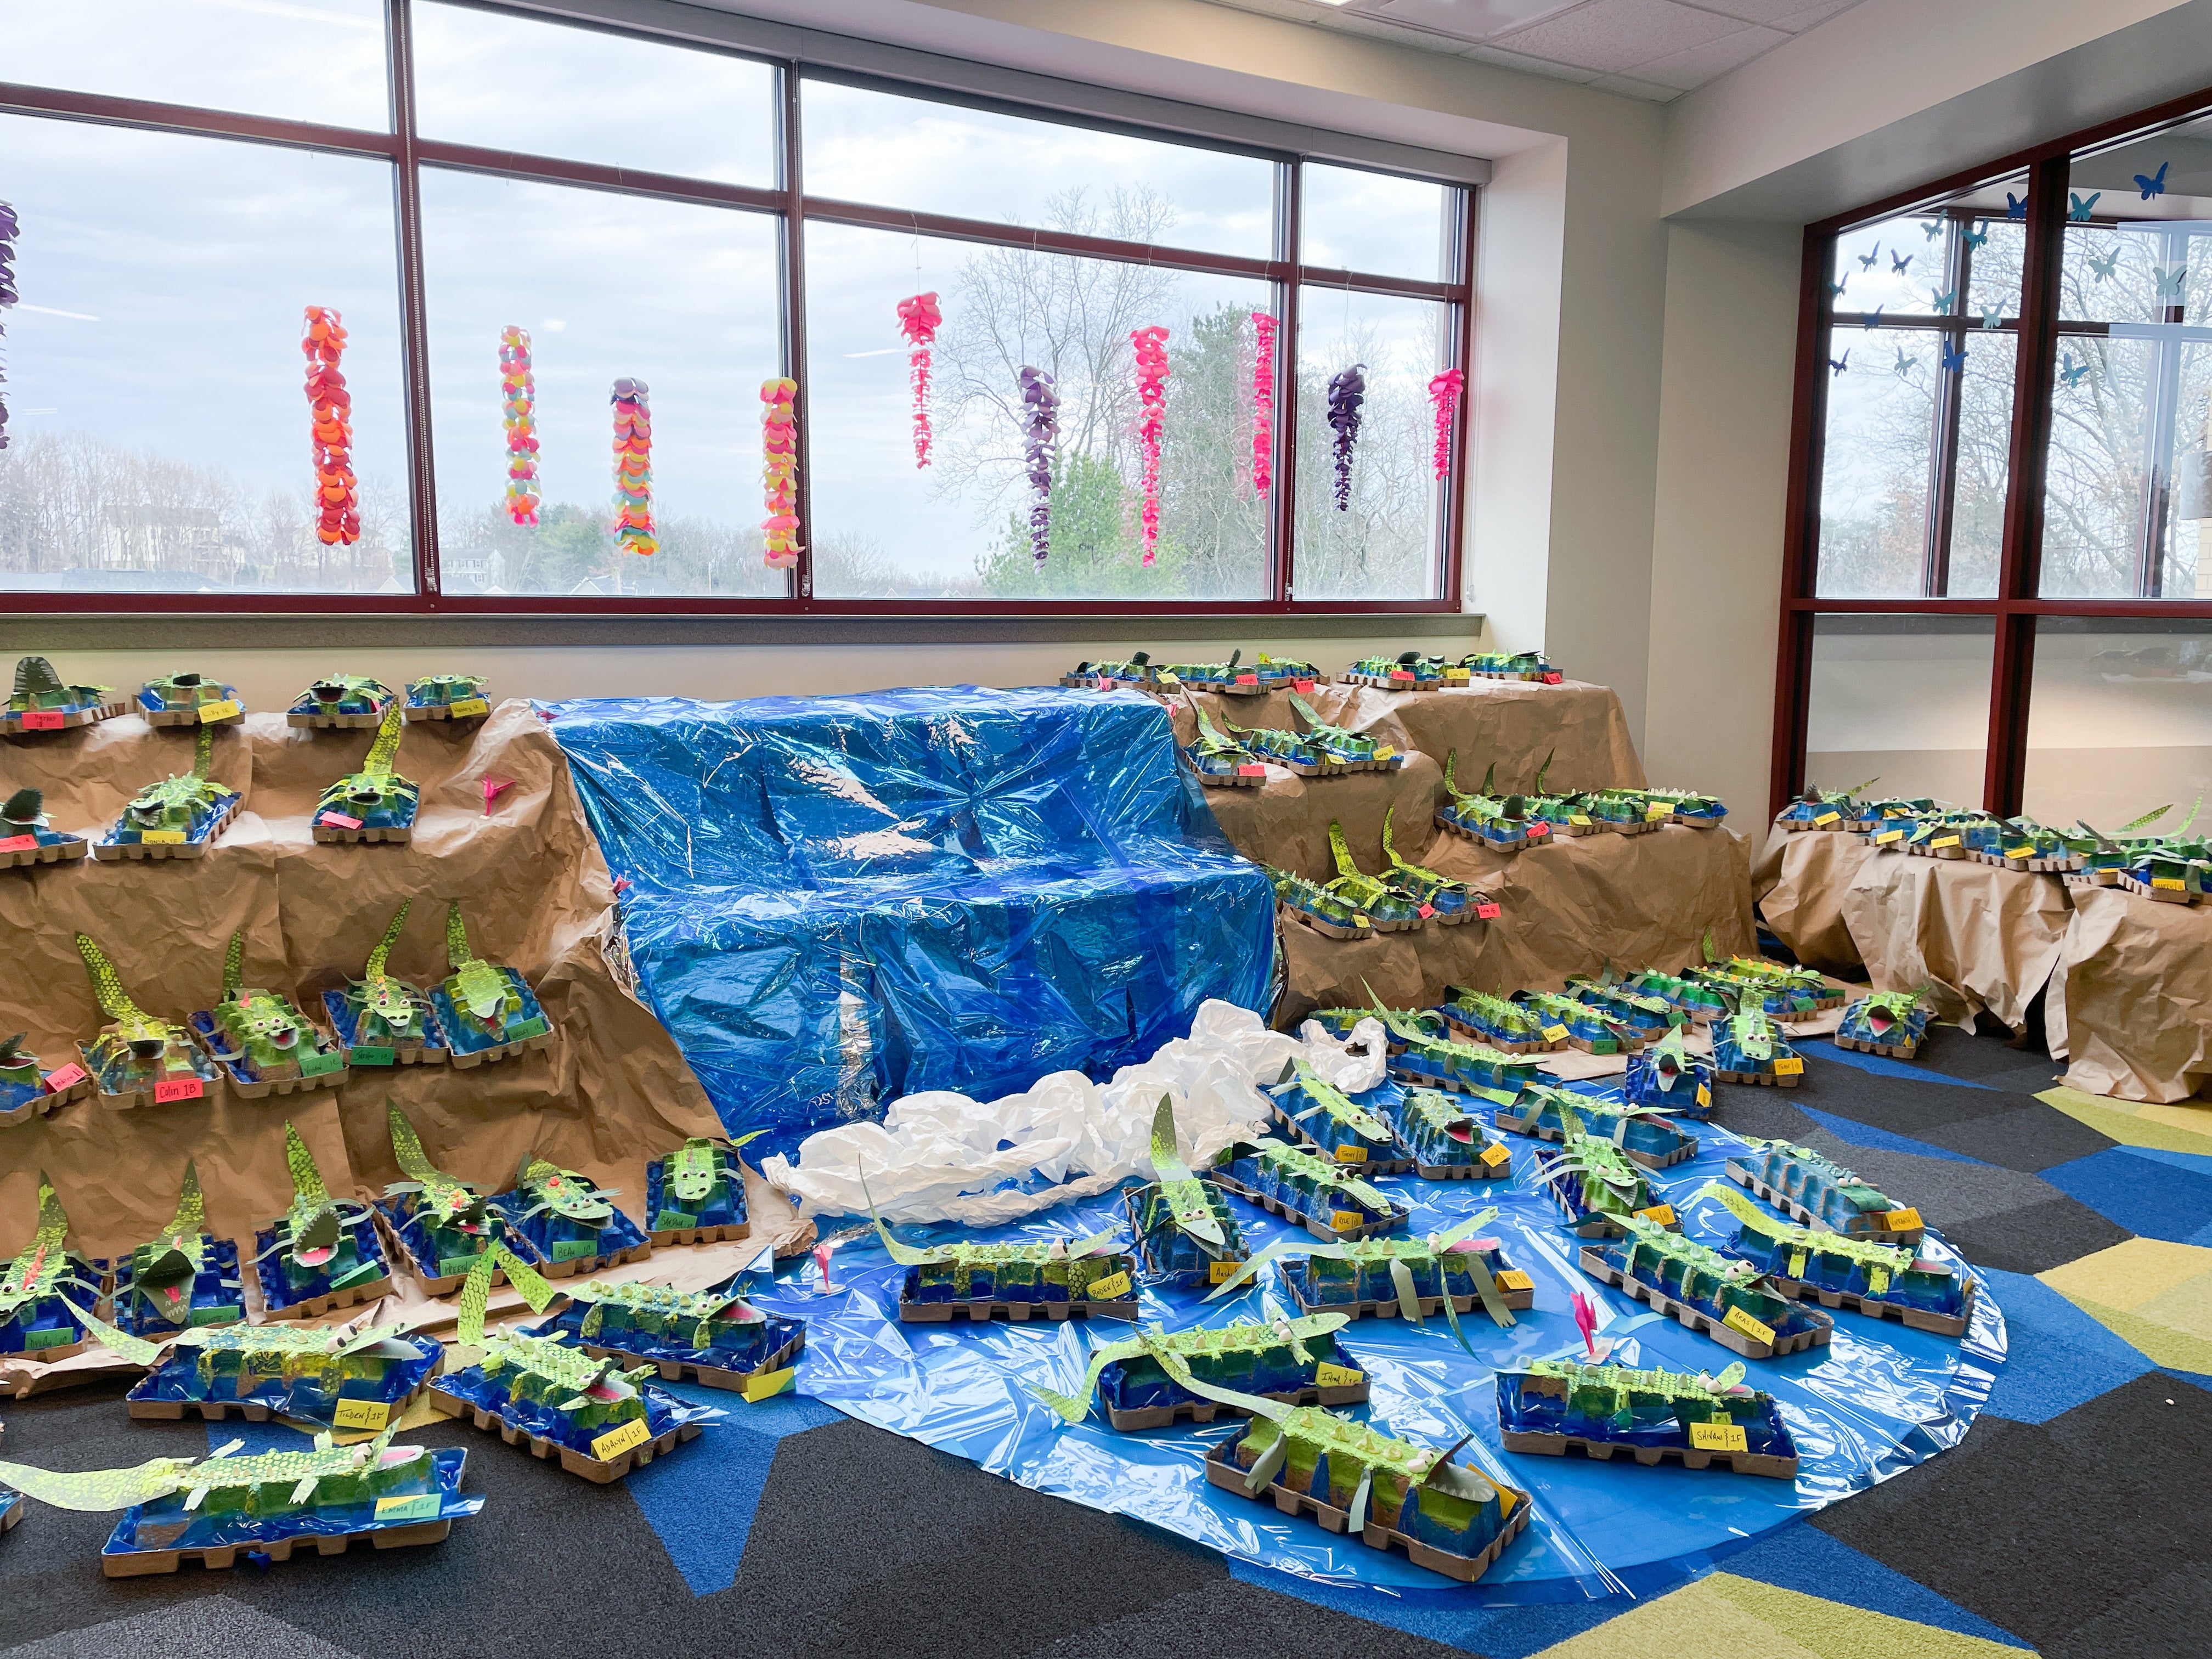
This is also one of my favorite ways to display student work to make it more interesting than just setting 3D projects on a table. Last year for our "Welcome to the Jungle" art show, my first graders created this amazing cardboard crocodiles and I knew they had to be displayed in and around water! So here is how I created this waterfall!
How DIY a Waterfall for Your Art Show
(this post contains affiliate links )
Supplies:
- Brown kraft bulletin board paper
- Blue Cellophane wrap
- Silver metallic foil wrapping paper (5-6 rolls)
- clear packing tape
- (optional) curtain twinkle lights

1. Scout out and select a good location. Obviously you will need an area that is more elevated to create a waterfall effect, so consider areas with a seat, steps, etc. My school had a beautiful wide open area with "stadium seating" for students that I thought would be perfect for our waterfall location. Also measure your space so you know how much gift wrap, cellophane and kraft paper to purchase.

2. Measure out how much area will be "water" and how much will be "rocks/ land. Unroll the metallic wrapping paper shiny side up to the desired width and length. We secured it with clear packing tape behind the seating and then rolled it down the steps, cutting when we reached the desired length. Then, start back at the top, overlapping slightly, and roll back to the bottom. Do that as many times as desired to get the desired width

3. Next, measure the kraft paper's on either side of the waterfall to desired length and width then cut a little longer than you need. To add texture crumple the paper to make it look more rocky. Secure the kraft paper with packing or masking tape. We taped it at the top around the back of the seating.

4. Lay the curtain lights out onto of the wrapping paper and secure at the top with clear packing tape. Definitely check to make sure the lights are near a plug if they require it, or if they are battery powered you should be good.

5. Secure the blue cellophane at the top and roll it down the waterfall over the lights and wrapping paper. Once it hits the floor you can crumple it for a bit of depth. Cut and repeat as many times as needed to fill the waterfall.
6. If you have extra gift wrap, cut out a "pond/ pool" shape at the base and layer cellophane on top. I ran out of gift wrap so I just used blue bulletin board paper as the base and layered and measured the cellophane on top.
7. Crumple kraft paper to create balls of paper aka "rocks" to place around the base of the waterfall and around the pond. You can also wrap boxes with kraft paper for added height that projects can be displayed on. Also crumple white bulletin board paper in long pieces and place at the base of the waterfall to create the "foam".
 Now add your students amazing artwork to your dreamy amazing space! Here are a few more examples of "water features" I have created and used during art shows in the past.


If you're interested in seeing more photos from my art shows, check out my "Night in Monet's Garden" Art show blog post and my 10 Must Have Items Every Art Teacher Needs to Put on an Art Show post here. If you have any questions- just let me know!
Happy making!


1 comment
Thank you, I needed some ideas as to creating a bulletin board with water falls for environmental friendly for caring for environment and this gave me many ideas.