

Valentine's Day is around the corner so why not invite your little artists to create a homemade valentine for the loved ones in their lives! You can create your own DIY marbled paper Valentines using two simple yet vibrant mediums: shaving cream and liquid watercolors? In this blog, I'll guide you through the step-by-step process of making stunning marbled paper that will add a special touch for your valentine, not to mention be a whole lot of fun to make!
Materials Needed:

- Shaving cream (preferably white, unscented)
- Liquid watercolors or food coloring in various shades
- Cardstock paper or heavy paper
- Toothpicks or a similar tool for swirling
- Tray or disposable surface for working
Steps:

-
Prepare Your Workspace: Before diving into the creative process, cover your work surface with a disposable tablecloth or tray to contain the mess. Shaving cream and liquid watercolors can be easily cleaned up, but it's always a good idea to protect your workspace.

-
Create a Shaving Cream Canvas:
- Spray a layer of shaving cream onto your tray, and use a spatula to create a smooth and even surface.

- Spray a layer of shaving cream onto your tray, and use a spatula to create a smooth and even surface.
-
Add Vibrant Colors:
- Drop liquid watercolors or food coloring onto the shaving cream. Be generous with the colors, creating a palette that resonates with the Valentine's Day theme.

- Drop liquid watercolors or food coloring onto the shaving cream. Be generous with the colors, creating a palette that resonates with the Valentine's Day theme.
-
Swirl and Mix:
- Use a toothpick or a similar tool to gently swirl and mix the colors into unique and intricate patterns. Experiment with different swirling techniques to achieve the desired effect.
-
Prepare the Paper:
- Cut your cardstock paper into the desired size for your Valentines. Ensure that it fits comfortably into the tray.

- Cut your cardstock paper into the desired size for your Valentines. Ensure that it fits comfortably into the tray.
-
Transfer the Marbled Design:
- Carefully press the prepared paper onto the surface of the shaving cream and colors. Gently pat it down to ensure the paper makes full contact with the marbled mixture.

- Carefully press the prepared paper onto the surface of the shaving cream and colors. Gently pat it down to ensure the paper makes full contact with the marbled mixture.
-
Reveal the Marbled Print:
- Lift the paper off the tray, holding it at one corner. Place it on a clean, flat surface.
- Use a flat tool, like a squeegee, ruler or a spatula, to scrape off the excess shaving cream. The marbled design will be revealed underneath.
-
Allow to Dry:
- Place the marbled paper on a flat surface and allow it to dry completely. This may take some time, so be patient to ensure the colors set properly.

- Place the marbled paper on a flat surface and allow it to dry completely. This may take some time, so be patient to ensure the colors set properly.
-
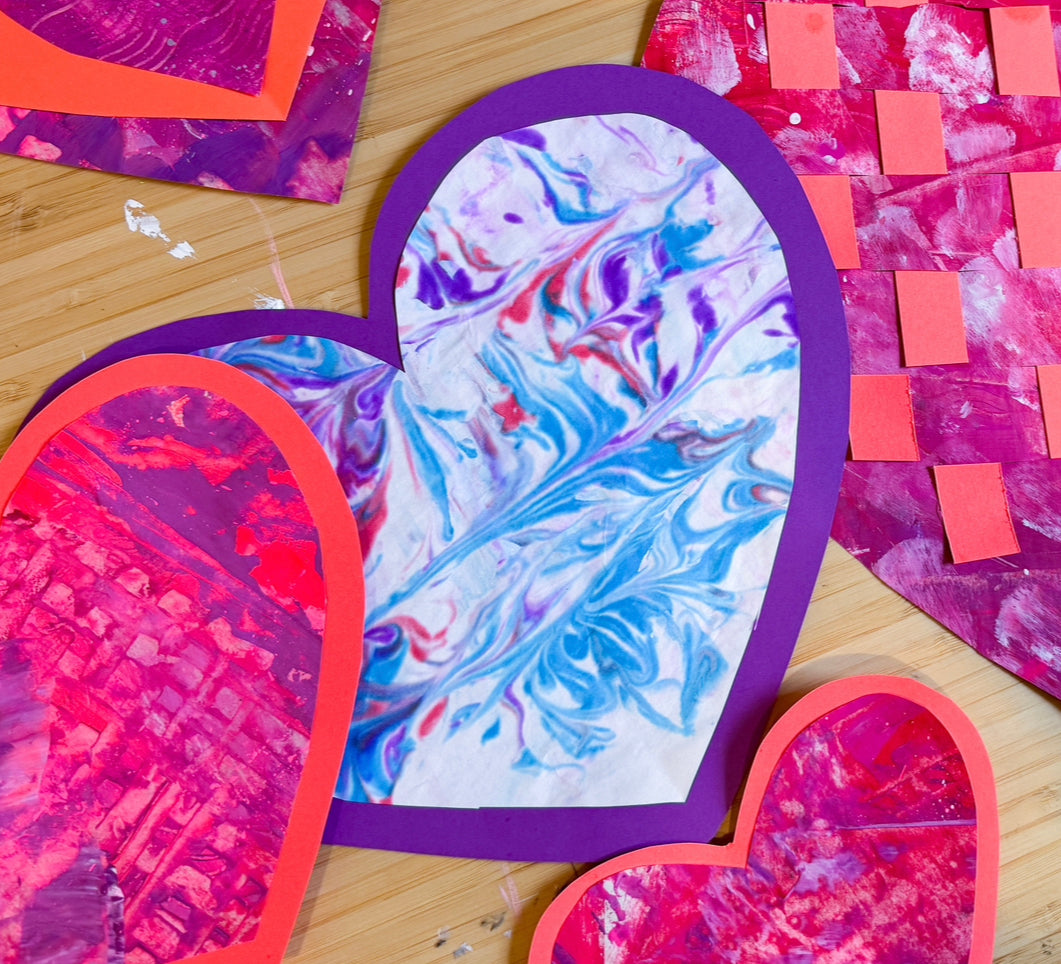
Personalize Your Valentines:
- Once the marbled paper is dry, cut it into heart shapes or any other desired form. Add personal messages, quotes, or embellishments to make each Valentine unique.
-
Share the Love:
- Your marbled paper Valentines are now ready to be shared with loved ones. Whether you're creating cards for family, friends, or that special someone, the handmade touch will surely be appreciated.
Creating marbled paper Valentines with shaving cream and liquid watercolors is not only a delightful and creative process but also a meaningful way to express your love. Each card becomes a unique piece of art, making your Valentine's Day greetings truly special and memorable, not to mention it's a project perfect for all ages! So, gather your materials, dive into the colorful world of marbling, and share the love through your personalized, handmade creations.
Happy Creating!


