Creating a large, textured tree is a beautiful, dynamic project that can be used year after year to create an immersive experience for an art show or your classroom. Whether you're celebrating the seasons, creating a backdrop for an art exhibit, or just looking to add some creative flair to your space, this DIY tree project is a perfect fit. Here’s how to make it step-by-step.
Materials Needed:
- Painter's tape
- Brown kraft paper
- Foil (for texture)
- Hot glue gun
- Brown paper towels (for paper mache)
- Paper mache paste (homemade or Elmer's glue paste)
- Cheap green plastic tablecloths
- Paper clips or binder clips
- Pool noodles (optional for branches)
- Streamers or twisted green bulletin board paper (for vines)
- Paint and brushes (for embellishments)
Step 1: Set the Base

Start by finding a column or bump-out wall space to use as the tree's base. Secure brown kraft paper onto the wall with painter's tape to form the trunk of the tree. This will provide a sturdy foundation for the rest of your project.
Step 2: Add Texture with Foil

Crinkle some strips of foil and hot glue them onto the kraft paper base. This adds texture and gives the tree a more sculptural, realistic look. Foil is lightweight but can still give the appearance of rough bark or tree texture.
Step 3: Paper Mache the Trunk

Next, use strips of inexpensive brown paper towels (perfect for this project and commonly found in schools!) to create a paper mache layer over the foil. Dip the strips into paper mache paste (you can either make it yourself or use Elmer's glue paste) and apply them over the crumpled foil. This layer adds both texture and strength to the trunk.
Step 4: Create the Tree's Leaves

For the leaves, use green plastic tablecloths from the dollar store. These are cheap, easy to work with, and have a nice flowing texture. Attach the tablecloths to the ceiling using paper clips or binder clips, letting them hang down to form the main body of the tree’s leaves.
Step 5: Make Vines to Hang from the Tree

Create some fun vines by twisting green bulletin board paper, streamers, or strips of tablecloths. Drape them around the tree to give it an extra layer of whimsy and realism. You can even have your students help create these in bulk for efficiency!
Step 6: Add Branches with Pool Noodles

If you'd like to add branches to your tree, pool noodles work wonderfully. Cut them to the desired length, then wrap them in crumpled kraft paper and secure them using hot glue or more paper mache. This makes for flexible, lightweight branches that can be arranged however you like.

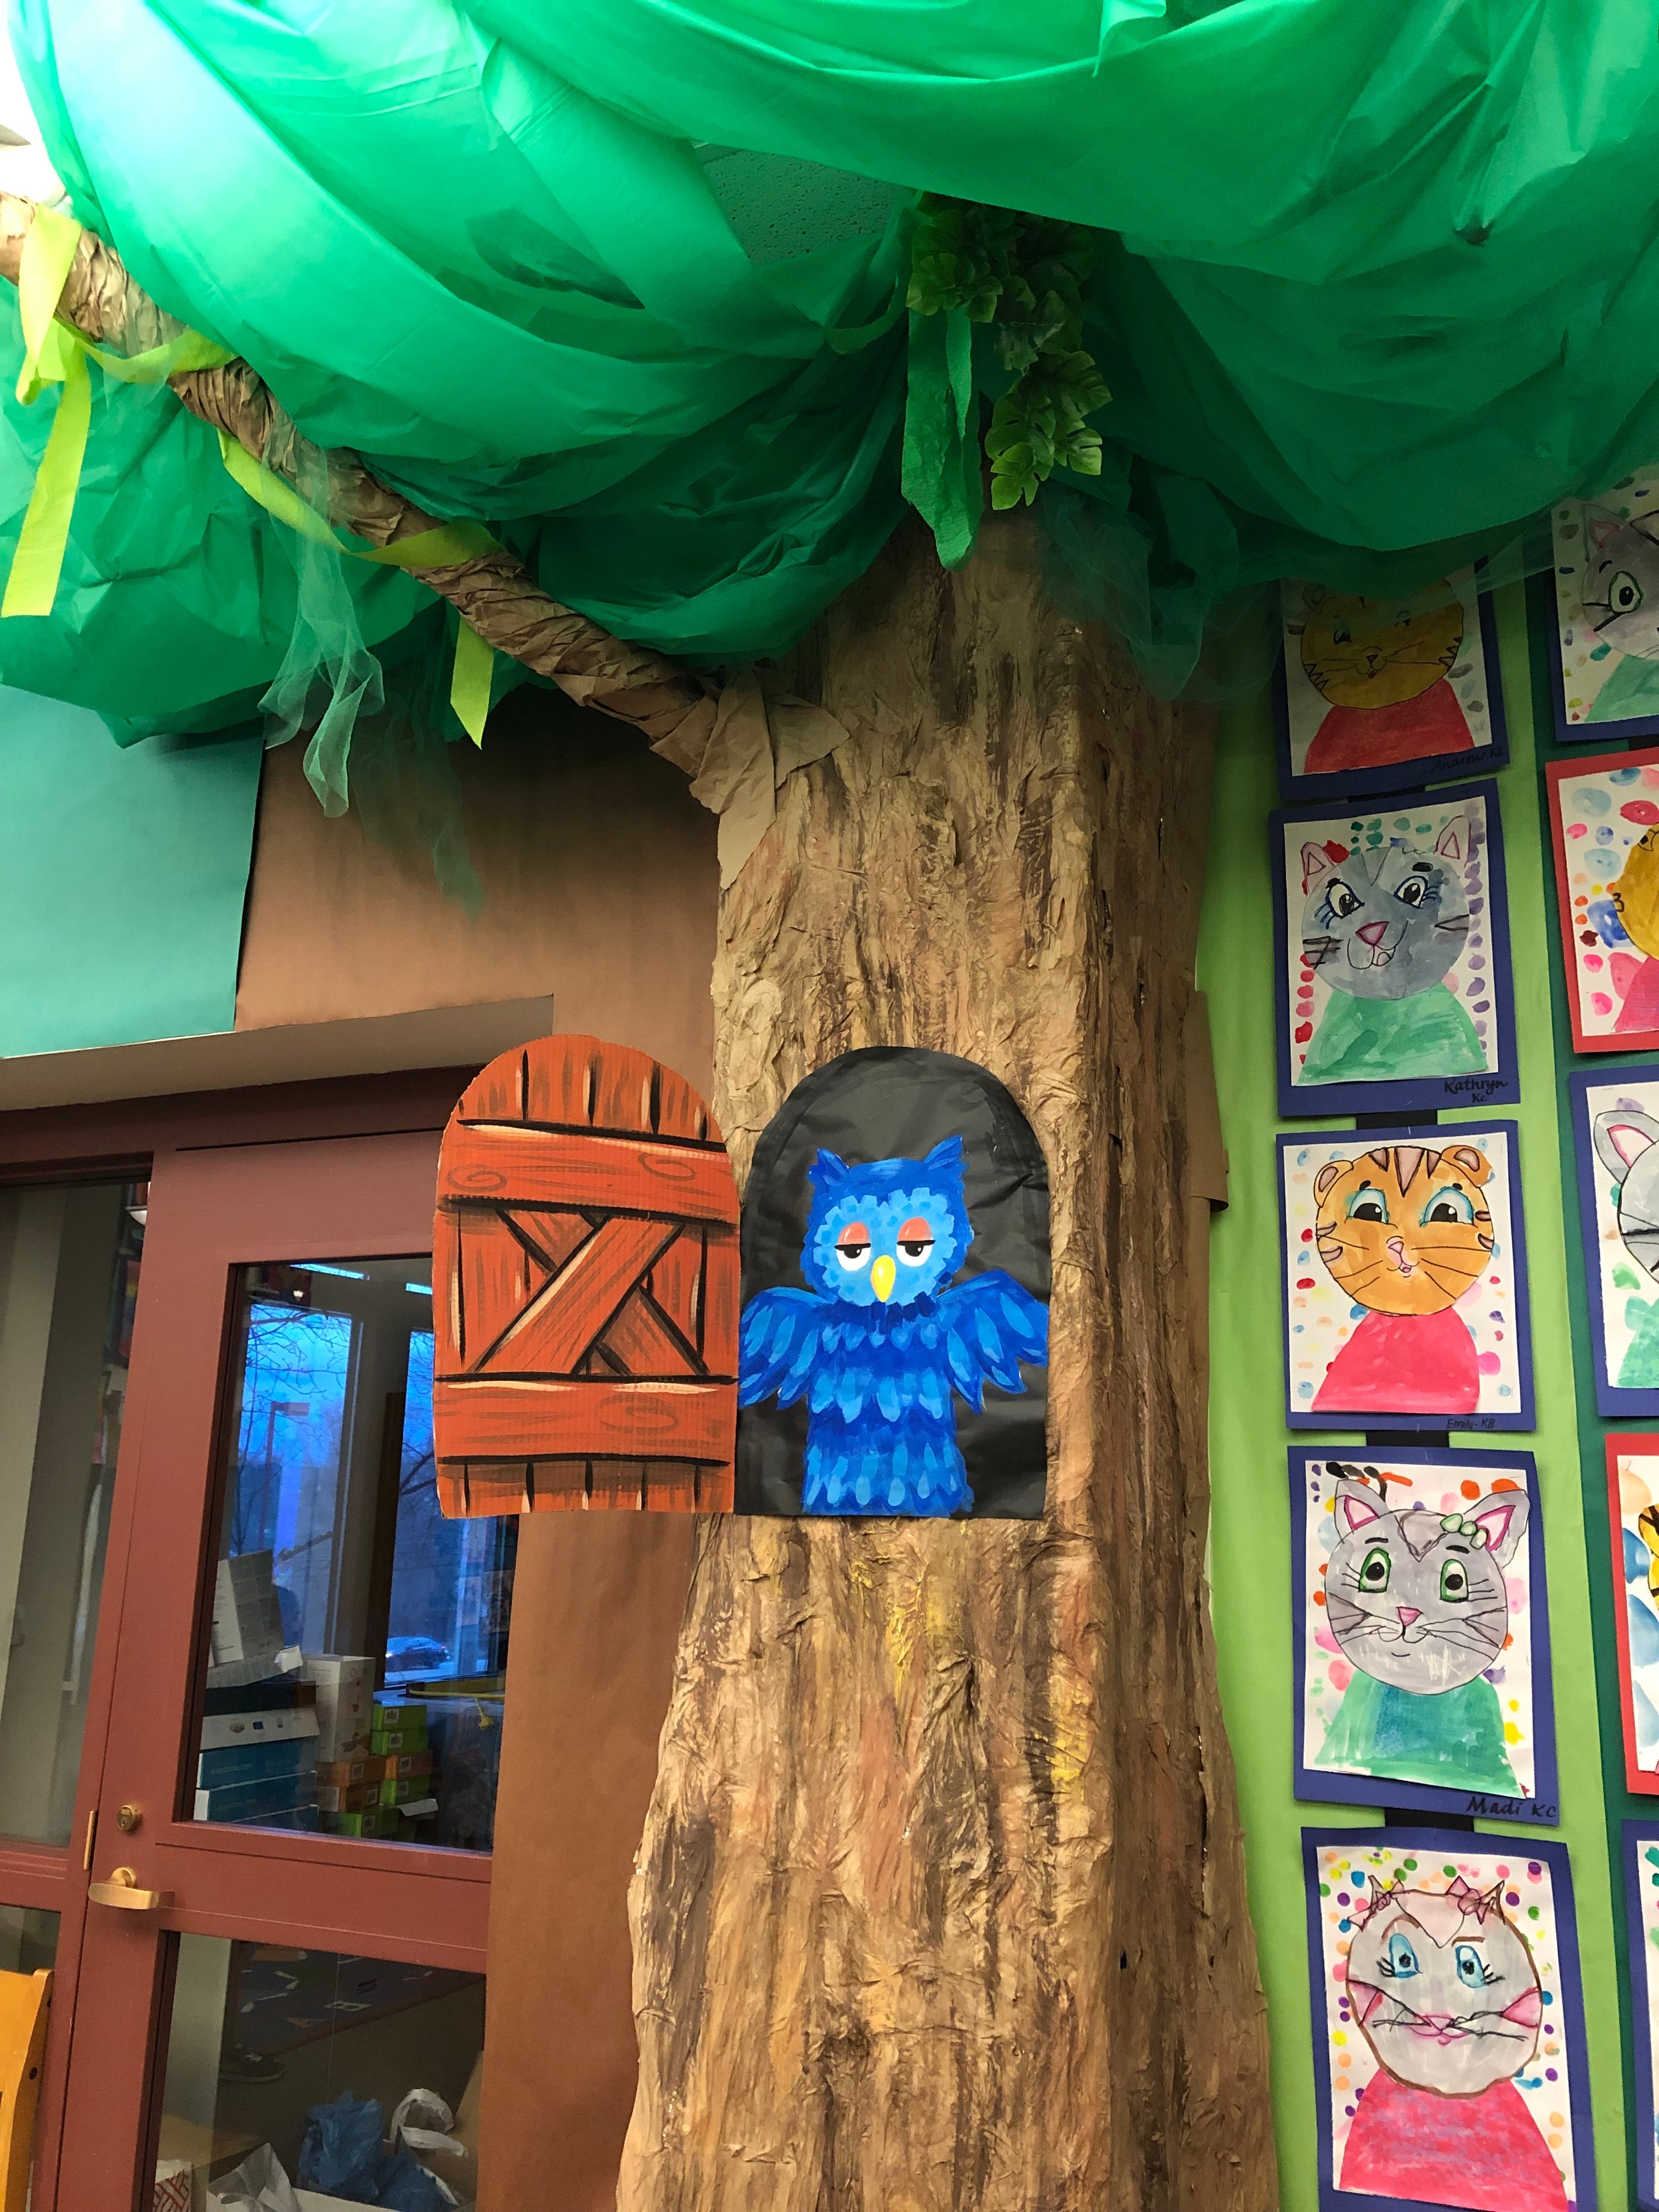
Step 7: Embellish the Tree Trunk

Once the basic structure is in place, it’s time for some finishing touches! Use a dry brush technique with different shades of brown paint to add texture to the trunk. You could also paint in a critter in a hole in the tree, or get creative with other ideas to personalize the look.
Step 8: Bonus – Reuse Your Tree for Different Celebrations
One of the best parts about this project is that it’s versatile! You can reuse the tree year after year for different themes or school events. For example, I used this tree as part of a Mister Rogers-themed art show. The possibilities are endless when you think about how to incorporate the tree into different celebrations or art show themes!

This DIY tree is a fun way to add a creative element to your space, and the best part is it can be used for multiple purposes throughout the year. From art shows to classroom decor, it’s sure to be a hit! Happy crafting!


