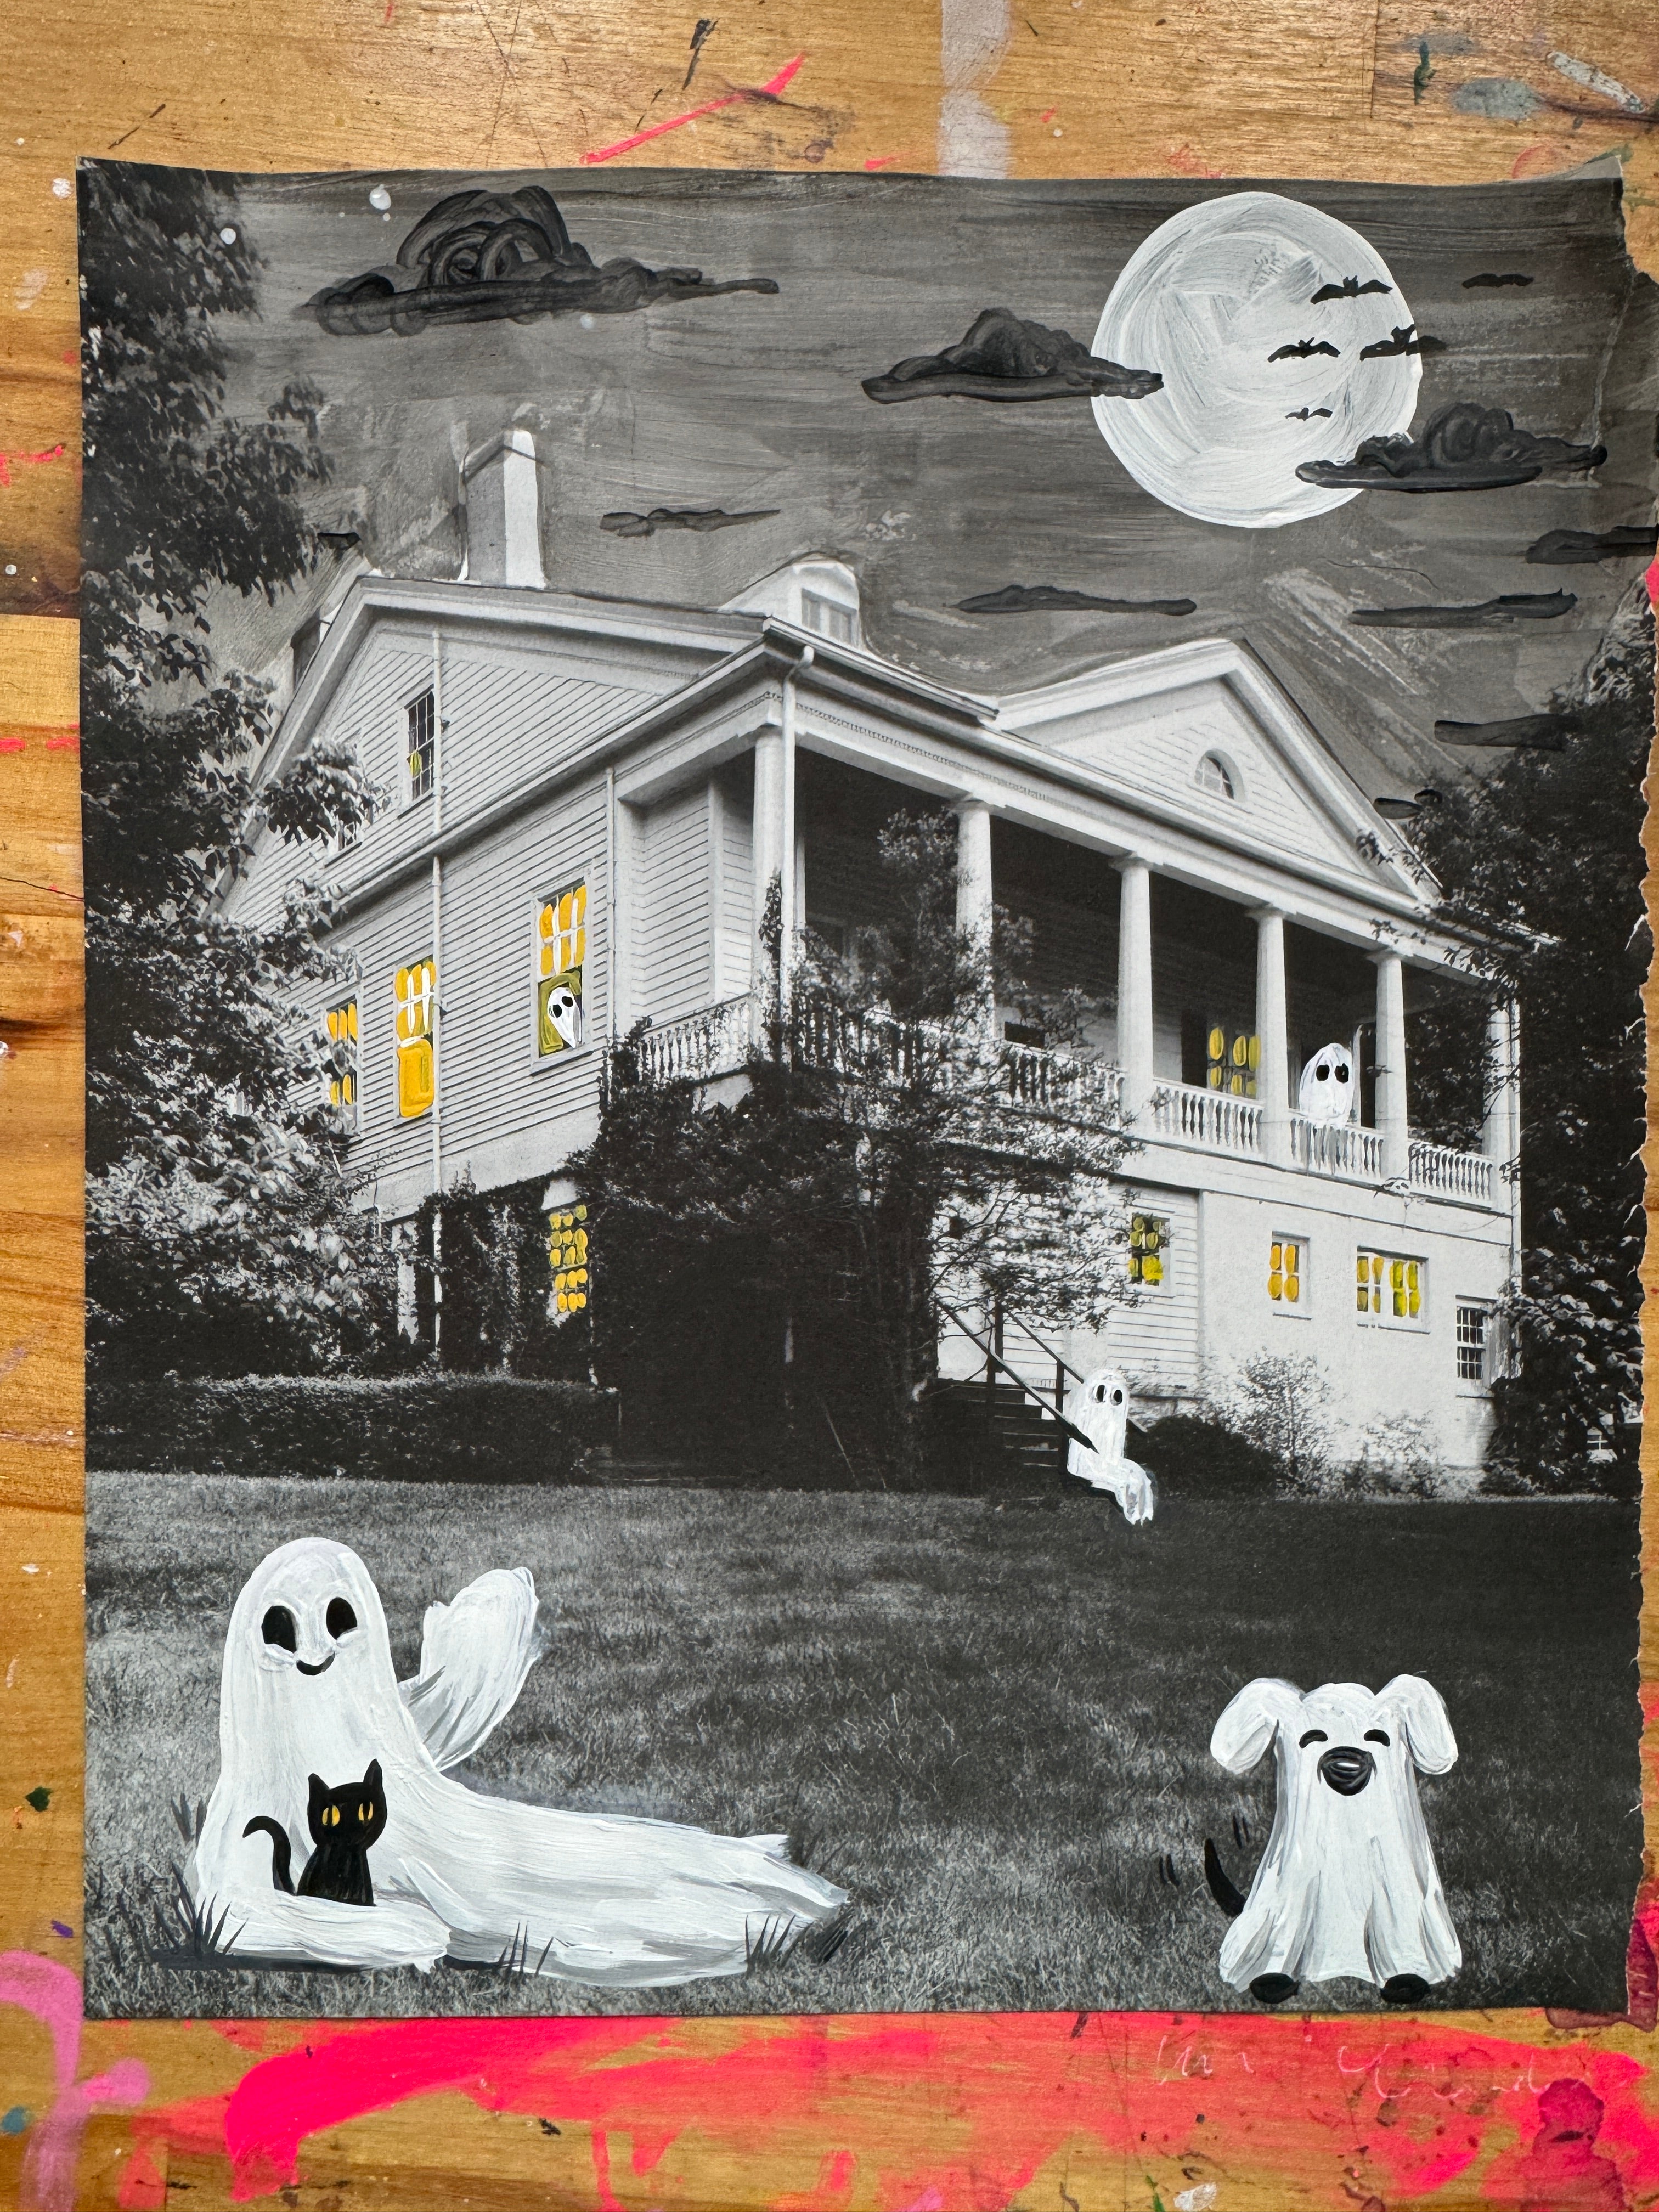
I’m not usually one to chase every viral craft, but when the “thrifted ghost painting” wave rolled through last fall, I couldn’t resist. I loved the hunt for old imagery, the playful ghostly add-ons, and—best part—sharing the spookiness with my kiddos. That got me thinking: how could we reimagine the concept for children in a way that’s interactive, classroom-ready, and rooted in storytelling?

Enter one of my favorite seasonal inspirations: Oliver Jeffers’ delightfully eerie There’s a Ghost in This House,. The magic of that book is the reveal—turn a page and…boo! Ghosts appear. That peek-a-boo moment became the heartbeat of this project. We combine an atmospheric background image with a clear top layer so students can hide and reveal their friendly phantoms. It’s upcycling, illustration, and a pinch of theater—all in one.
Here’s how you can bring this Halloween art lesson into your classroom or home—and make it your own!

Why this project works so well with kids
- Storytelling first. Students design a tiny narrative—Who haunts this home? Where do they hide? What are they doing?
- Upcycling + design thinking. Old books or printed photos get a second life, and kids make composition choices with purpose.
- Accessible drawing. Ghosts are simply shaped and wonderfully forgiving, leaving room for personality, pattern, and emotion.
Interactive display. The layered format invites viewers to lift, look, and discover.

Materials (at a glance)
- A moody house image (thrifted book page or printed photo).
- A transparent top layer (clear film or tracing/vellum sheet).
- Opaque white + a dark detailing tool (paint pen/marker or paint + pen).
- Optional: a thrifted frame for instant “antique gallery” vibes.
Don’t have the “perfect” book? In my full lesson I include a ready-to-print set of spooky interiors and façades so you can jump right in—no thrifting required. You can find 12 different background images in my full lesson here.
I had the BEST time teaching this lesson to my son's class for the halloween party at school, and then again for a group of fabulous teachers during a PD day. Everyone was so engaged, had a blast and I loved seeing how different everyone's projects turned out in the end! Here are just a few:


After the artwork is dry, place the finished ghost painting inside a thrifted frame. The mismatched frames can add a vintage or eerie vibe to the finished pieces. These framed ghost paintings are perfect for classroom displays, home décor, or even as gifts!
This project is not only fun to do alone, but is even better when you are sharing the experience with others! Whether it's a family painting party with your kids, or hosting a girls night to allow everyone to create their own spooky work of art, this project allows you to connect with your loved ones and make memories.


My friends and I had the best time getting together and creating our own ghost paintings, not to mention an excuse to make a whole bunch of festive food! :)

If you're interested in the FULL step by step lesson, you can download it here!
I hope yall give this project a shot and if you do, be sure to share it with me or tag me on Instagram (@artwithmrs.e) Oh and also, if you are lookin for more fun Halloween / fall projects, be sure to check our my Haunted House art project, There's a Monster in my Closet Lesson, and my Autumn landscape lesson.
Happy making!


