Skip to content

Looking for physical art supplies? Check Quell

Easy Coffee Filter Flowers Craft for All Ages! 🌸

 A Bloomin' Beautiful Art Project for Kids

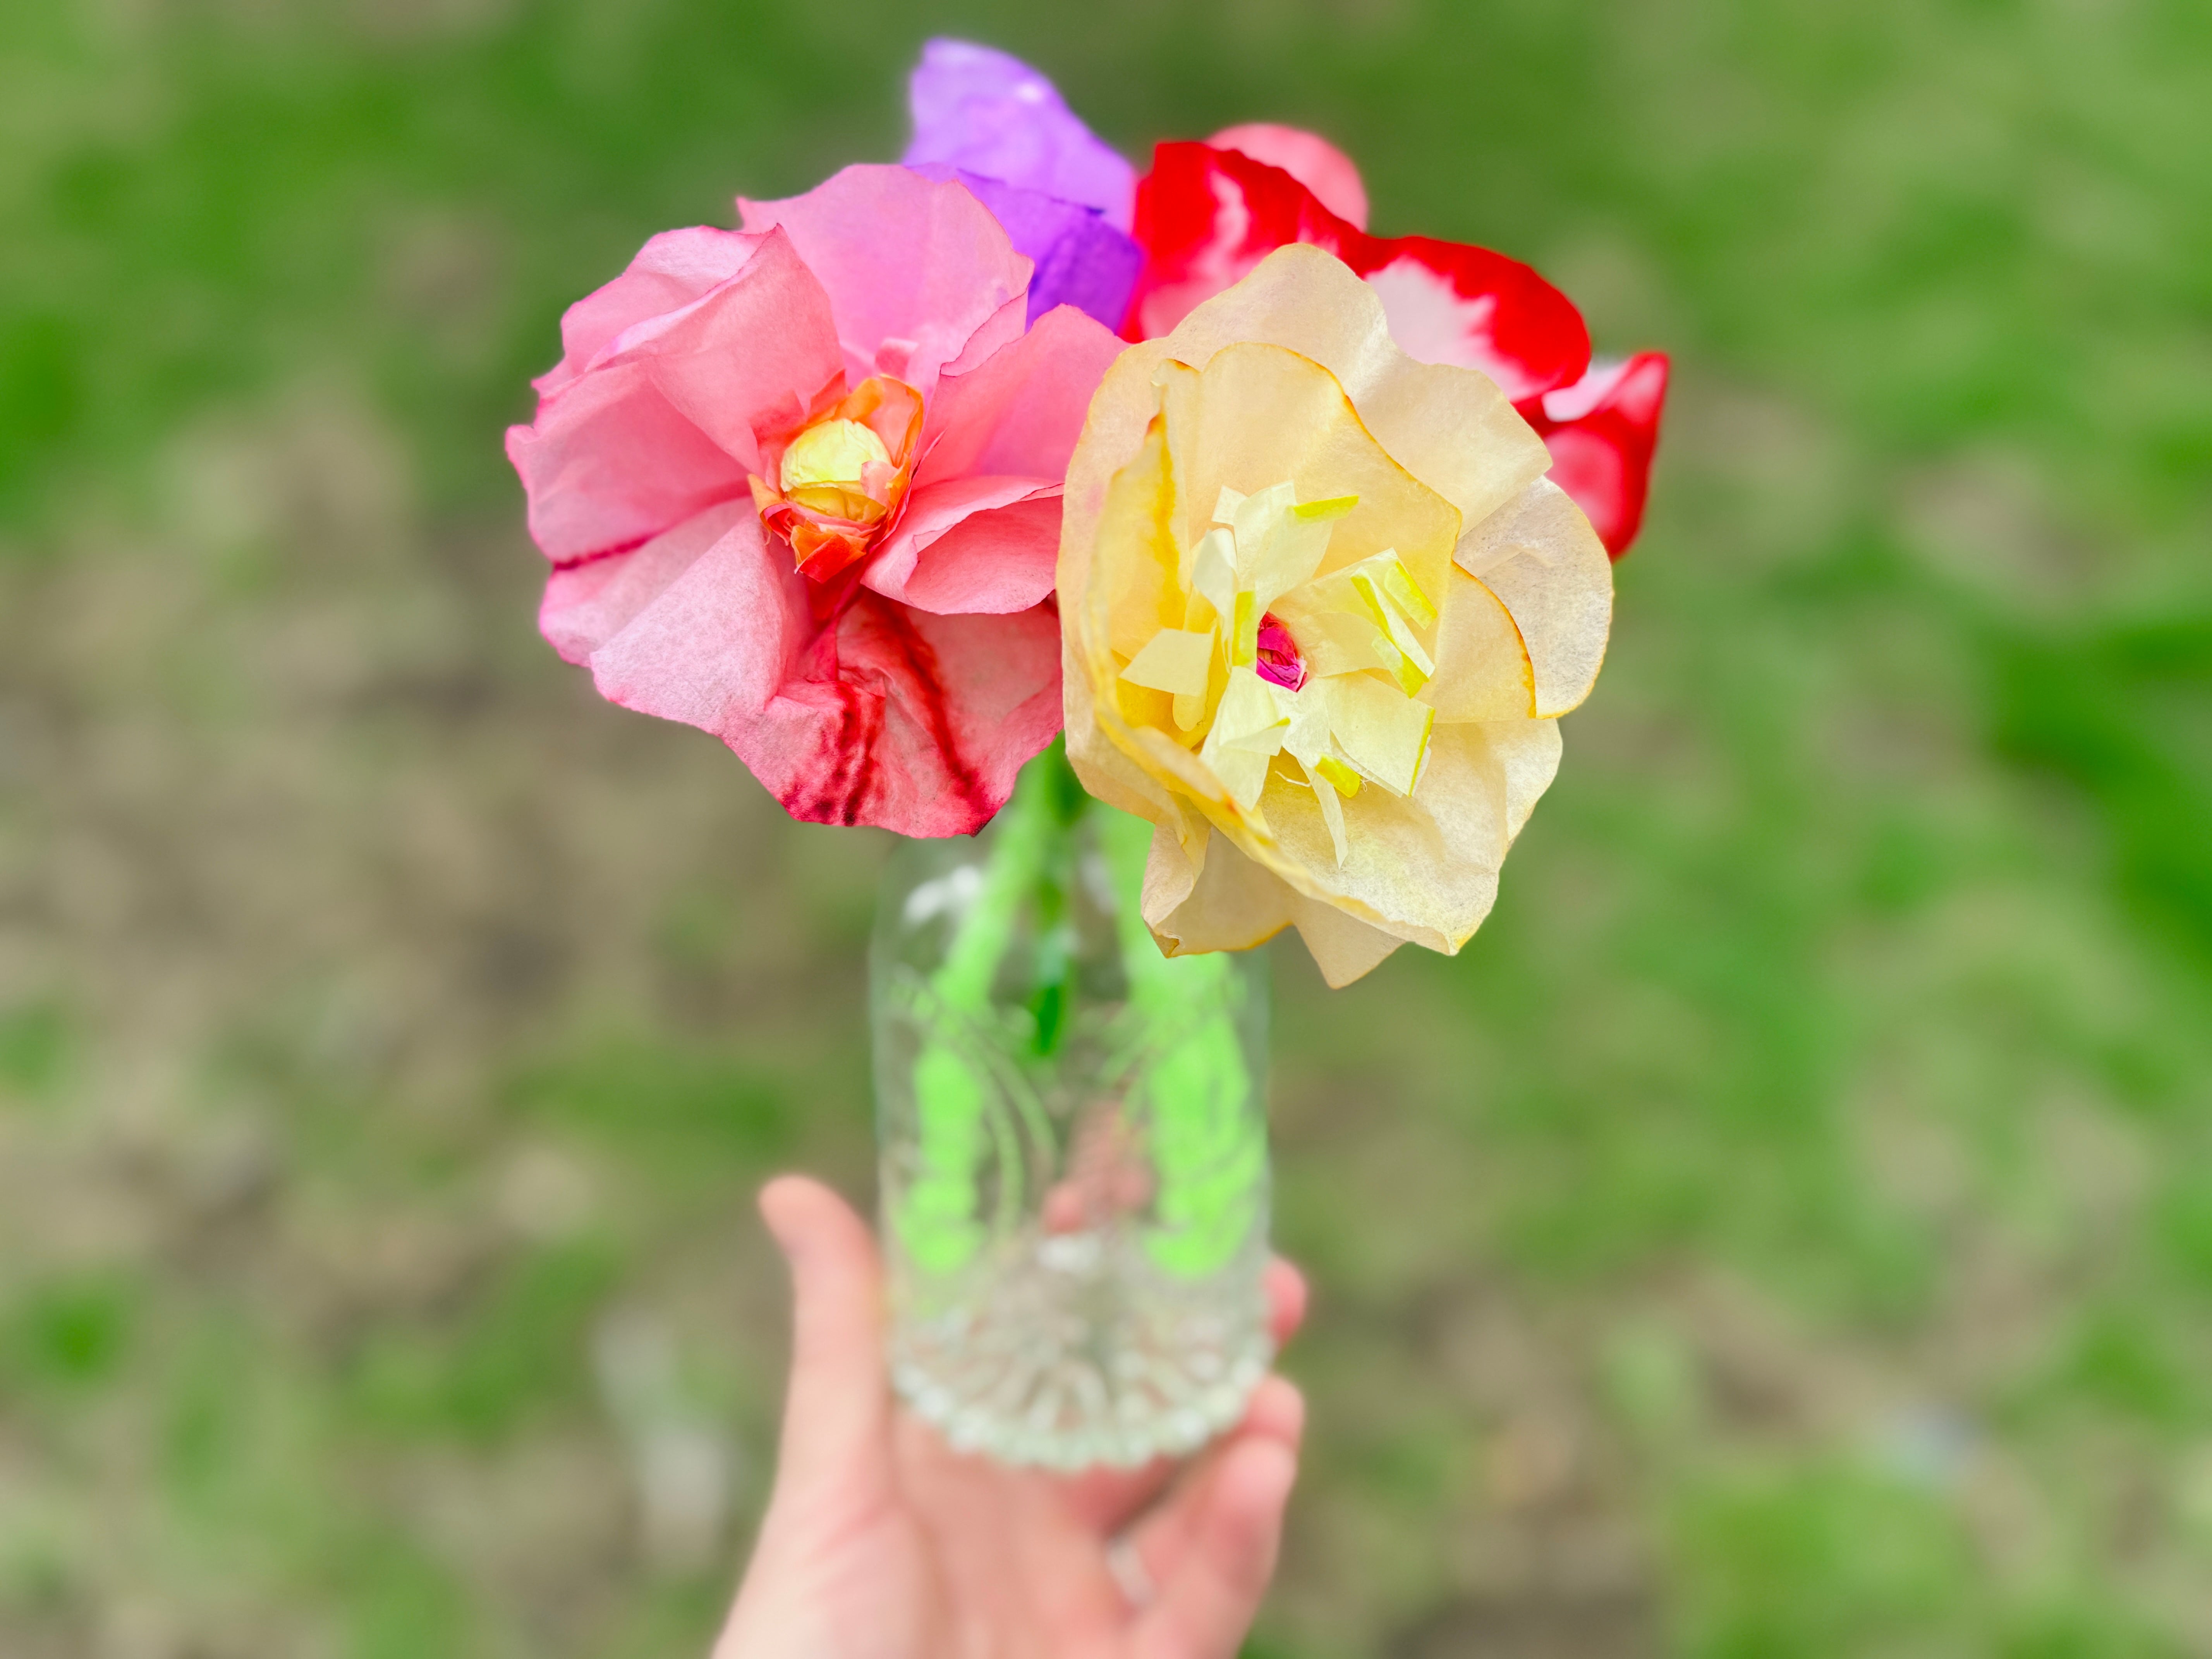
Ahhh, spring is finally here—and all I want to do is dream about beautiful blooms to plant, paint, and even DIY! 🌸 What if I told you that you could create a colorful bouquet of flowers that never wilts and doesn’t need watering? Sounds pretty intriguing, right?

This coffee filter flower project brings the magic of spring into your home or classroom using simple materials and a whole lot of creative fun. It’s process-based, sensory, and just plain beautiful. This project is perfect for children of all ages! Whether you're in the art room, classroom, or looking for a fun DIY craft to do at home with your kiddos. Or heck- maybe even for a fun craft night with your friends! This craft is a winner all around! 


🌼 Materials Needed:

  • White coffee filters 

  • Washable markers (like Crayola)

  • Spray bottle filled with water

  • Pipe cleaners (green preferred)

  • plastic plates or wax paper (to allow wet filters to dry)

  • Scissors


✂️ Instructions:

1. Color the Coffee Filters


Use washable markers to create bright, bold designs. Scribbles, dots, shapes—it’s all fair game! No need to fill every inch. Please note: I have found that Crayola Markers work best, and diffuse right away, however Mr. Sketch markers are gorgeous in color, and will diffuse while they dry, they do not "bleed" immediately when sprayed with water. 

2. Cut Petal Shapes 


Fold the coffee filter in half two or three times, then cut a curved line along the edge. When you unfold it, you’ll see a repeated petal shape around the filter’s circumference. You can even stack and cut multiple filters at once for layered blooms!

3. Spray with Water


Place your filter on a tray or paper towel and lightly mist with water. Watch as the colors bloom and blend like magic!

4. Let Them Dry


Set your filter aside and let it dry completely. (This is a great time to start coloring another one!) I like to have each filter on a plastic plate to easily move it to a safe space to try. The plate is also great because it not only catches the drips, but because it's plastic, the water that drips will actually reabsorb into the filter as it dries. 

5. Shape Into Flowers
Once dry, pinch the center of the filter and either staple the bottom to fold it in place or twist a pipe cleaner around the base to create a stem. Gently fluff and shape the petals and then display! 


🌸 Optional Enhancements:

  • Instead of coloring filters with marker, try dipping the edges in food coloring or liquid watercolor paint for a more soft/ diffused look. 


  • You can also try coloring just the outside of the filter with marker and then placing them filter in a cup of water for a similar, soft look. Check out this tutorial from Think Blue Marble! 
 

💕 Why I Love This Project:

  • Quick and easy to prep

  • Encourages color mixing and creativity

  • Accessible for all ages

  • The results are absolutely stunning!

Whether you’re doing this in your classroom, at home with kids, or just as a joyful springtime activity, these blooming beauties are sure to brighten your space.

If you're looking for another fun, easy and engaging art lesson for the spring, definitely check out my Printed Petals Lesson here! This is a great lesson for mother's day too!

Happy Making! 

Leave a comment

Please note, comments need to be approved before they are published.

Resources that could be helpful

Type:

Printed Petals | Digital Art Lesson

Regular price $5.00
Sale price $5.00 Regular price $6.00

Ready for the perfect mix of fun and exciting processes that ALSO results in a gorgeous final art product? Well then let me introduce you to my “Printed Petals” lesson. Inspired by the legendary artist Pablo Picasso and his print titled “Bouquet of Peace”, this engaging lesson is designed for students in grades K-3 and will delve into the fascinating world of printmaking techniques.


Students will explore concepts such as line, shape, texture, symmetry, and balance while creating a stunning flower bouquet art project. They will learn how to use unexpected products and materials to create their own unique and stunning prints, allowing their creativity to bloom.


With step-by-step demonstration photos, students will discover the joy of experimenting with various printmaking techniques to bring their flower bouquets to life. From stamping with found objects to create textured prints, to additive and subtractive printing techniques, students will unlock their artistic potential while gaining a deeper appreciation for the work of Pablo Picasso.


This art lesson offers a perfect blend of creativity, hands-on learning, literacy connections, and art history exploration. Catering to different learning styles, it encourages artistic expression, fine motor skill development, and critical thinking.


Prepare to witness your students’ imaginations blossom as they embark on this captivating artistic journey! Don't miss out on this wonderful opportunity to nurture their artistic talents while having a blast.


The digital pdf for this lesson includes:


  • Lesson Objectives
  • Vocabulary List
  • National Standards
  • Supplies needed for the project
  • Artist background info on Pablo Picasso
  • Step-by-Step Photo of the lesson from beginning to end with detailed explanation for each step.
  • Helpful tips & tricks for teacher to share with students
  • 5 Book recommendations to pair with the lesson
  • PDF of additive and subtractive Flower Designs
  • Completed student examples for reference


Terms & Use:

Please note, in purchasing this resource, you are agreeing that the contents are the property of Kaitlyn Edington and licensed to you only for classroom/personal use. I, Kaitlyn Edington retain the copyright, and reserve all rights to this product.

This lesson is intended for classroom use only and may not claimed or resold as your own.

Type: Drawing Guide

Spring Drawing Guide | Digital Download

Regular price $4.25
Sale price $4.25 Regular price

Spring is here with this directed drawing guide that provides 48 different spring animals, activities and more! This drawing guide is great for students of all ages and is perfect as an early finisher activity, sub plans, sketchbook activities and of course great for a variety of art lessons!

In this guide you will find over 60 different fall items divided into categories such as: Flowers/ greenery, farm animals, bugs and birds, spring animals, spring activities, and spring weather.

INSIDE THIS GUIDE YOU WILL LEARN HOW TO DRAW :

  • 15 different flowers/ greenery
  • lamb
  • pig
  • chicks
  • goose
  • ladybug
  • butterfly
  • caterpillars
  • chrysalis
  • bird nest with eggs + chicks
  • robin
  • blue jay
  • 2 different fawn poses
  • 4 different rabbit poses
  • duck + duckling
  • umbrella
  • rain boots
  • 6 different gardening supplies
  • potted plant
  • kite
  • butterfly catcher
  • bird house
  • bicycle
  • sun + clouds
  • storm clouds
  • rainbow

________________________

Terms & Use:

Please note, in purchasing this resource, you are agreeing that the contents are the property of Kaitlyn Edington and licensed to you only for classroom/personal use. I, Kaitlyn Edington retain the copyright, and reserve all rights to this product.

This lesson is intended for classroom use only and may not claimed or resold as your own.


Art Supplies Created by Art Lovers

Visit Quell

Quality art accessories, vibrant community, and support for teachers.
Unleash your creativity with Quell!

Visit Quell