Looking for a bright and beautiful way to bring more color into your home or classroom? These DIY Sun Catchers are a simple and satisfying art activity that both kids and adults will love. I recently taught this lesson live on air for Talk Pittsburgh during their Take Your Child to Work Day special, and let me tell you— it was a huge hit amongst the kiddos!

The idea for this activity was inspired by a beautiful post from @bright_little_brains on Instagram. As soon as I saw it, I knew I had to try it with my own twist—and it’s quickly become one of my favorite springtime art projects.
It’s low-mess, low-cost, and makes a gorgeous finished product that looks like stained glass when the light shines through. Here's how to make your own:
✨ Materials:

- Transparency film (or recycled plastic packaging/ lamination film)
- Black glue (you can make your own using white glue mixed with a bit of black acrylic paint or ink)
- Colored Sharpies or Alcohol-based markers (I love these Ohuhu ones!)
- Scissors to cut out designs
- Clear double sided tape or clear adhesive dots or string for hanging
🎨 Step-by-Step Instructions:
* Prep Before Hand:
Make your black glue. To save the step and the mess you can actually not buy black glue (big time saver that art teachers know well!) but if you are only needing to make a small amount, it's easy to make at home! All you need is white glue and black acrylic paint. Pour about half of the white glue into a separate container and then pour in about half of the black paint into the bottle and mix well. You can also use black india ink as well. Once the glue is mixed, test it out first to make sure it's all black and then you're ready!


1. Draw Your Design


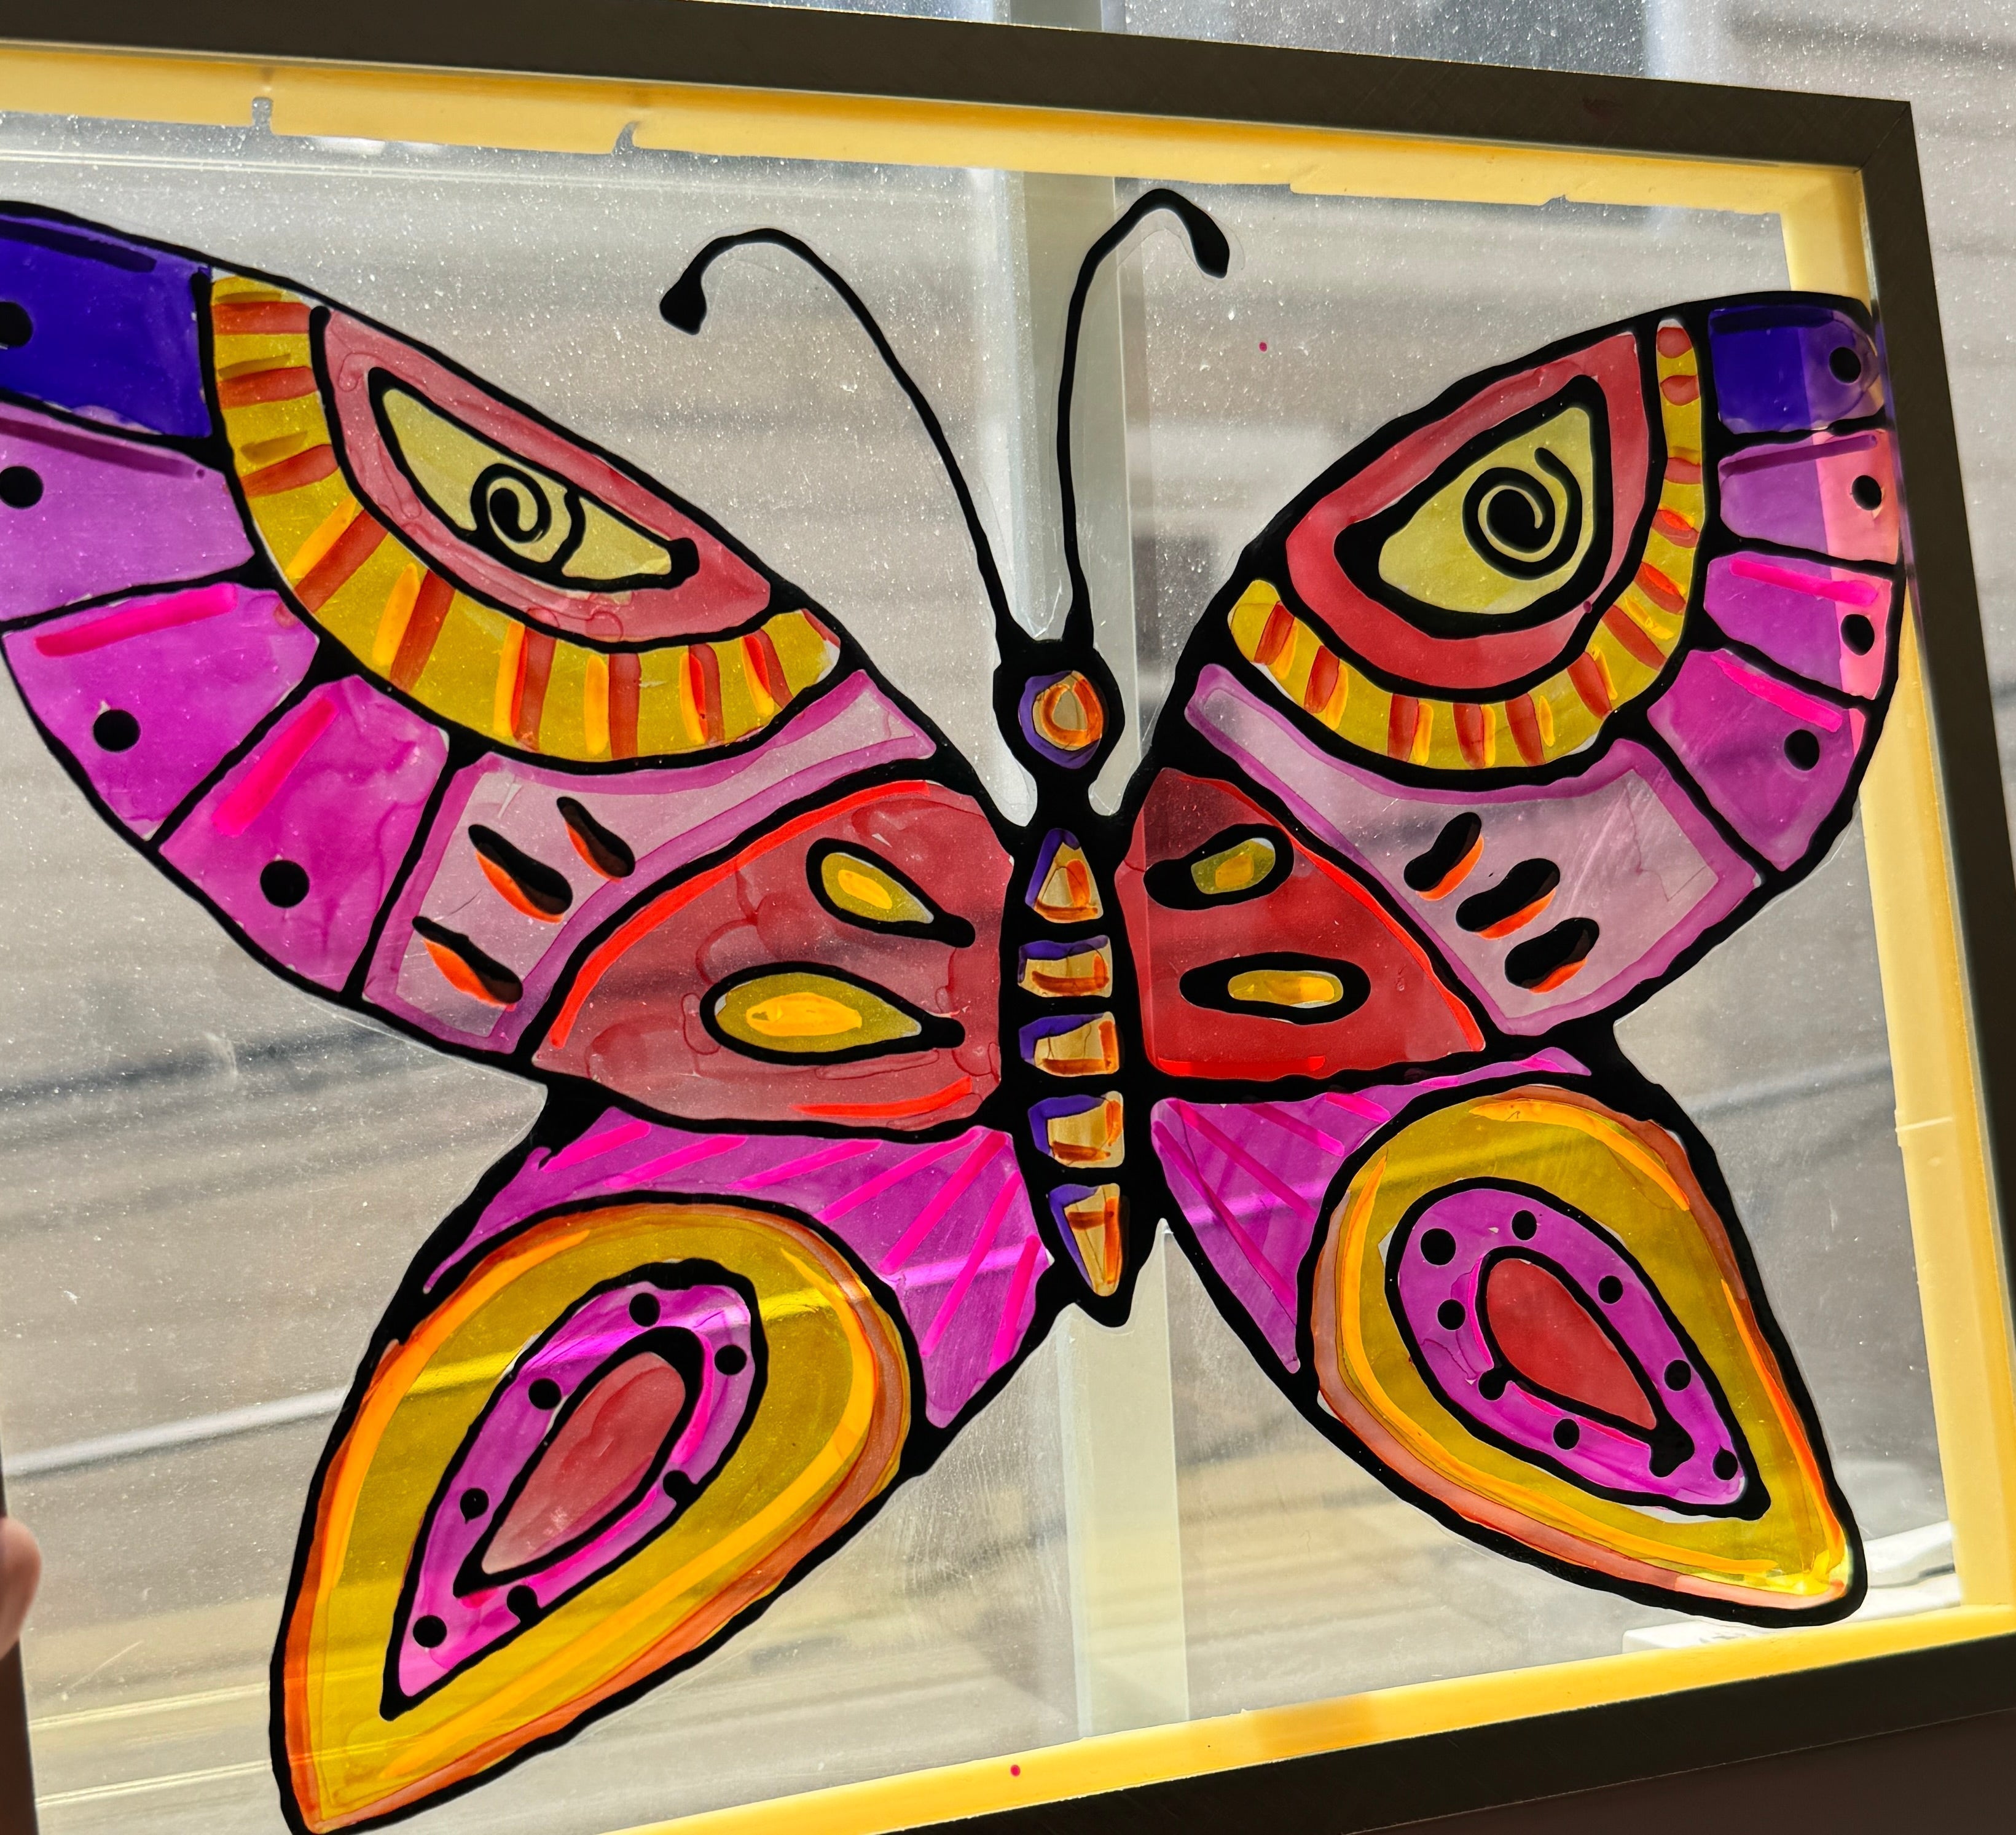
Start by deciding what subject you would like to do. I opted to draw some spring themed illustrations like bugs, birds, butterflies, suns, and flowers. I recommend drawing on a white piece of paper first before the next step, but it's up to you! If you're looking for some spring themed subject matter, check out my Spring Drawing Guide!
Pro tip: you want to draw your picture much bigger than you think you will need to because the glue lines are thick and spread out a bit.
Also, if you don't want to draw your own picture, you can actually just print out a picture / template to trace over!
2. Trace over Design with Black Glue


Place a piece of transparency film on top of the drawing or template you are using. Using black glue, trace the design directly onto the transparency film. Be sure to keep the glue tip as close to the transparency as possible- the higher you lift up the thicker your glue lines will be.
💡 Tip: Let the glue dry overnight for best results.
3. Color Different Sections with Permanent Marker

Once your black glue lines are dry, fill in the spaces using Sharpies or alcohol markers. These markers glide beautifully over the film (seriously, so satisfying ) and give your sun catcher that vibrant, glowing effect when held up to the light.

Optional: Add some lines, pattern or detailing with acrylic markers in some places on top of the alcohol markers for an even more vibrant look! These markers are opaque (meaning you cannot see through them) so you don't want to color the whole thing with these markers or else no light will come through, but they are fun for accents! These two different sets of Ohuhu acrylic markers are my favorite markers to use (the quality is great and you cannot beat the price!)


4. Display Your Sun Catcher

Tape it to a sunny window, hang it in your classroom, or punch a hole and add string to make it mobile! However you display it, it’s sure to add a little joy and color to your space.
💛 Why I Love This Lesson:
This project is perfect for families, classrooms, or community events. It requires just a few basic supplies, encourages creativity, and works for almost any age group. Best of all, it's a beautiful reminder that we can always create our own sunshine—no matter what the weather is doing outside.
Whether you're an art teacher, a parent, or just someone looking for a little creative fun, I hope you’ll give this project a try. Happy Creating!


