
Are you a sucker for a recycled art project like me? If so well then you’re in the right place! I am so excited to share with yall these adorable cardboard alligators my 1st grade students just completed! Let’s chat about how we made them, shall we?

-
Secure your Cardboard
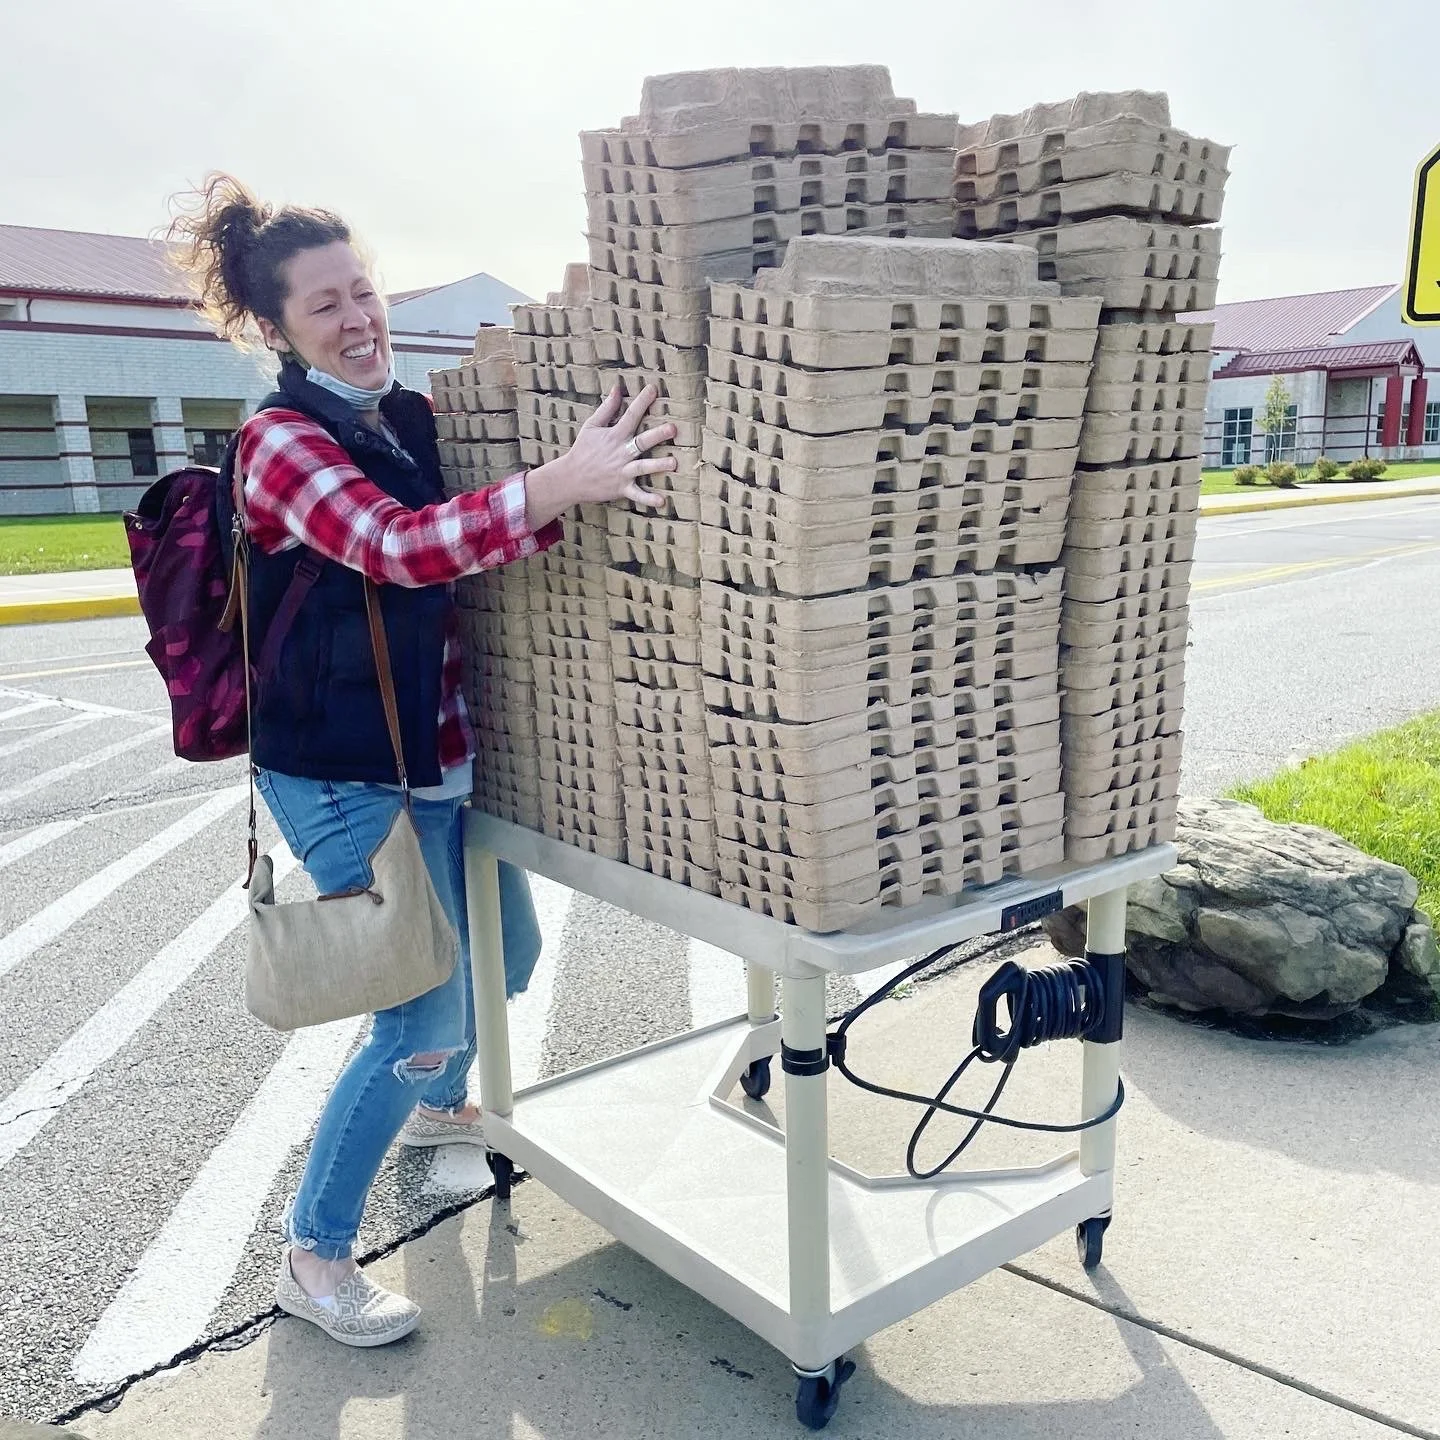
Ok so truth be told, I didn’t go seeking out this alligator project- the materials actually came to me! One of my coworkers mentioned that the IT department had tons and tons of these cardboard dividers that came in the iPad delivery boxes and had asked if anyone was interested. Once we saw the shape of the cardboard inserts, my teammate, Katy and I’s brains started spinning! Once one of us mentioned that the shape kind of resembled an alligator that was it- we had to make alligators! They were too perfect. If you don’t have this exact shape I’m sure cardboard egg cartons would be an easy swap!
Make it stand out
Check out our attempt to transport all of these pieces of cardboard through the parking lot to our cars without a spill! Lots of laughs were had in this silly scene!

2. Mix your Green
Definitely one of the best parts of this project was allowing my students to mix blue and yellow to make their own specific shade of green. To make the paint nice and opaque I added a bit of white to the yellow and blue paint before passing it out so that they would stand out nicely against the brown cardboard. I always instruct students to start with the lighter color first (yellow) and then slowly add the blue in until the preferred shade of green is achieved. I absolutely loved seeing the variety in their greens at the end of this painting day.

3. Bubble Wrap Printing!!!
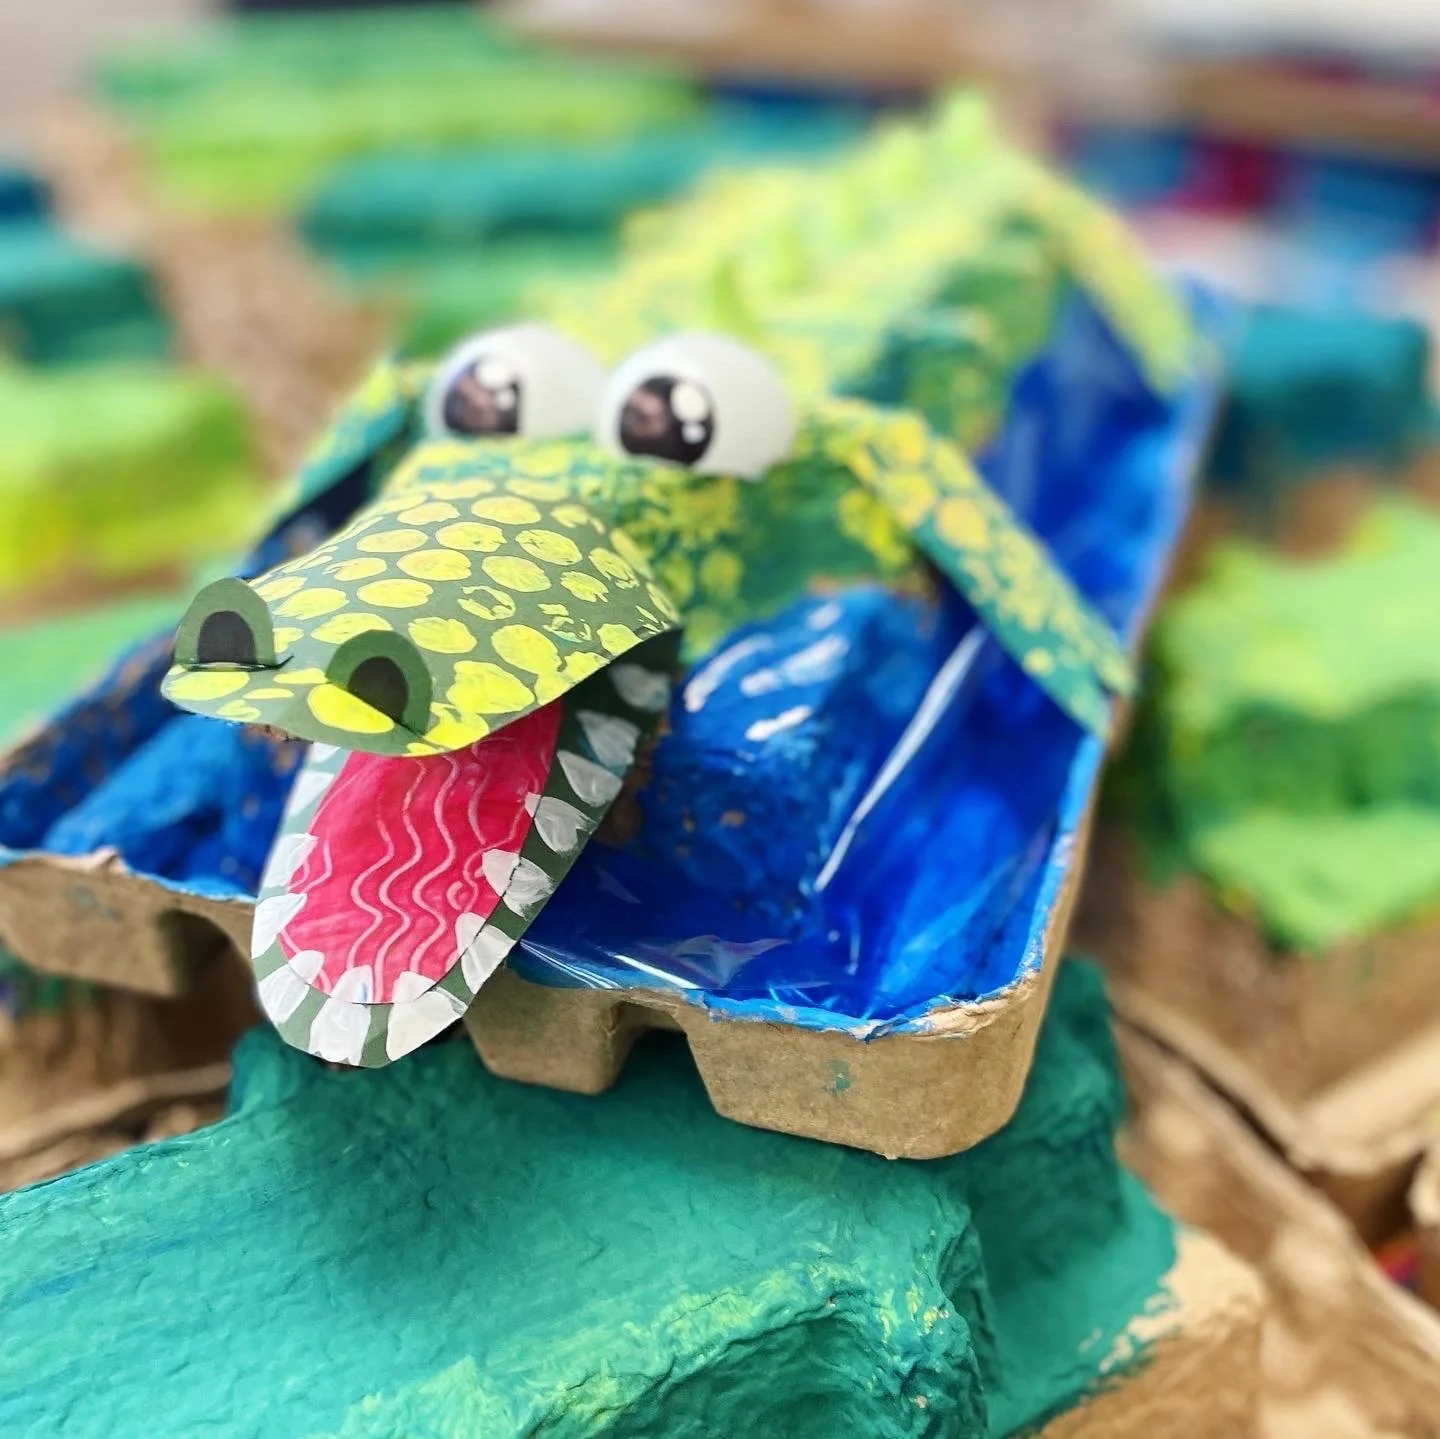
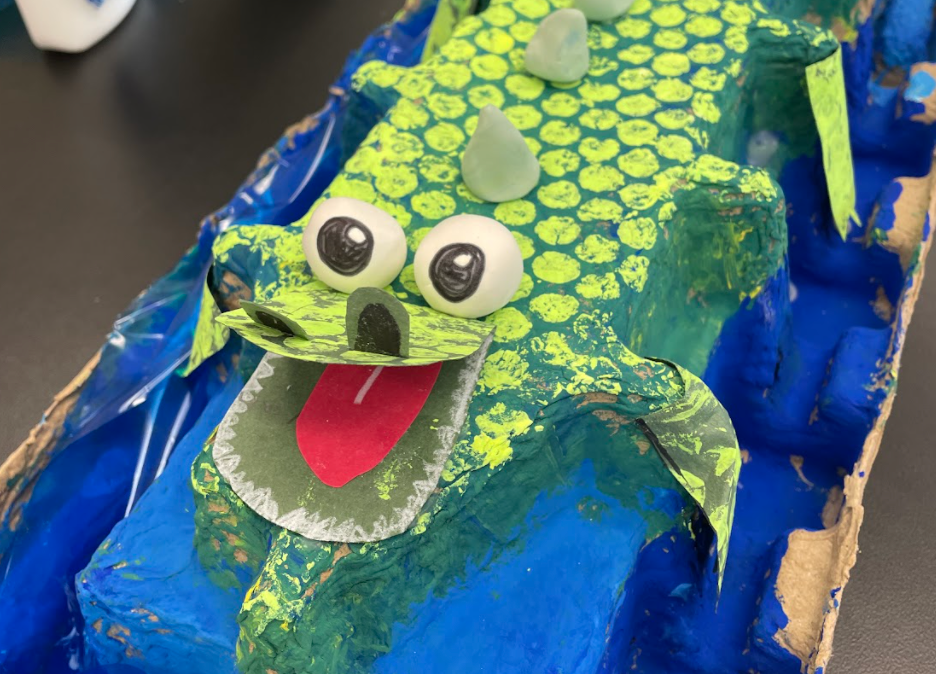
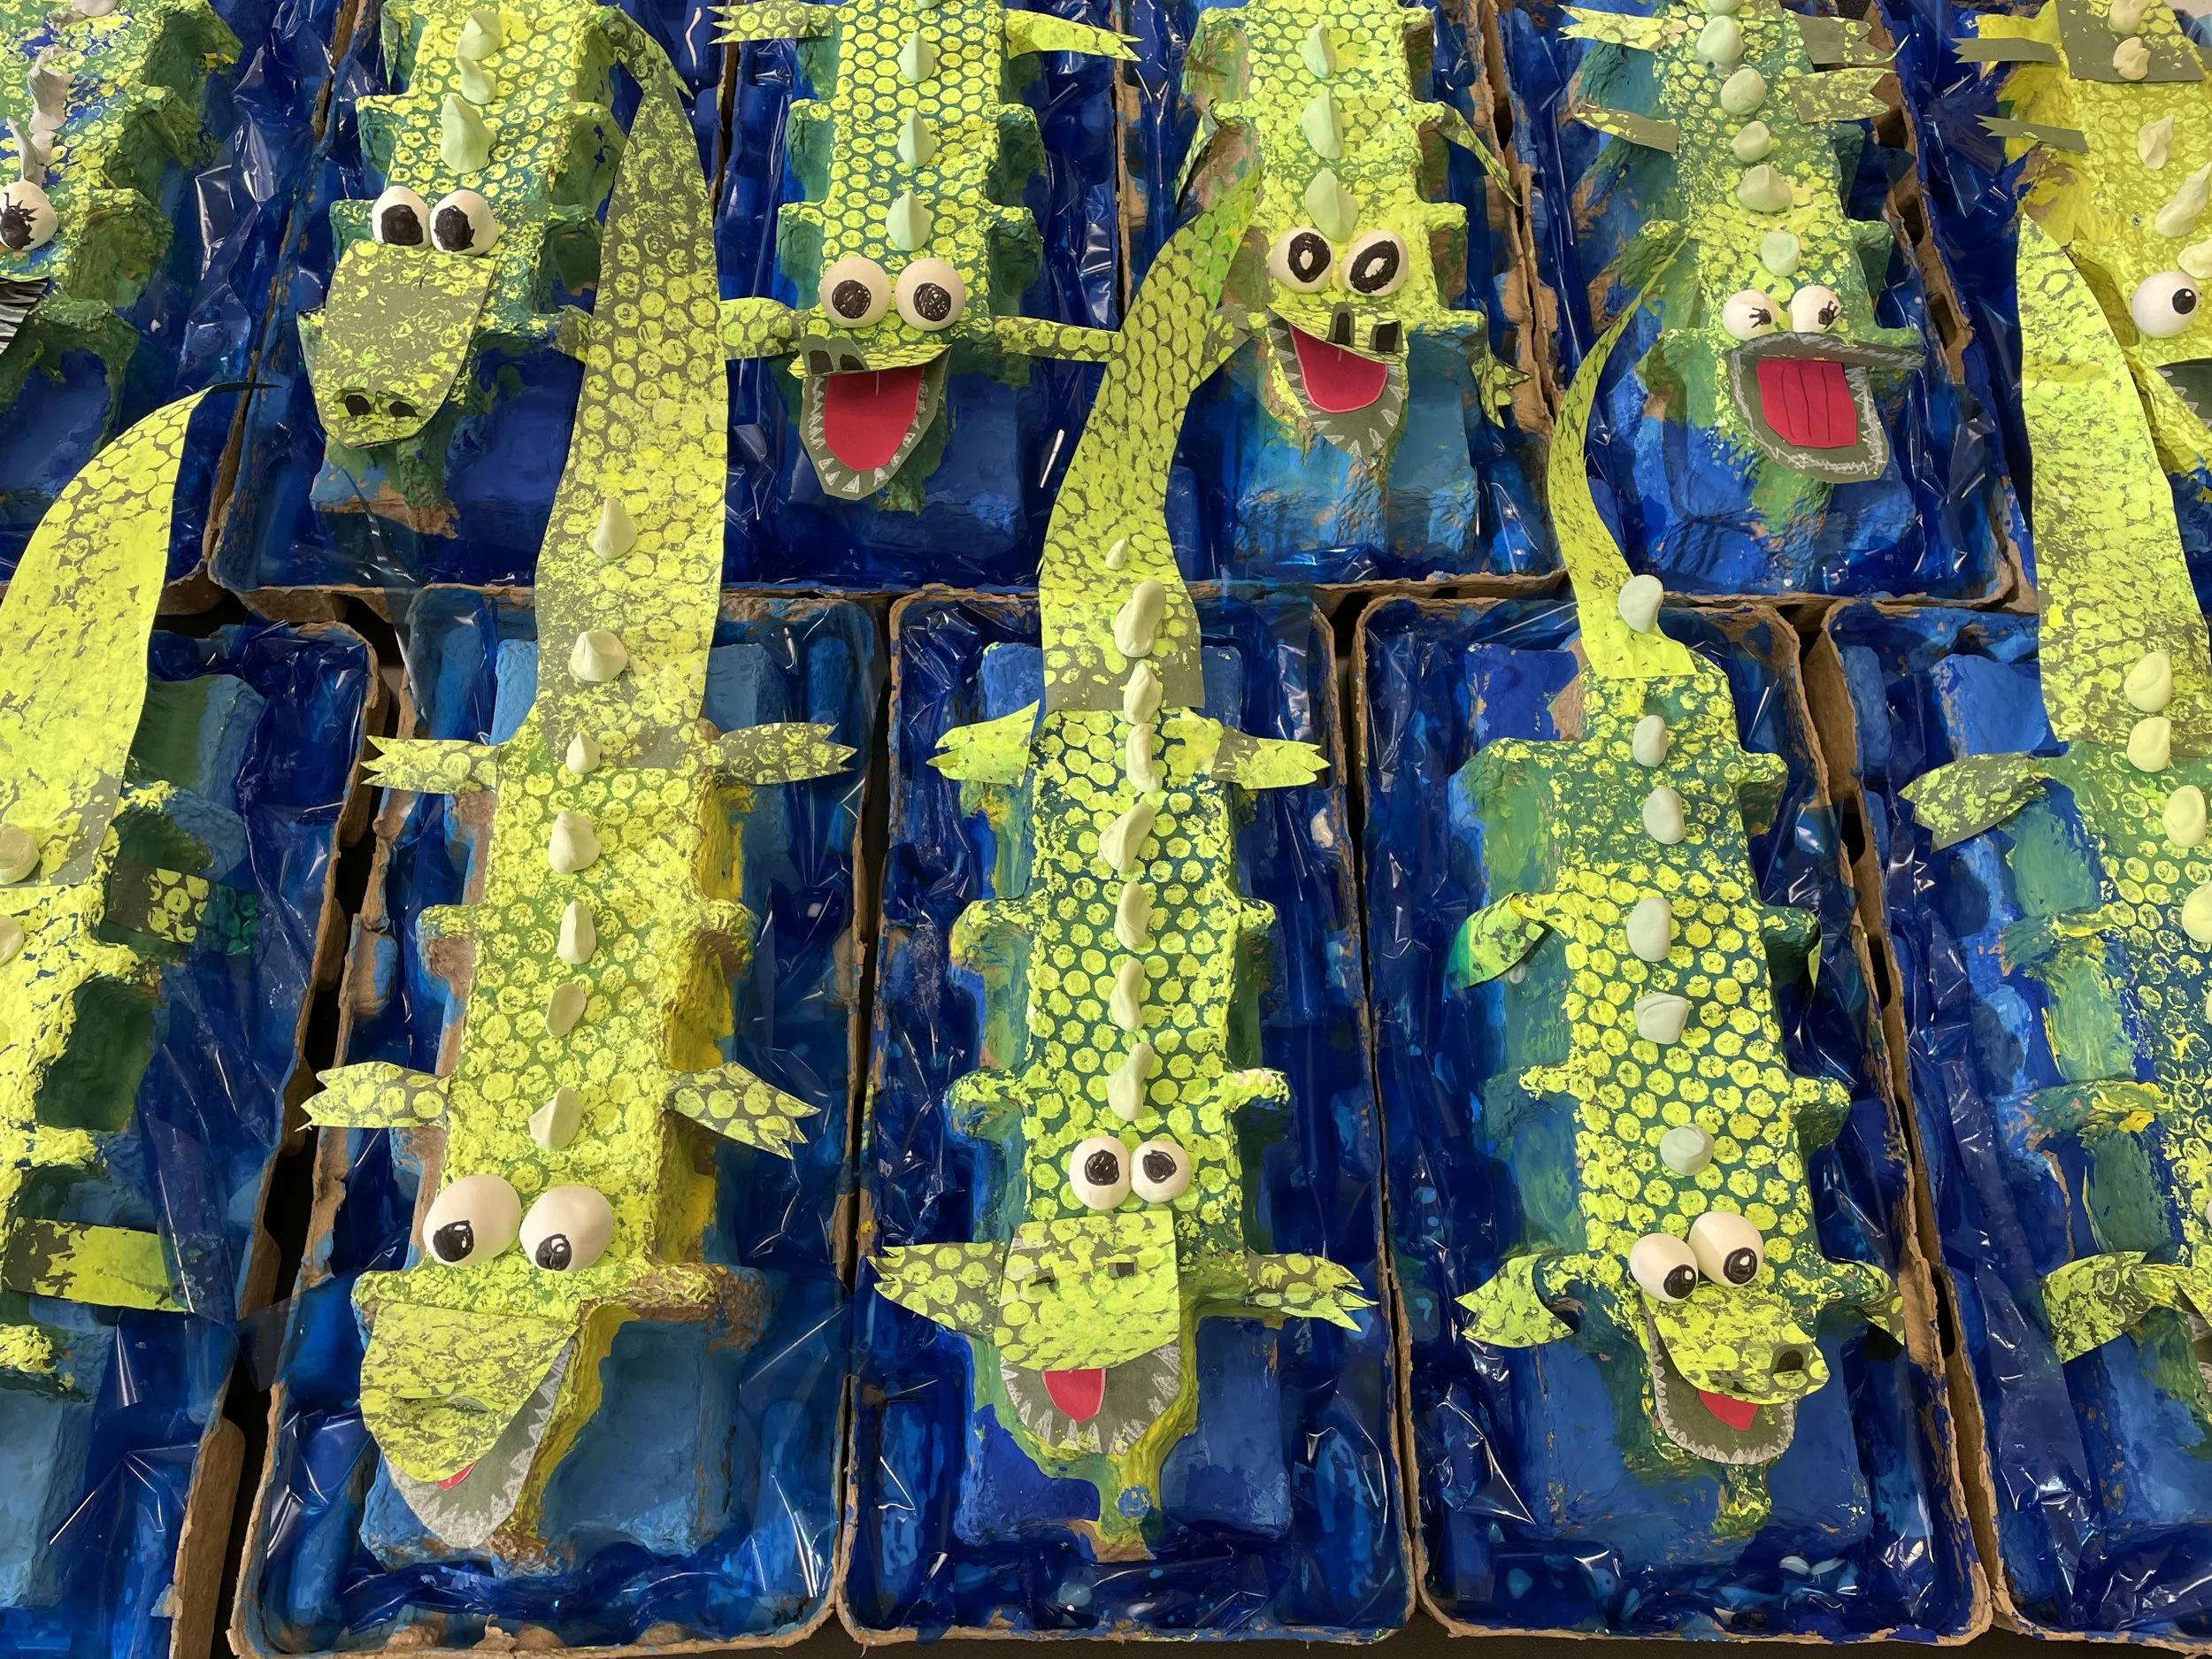
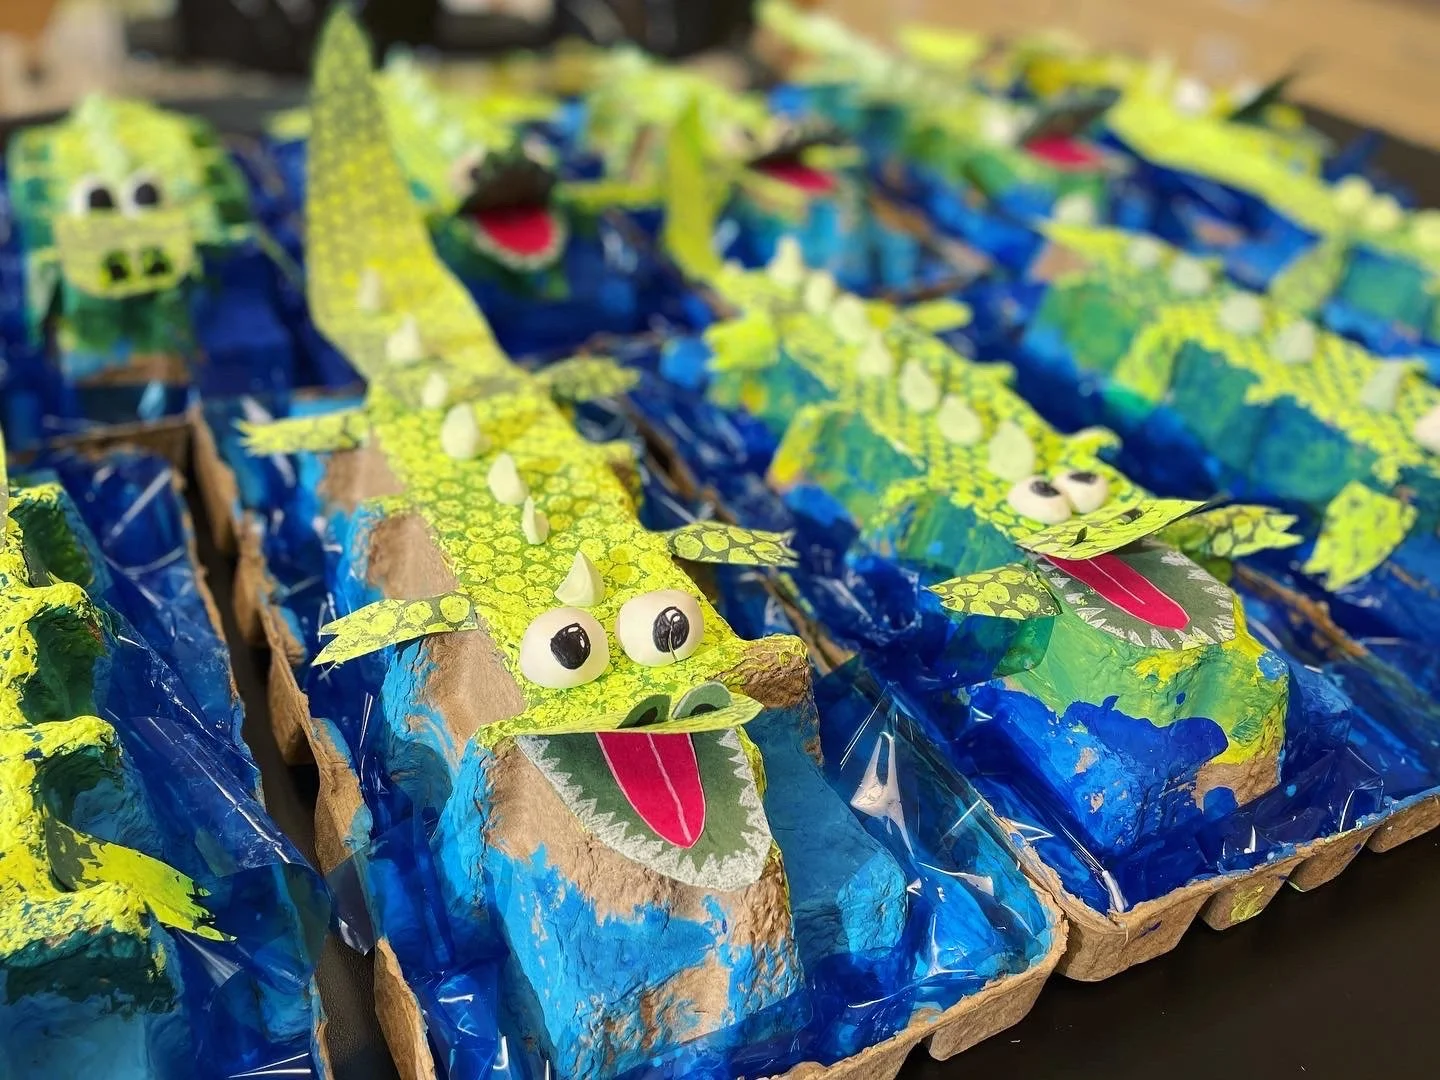
Every kids’ favorite thing to do! And what’s not to love? On this day of the project we spent a lot of time talking about texture, comparing the texture of alligators vs. crocodiles. We knew we definitely needed texture on our gators and bubble wrap seemed like just the ticket! I gave each student a 5x5 ish square piece of bubble wrap, as well as a piece of dark green construction paper to print on. Students used Crayola yellow fluorescent paint cut with a bit of white to paint the bubble wrap and then print on their green paper. Once their green paper was filled, students printed the “body” of the gator on the cardboard which was essentially just the top of the sculpture. We allowed all piece of cardboard and paper to dry.


4. Tail and Snout
Now it’s time to take that extra green piece of paper and create your details for your alligator. You will definitely be cutting the snout and tail out from this paper, but depending on how much space is left- maybe not the legs. It’s up to your students!
-
Cut the printed green paper in half vertically, one side will be for the tail and the other for the mouth.
-
I rarely ever use tracers so instead, I have my students measure a 4 finger width for how wide their tail should be at the base. Then on the opposite end of the long piece of paper, they find the middle with a dot, then connect the lines to make a large, long triangle.
-
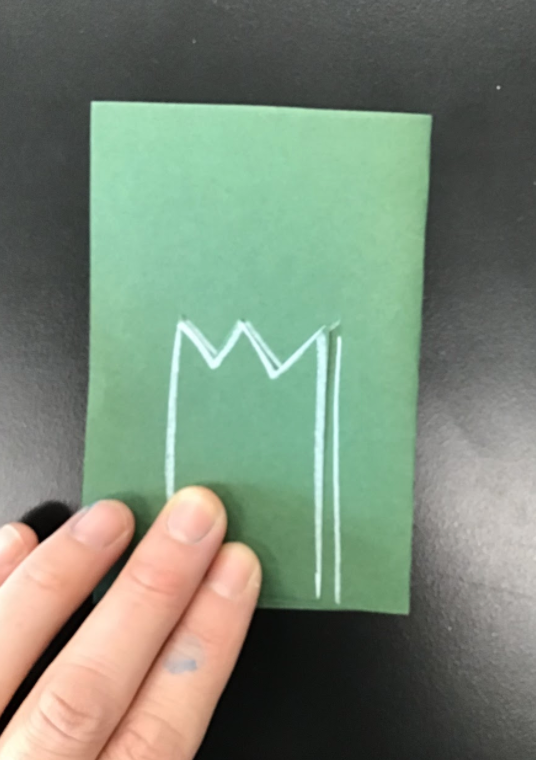
One your second green paper strip, fold it in half like a book- this will be the open snout of the gator. Again, have students measure the width of 4 fingers on the folded side of the paper, draw a large long rainbow or V shape (for a crocodile) and cut it out so that you have a mouth that opens and closes. Use red paper to cut out a “U” that is smaller than the mouth and glue it inside, then use white colored pencils or crayon to draw all those alligator teeth!
-
For added details, use green scraps to draw and cut out two small “U” shapes for nostrils. Draw them as wide as the tip of your finger and then fold the flat part over just a bit to create a flap. Using a sharpie, draw another (slightly smaller) “U” on the shape and color in.


5. Legs, Eyes and Spikes, oh my!
Legs: Using either scrap pieces of green bubble printed paper or just plain green construction paper, have students fold a small piece of paper in half (hot dog style) and draw a leg. I have the students make sure their leg is at least 2 fingers wide with a zig-zag line for toes. Cut out the leg, which will double into two because the paper was folded. Take another piece of green paper, trace the leg you just made as a template and cut out two more legs. Glue legs to sides of alligator, but be sure to have students hold for at least “20 alligator seconds” for some grab time.
Eyes: Ok, so on my original example, I used a ping pong ball that I had cut in half with an X-acto knife… and quickly realized how unrealistic it would be for me to find the time to cut all these ping pong eye balls for 200 first graders. So, enter- model magic! SUCH a better solution! If you have never used model magic before, it is SO much fun- and the best part about it is that it is there is NO MESS! Hooray!! Give each student a small packet of white model magic and have student split the packet in half. Reserve half of the pack for spikes ( we will do those in a moment). Split the original amount in half again and roll each piece into a ball. Model magic is amazing and will stick to surfaces while it’s malleable, so place each of the spheres on the cardboard for the eyes. Once the model magic has hardened the following week, you can take a sharpie and draw the gators’ pupils.
Spikes: Using the remainder of the model magic, flatten it out to make a slab. Then, take a yellow washable marker and color right onto the model magic, covering as much of the surface as possible. Then take a blue marker, and make blue dots all over the yellow. Pick up model magic and begin to work the materials in your hands so that you see the yellow and blue starting to swirl together to make… you guessed it… GREEN!!! If the green is pretty light, feel free to repeat this process over and over to mix the shade of green your students would like.
Once the green is mixed, pinch off small amounts of model magic and form into small triangles. Add a dot of Elmer’s glue underneath and then place them in a row along the spine of the gator. Repeat to make as many spikes as desired
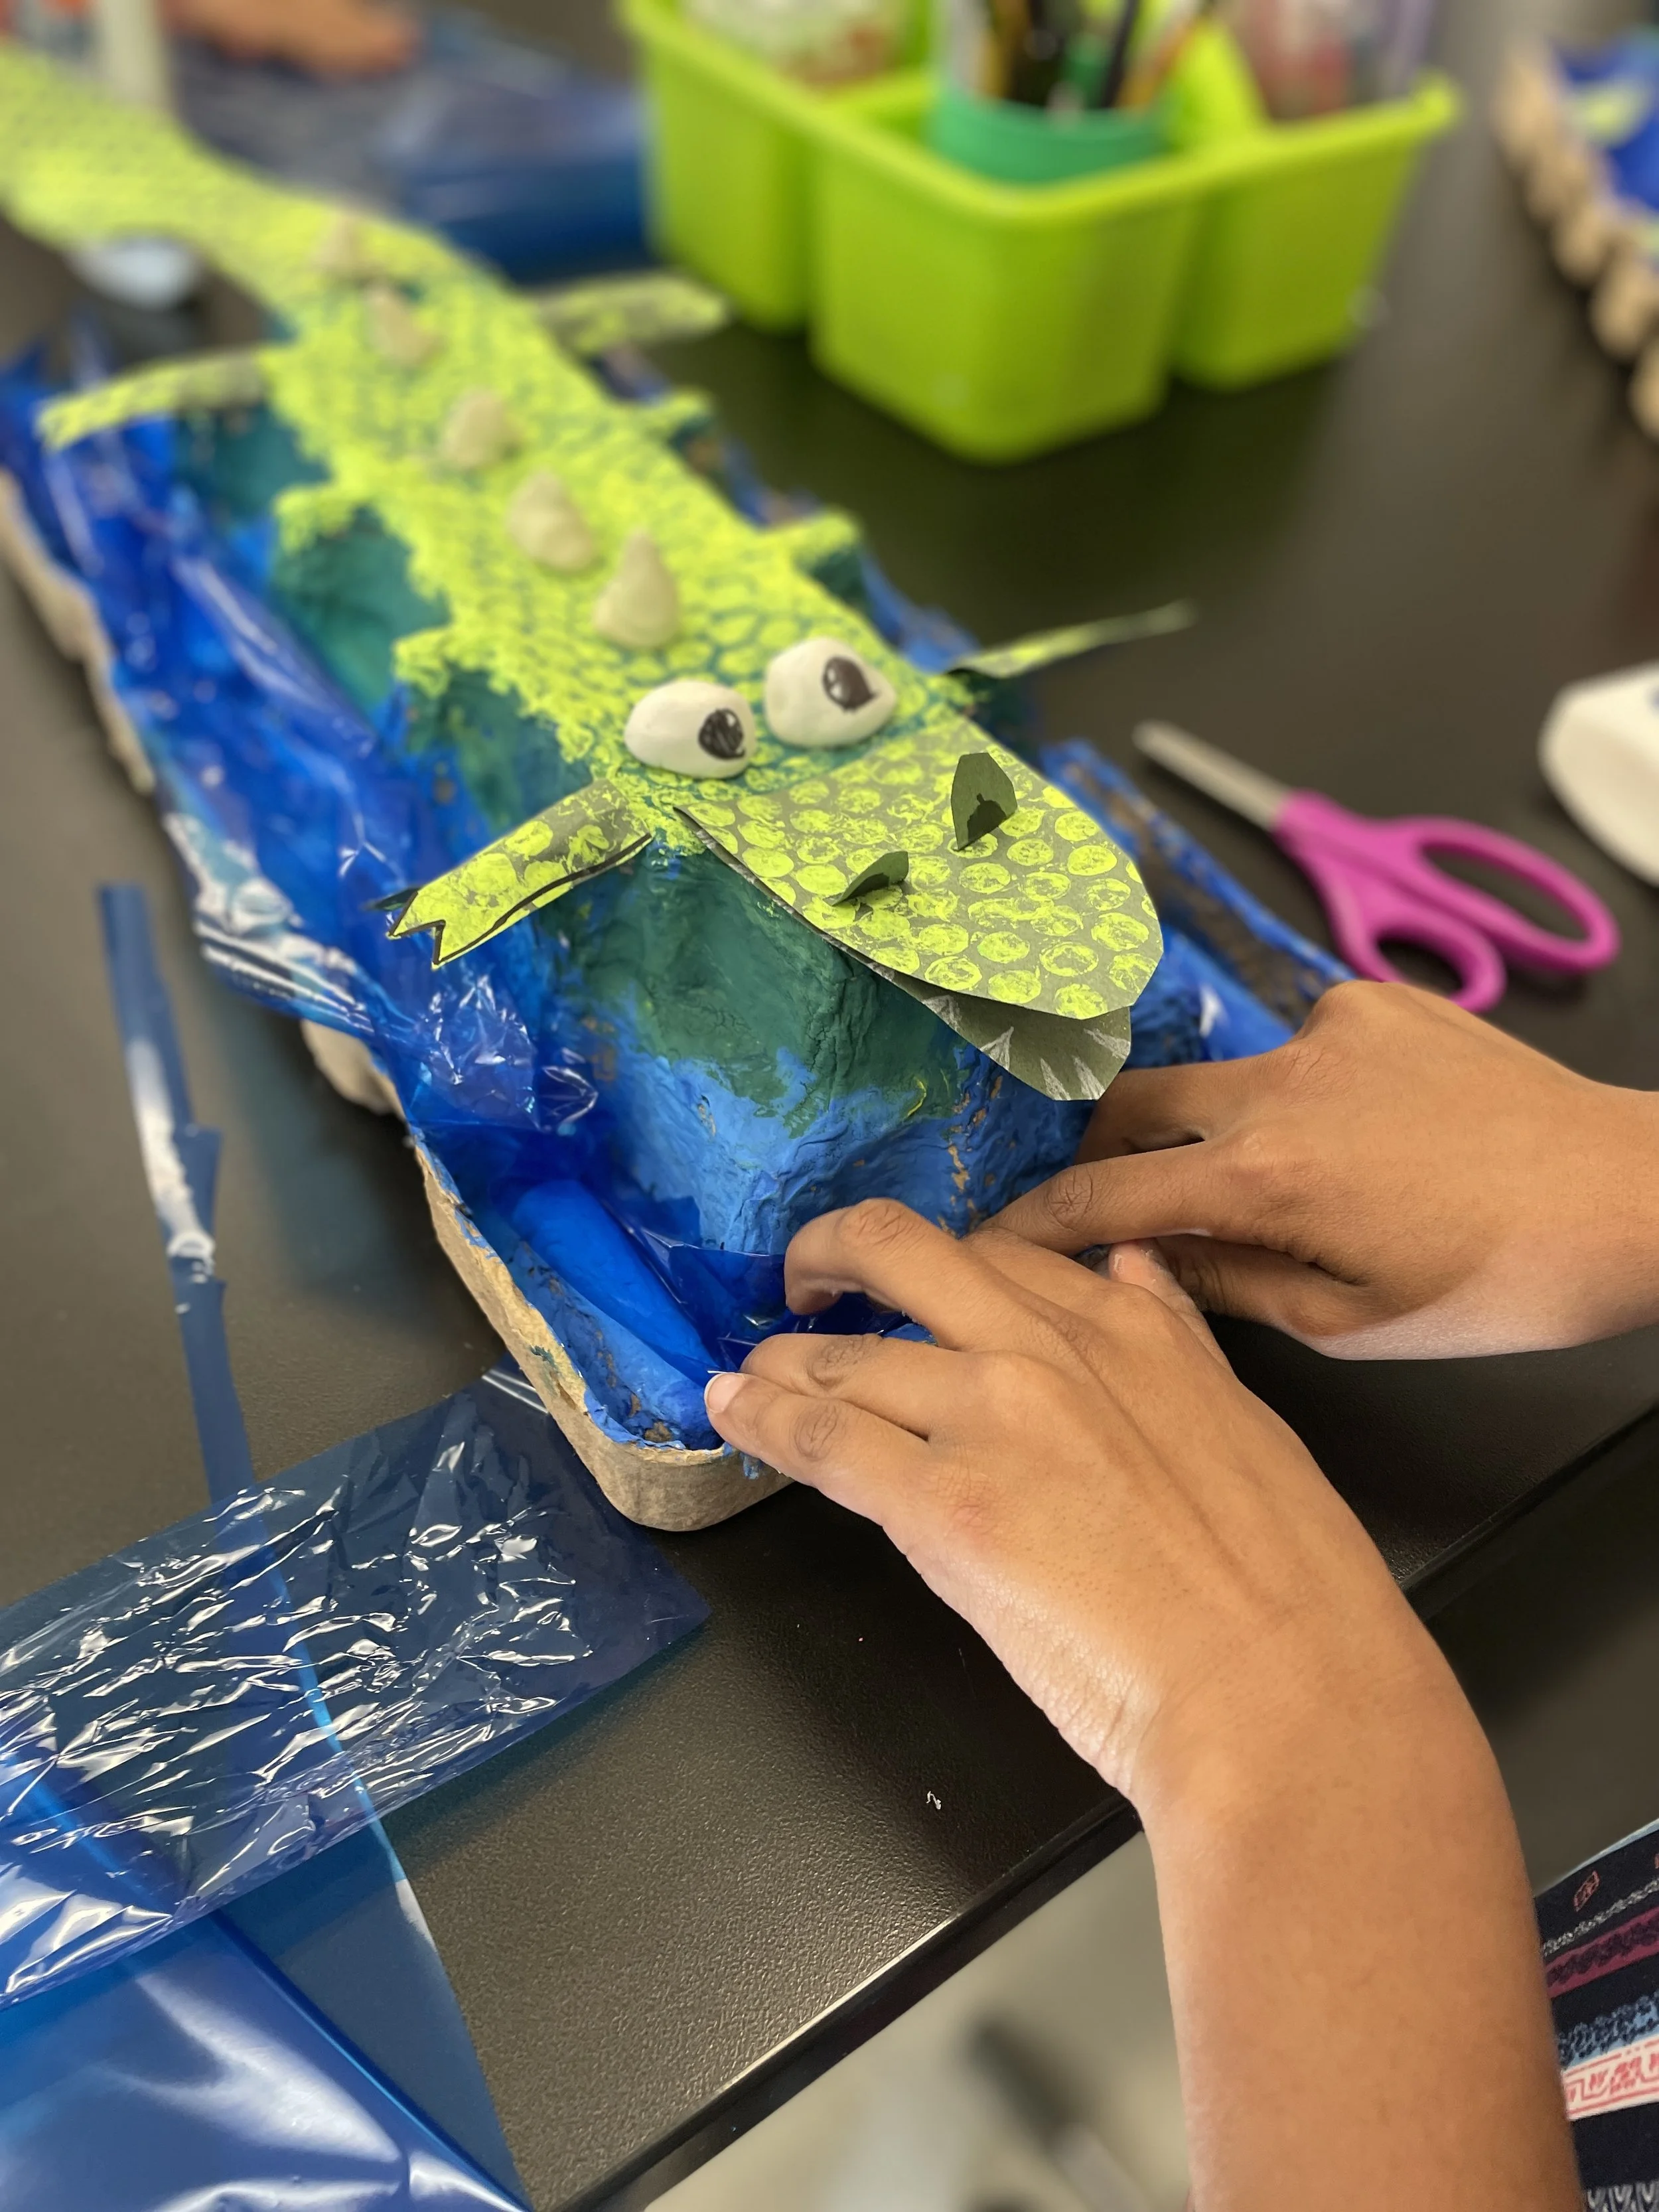
Bonus Step: If you have it, have students add a bit of blue cellophane down around the base of the alligators for added shine and fun! I had students first cut a piece of cellophane into two long strips, add a line of glue into the base of the cardboard and then tuck the cellophane in on each side, wrapping it around.

Honestly this has been one of the kids’ favorite projects and I couldn’t agree more! So many fun processes all wrapped up into one! If you give some variation of it a whirl, be sure to tag me on Instagram so I can see! Have fun!


1 comment
Those alligators are so adorable