Is there anything more satisfying than painting on glass or plastic? I think not! That’s why plexiglass is the perfect surface to keep your students engaged while painting.
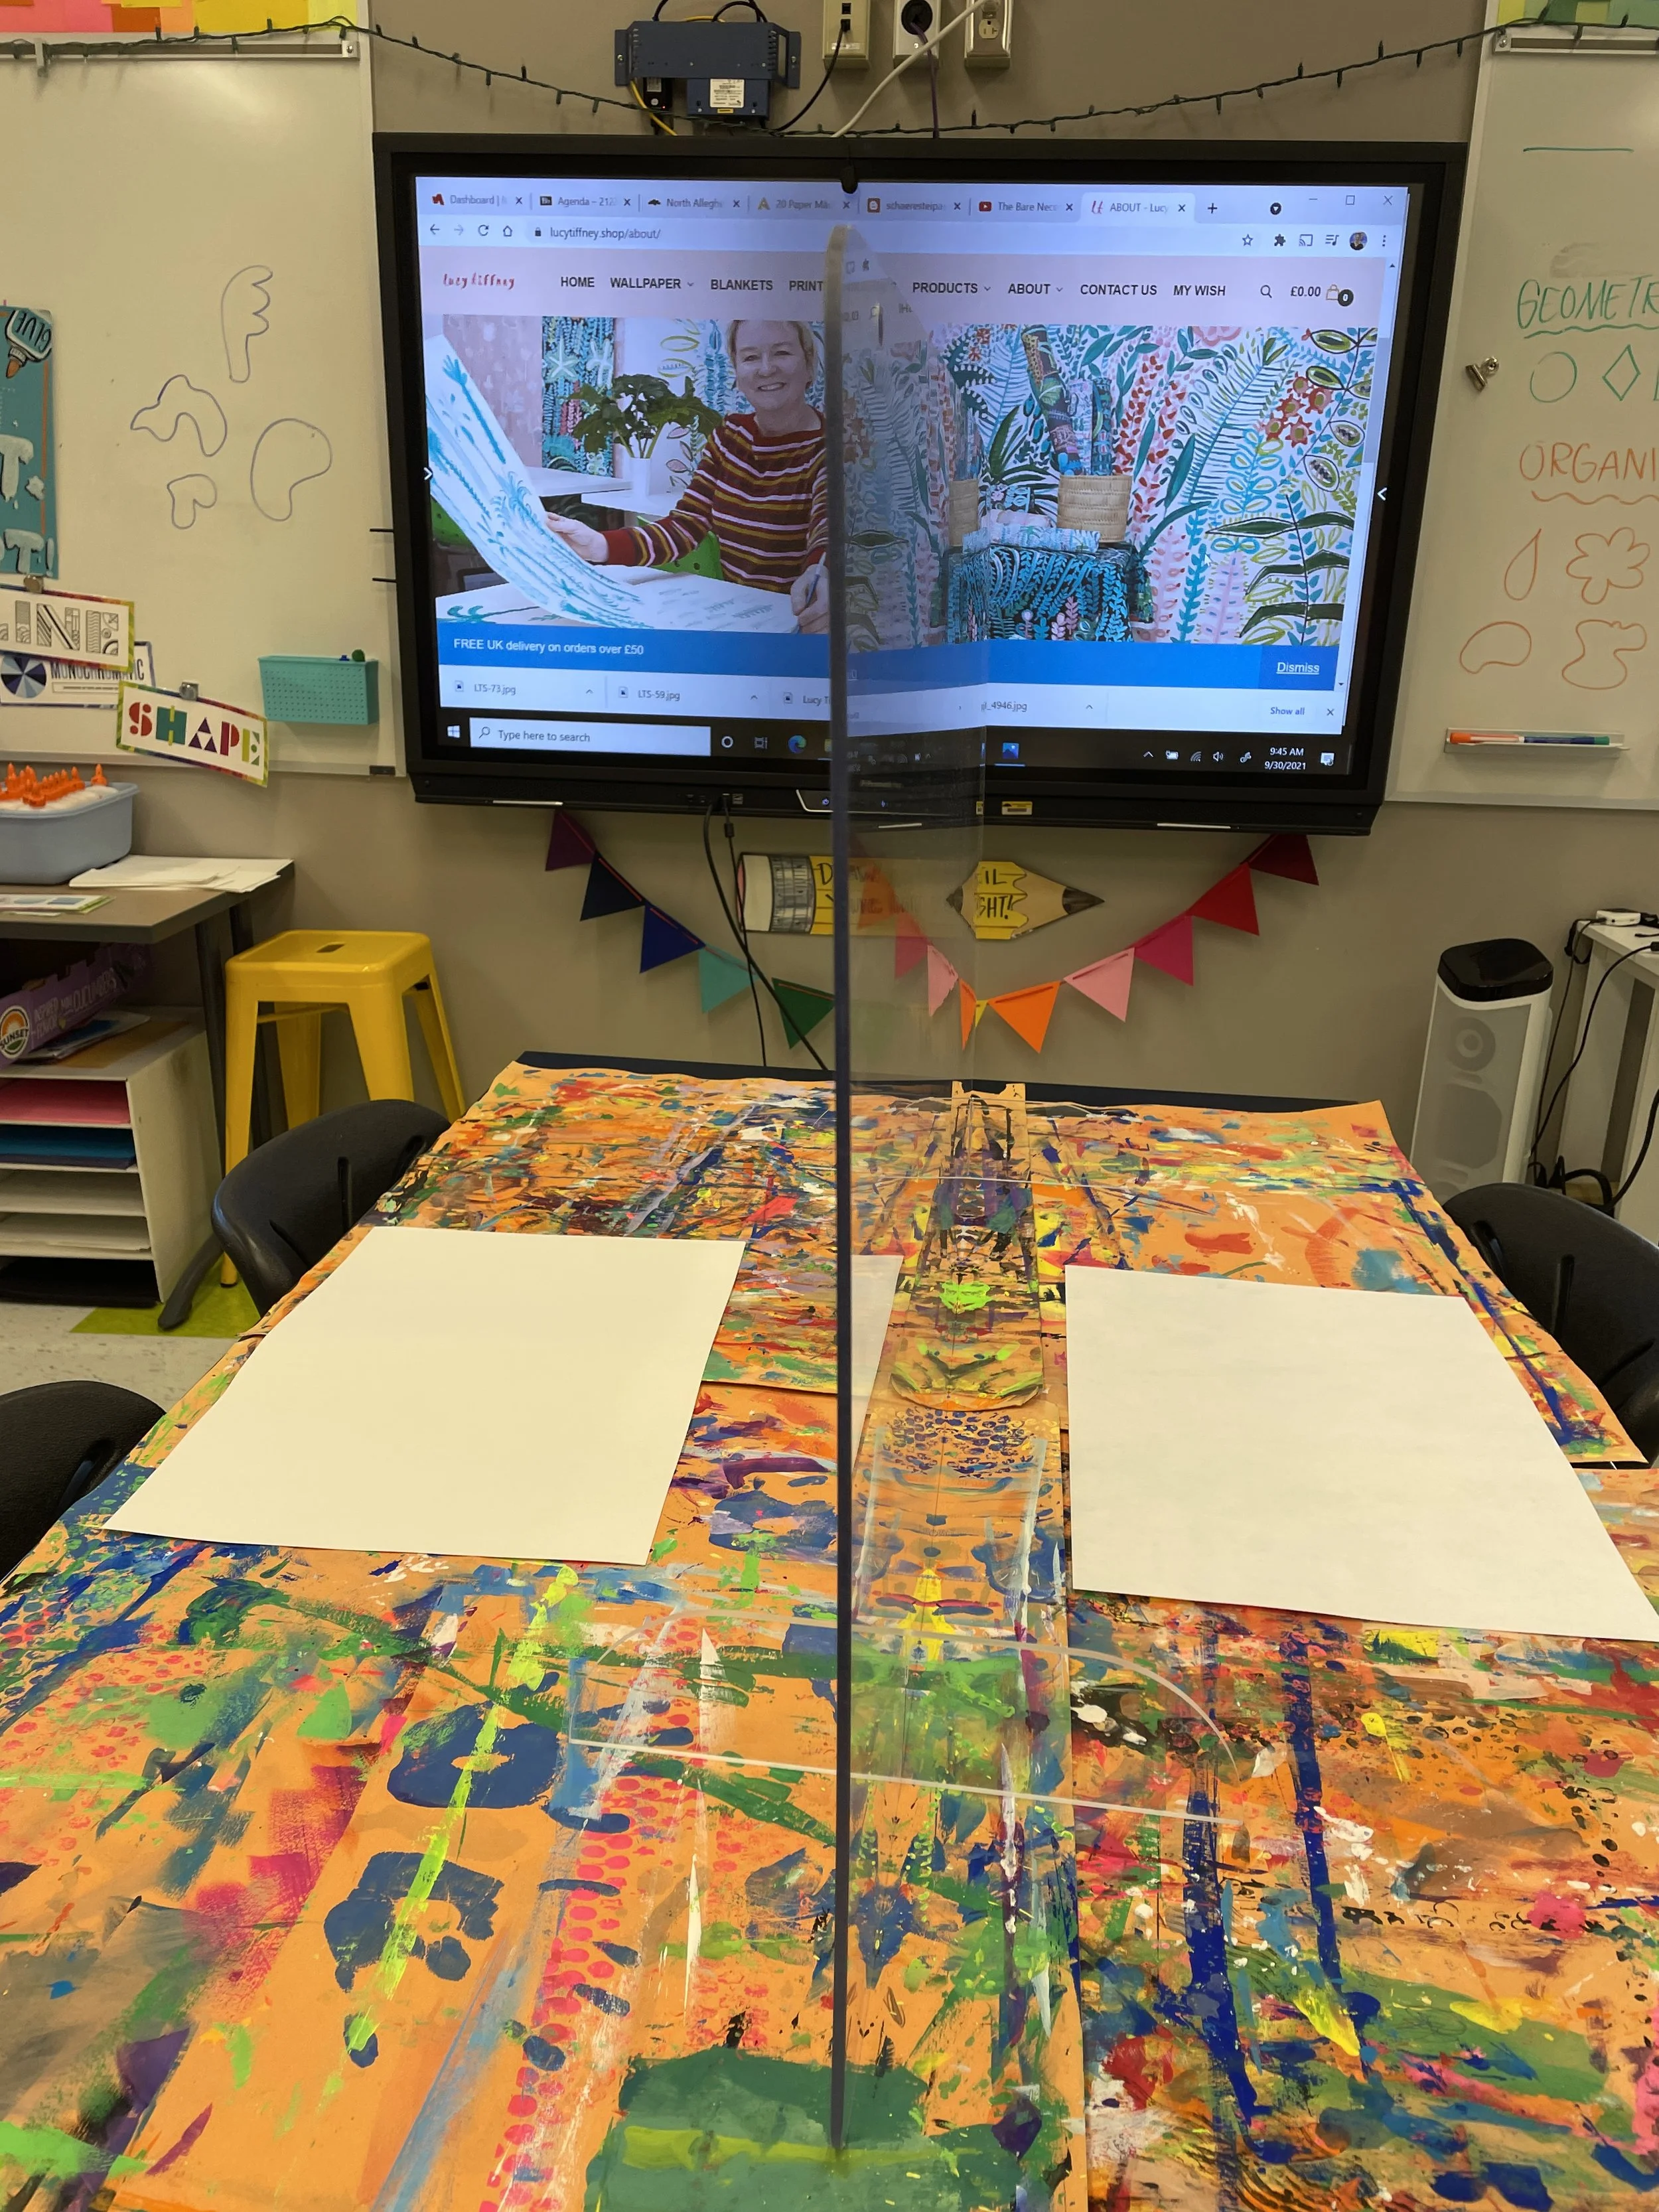
A few days before my adapted class while chatting with my librarian pals, I noticed an extra standing piece of plexiglass in their storage room that was currently not in use. My brain instantly started spinning thinking of potential ideas of how I could use it in the art room. My students paint and print on small pieces of individually cut plexiglass all the time, so I’m no stranger to how wonderful plexiglass is- but I was so excited to have a large piece that was vertical! Thankfully my fabulous coworkers said I was happy to borrow the plexiglass for class so that’s what I did!
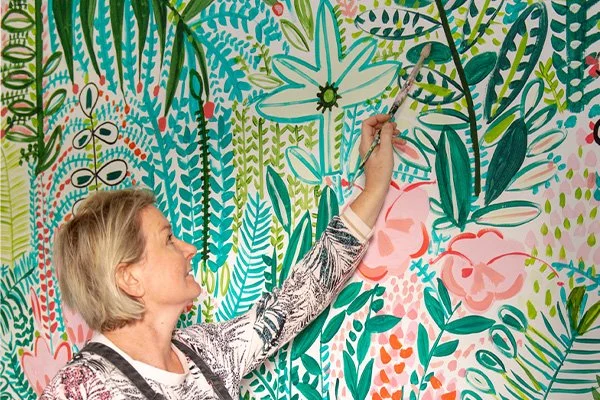
Photo of Lucy Tiffney working (Source https://www.sofa.com/inspiration-corner/design-lab-lucy-tiffney/ )
When trying to figure out what it is we were going to paint on the plexiglass, I suddenly remembered artist and designer Lucy Tiffney who I had started following randomly on Instagram a few years back. Lucy is an artist, muralist, and designer with a distinct painterly style of vibrant botanicals and her work is just gorgeous! With our theme this year being the rainforest, I thought that Lucy’s work would be the perfect reference for this project in adapted art. So here’s how we did it!
Materials:
-
Plexiglass
-
soft bristle paint brushes (I love Royal Langnickle brushes of all sizes)
-
Tempera paint (if you plan on washing it off) I use Crayola Premier Tempera paint- the fluorescent colors are my favorite!
-
Messy Mats & Smocks
-
Reference images of Lucy’s work and plants
1. Prepare Your Materials and Work Space
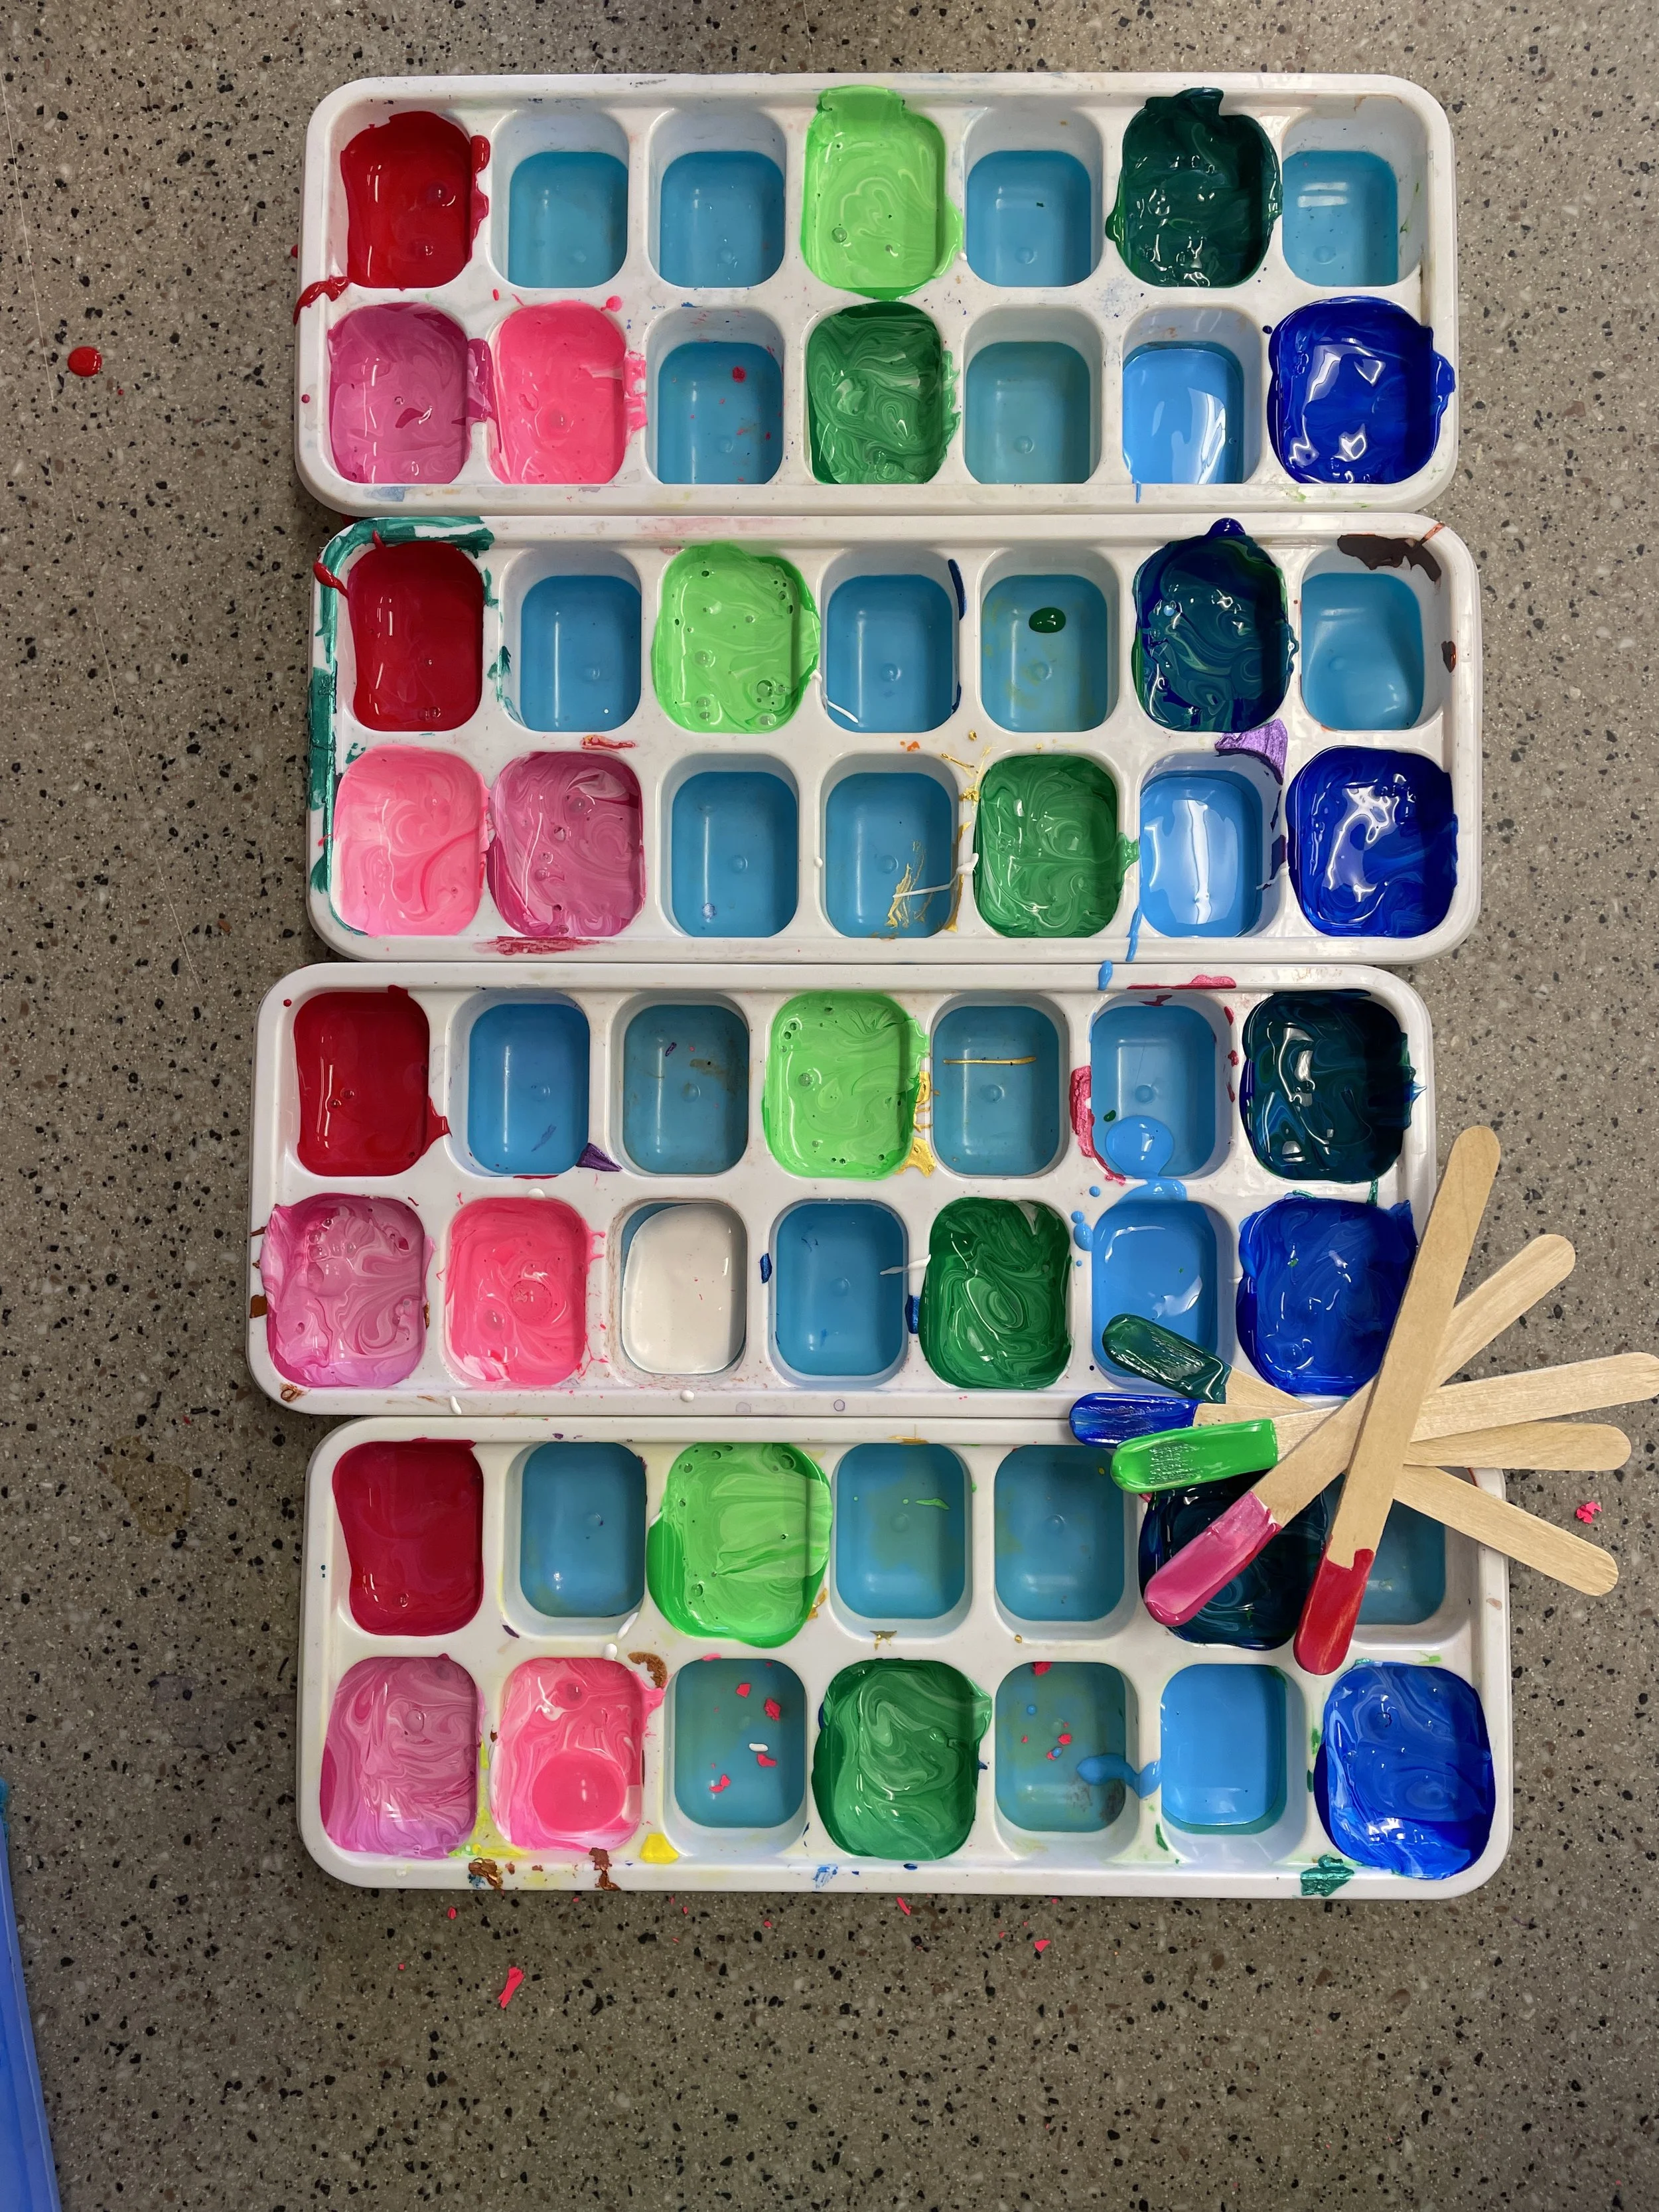
Prep your paint.
Lucy obviously uses many different types of greens and blues, but she also uses different pinks for a pop in her work. So I prepared lidded ice cube trays with colors from Lucy’s palette mixed with a bit of white to make the paint nice and opaque on the glass.
Prep the space
I prepared the tables by covering them in my large messy mats with the plexiglass in the middle and Lucy’s work on my board as reference
2. Get Them Started

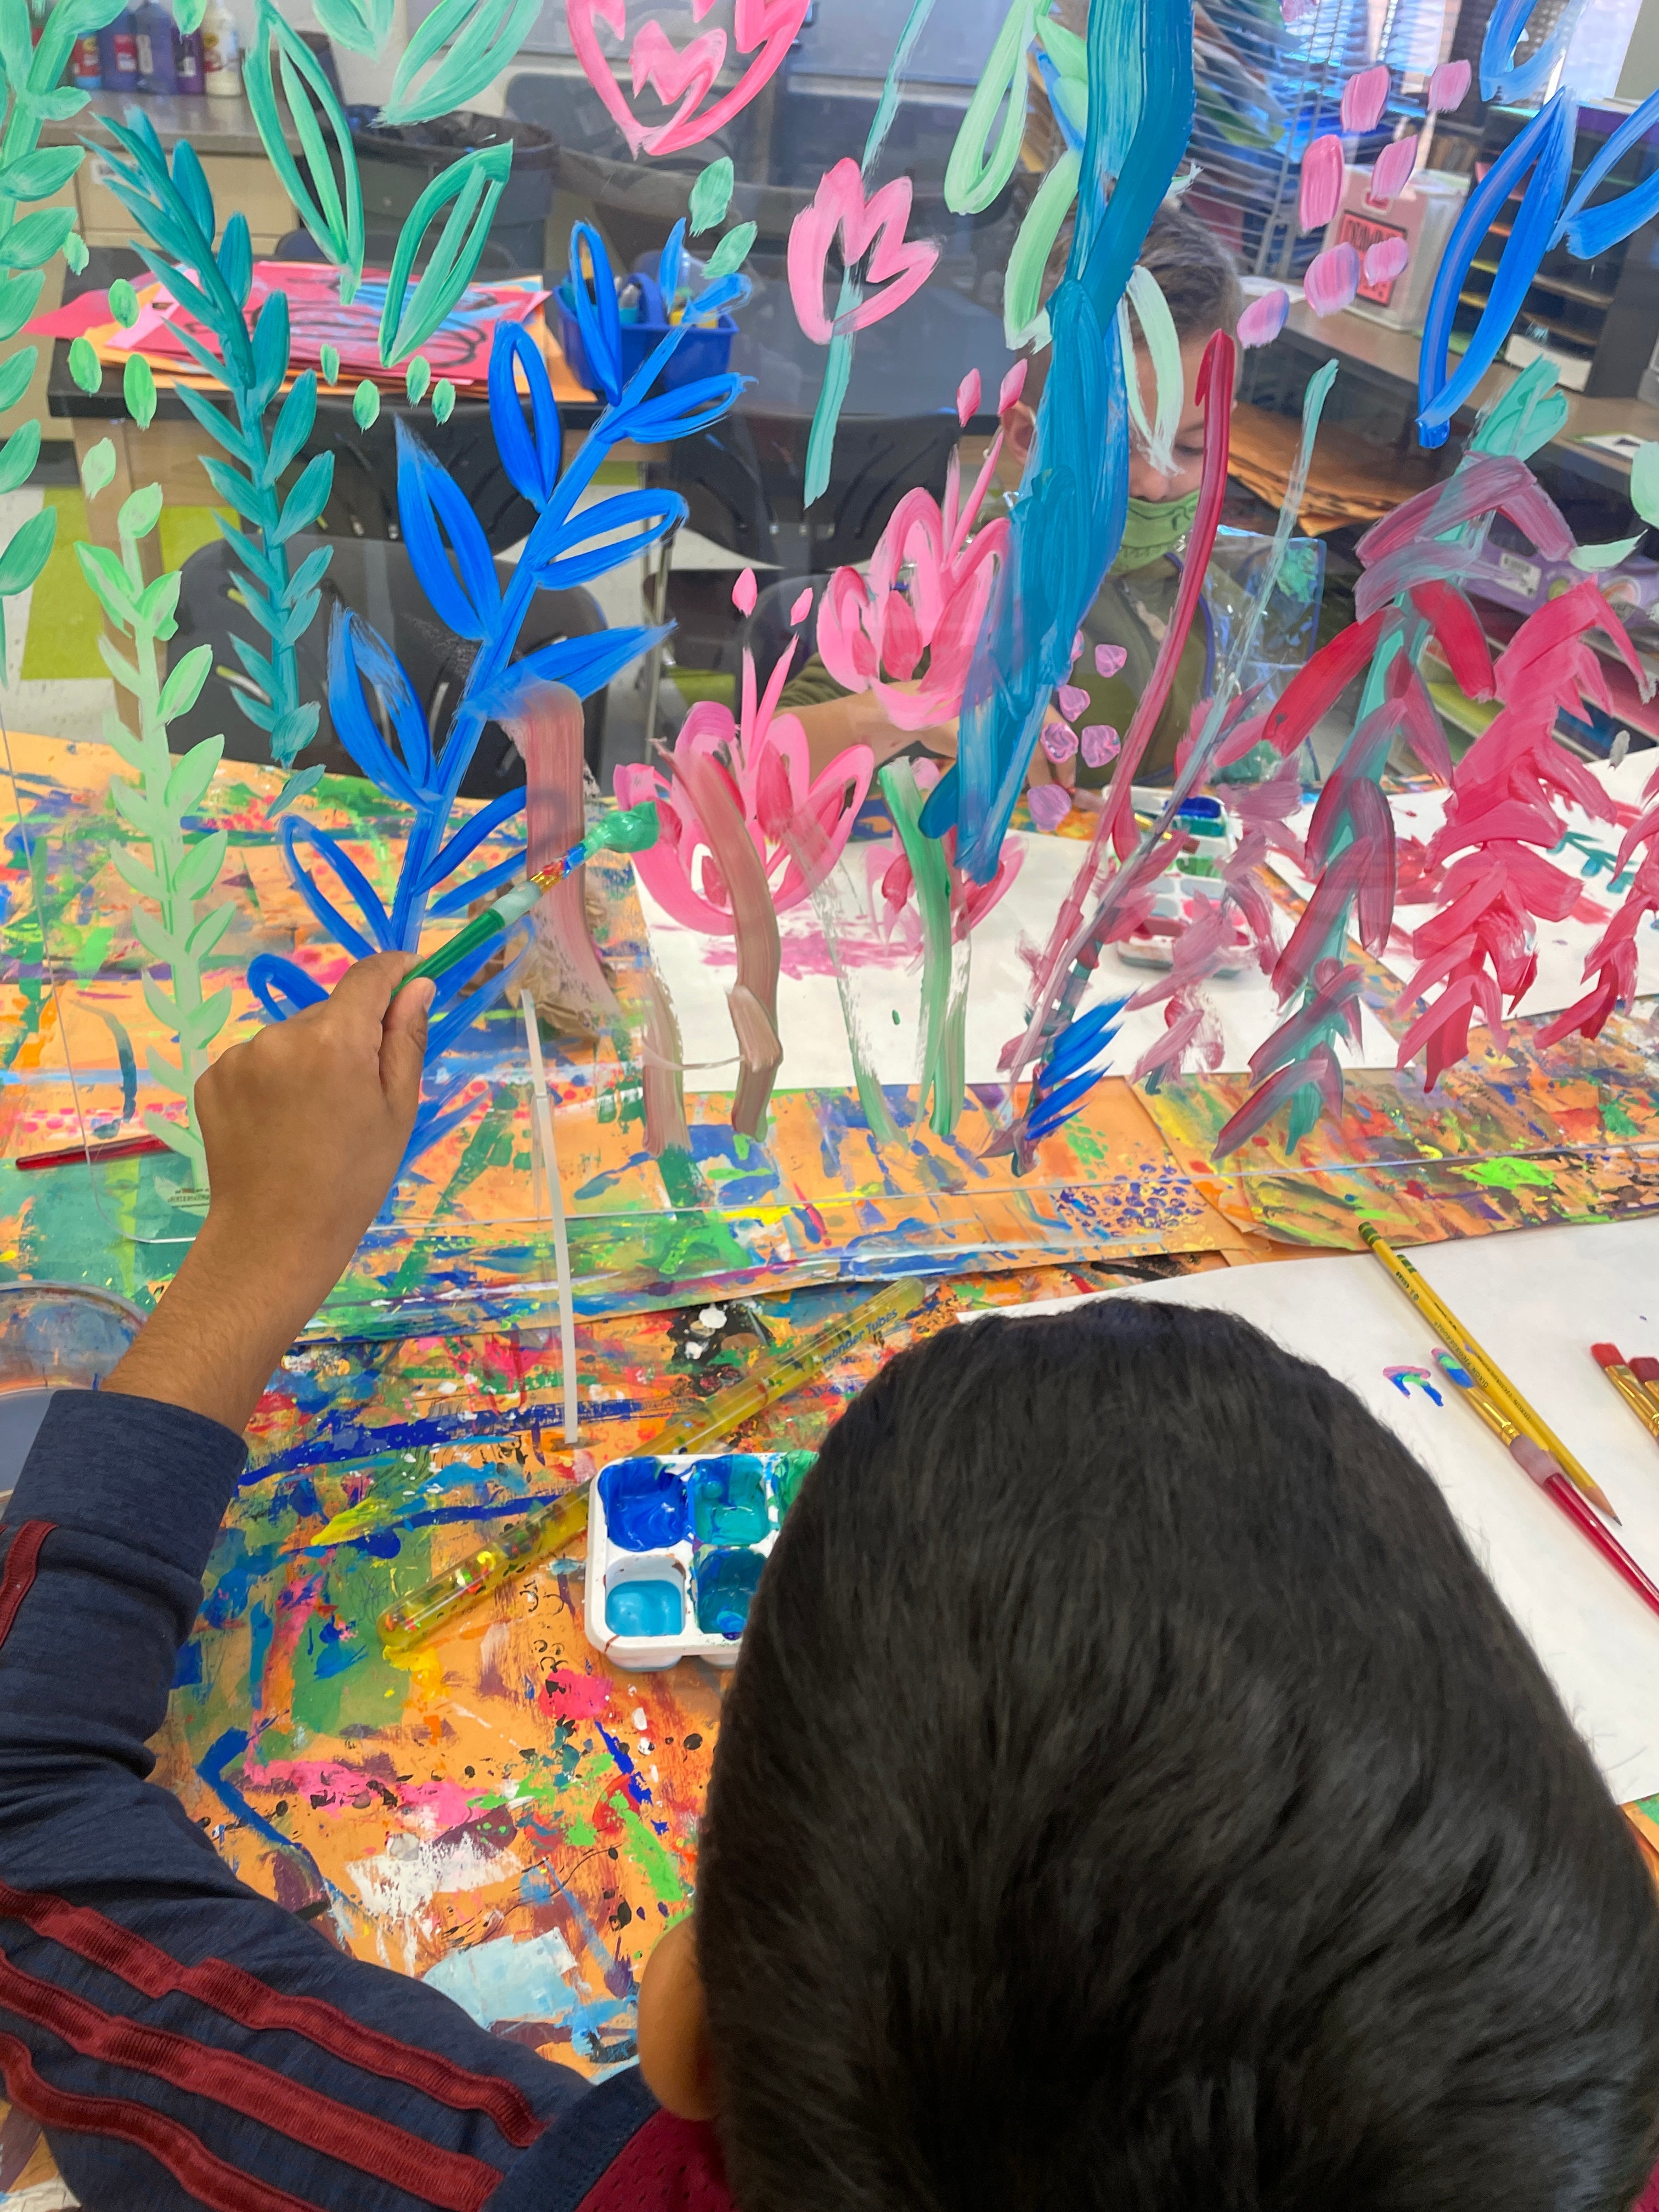
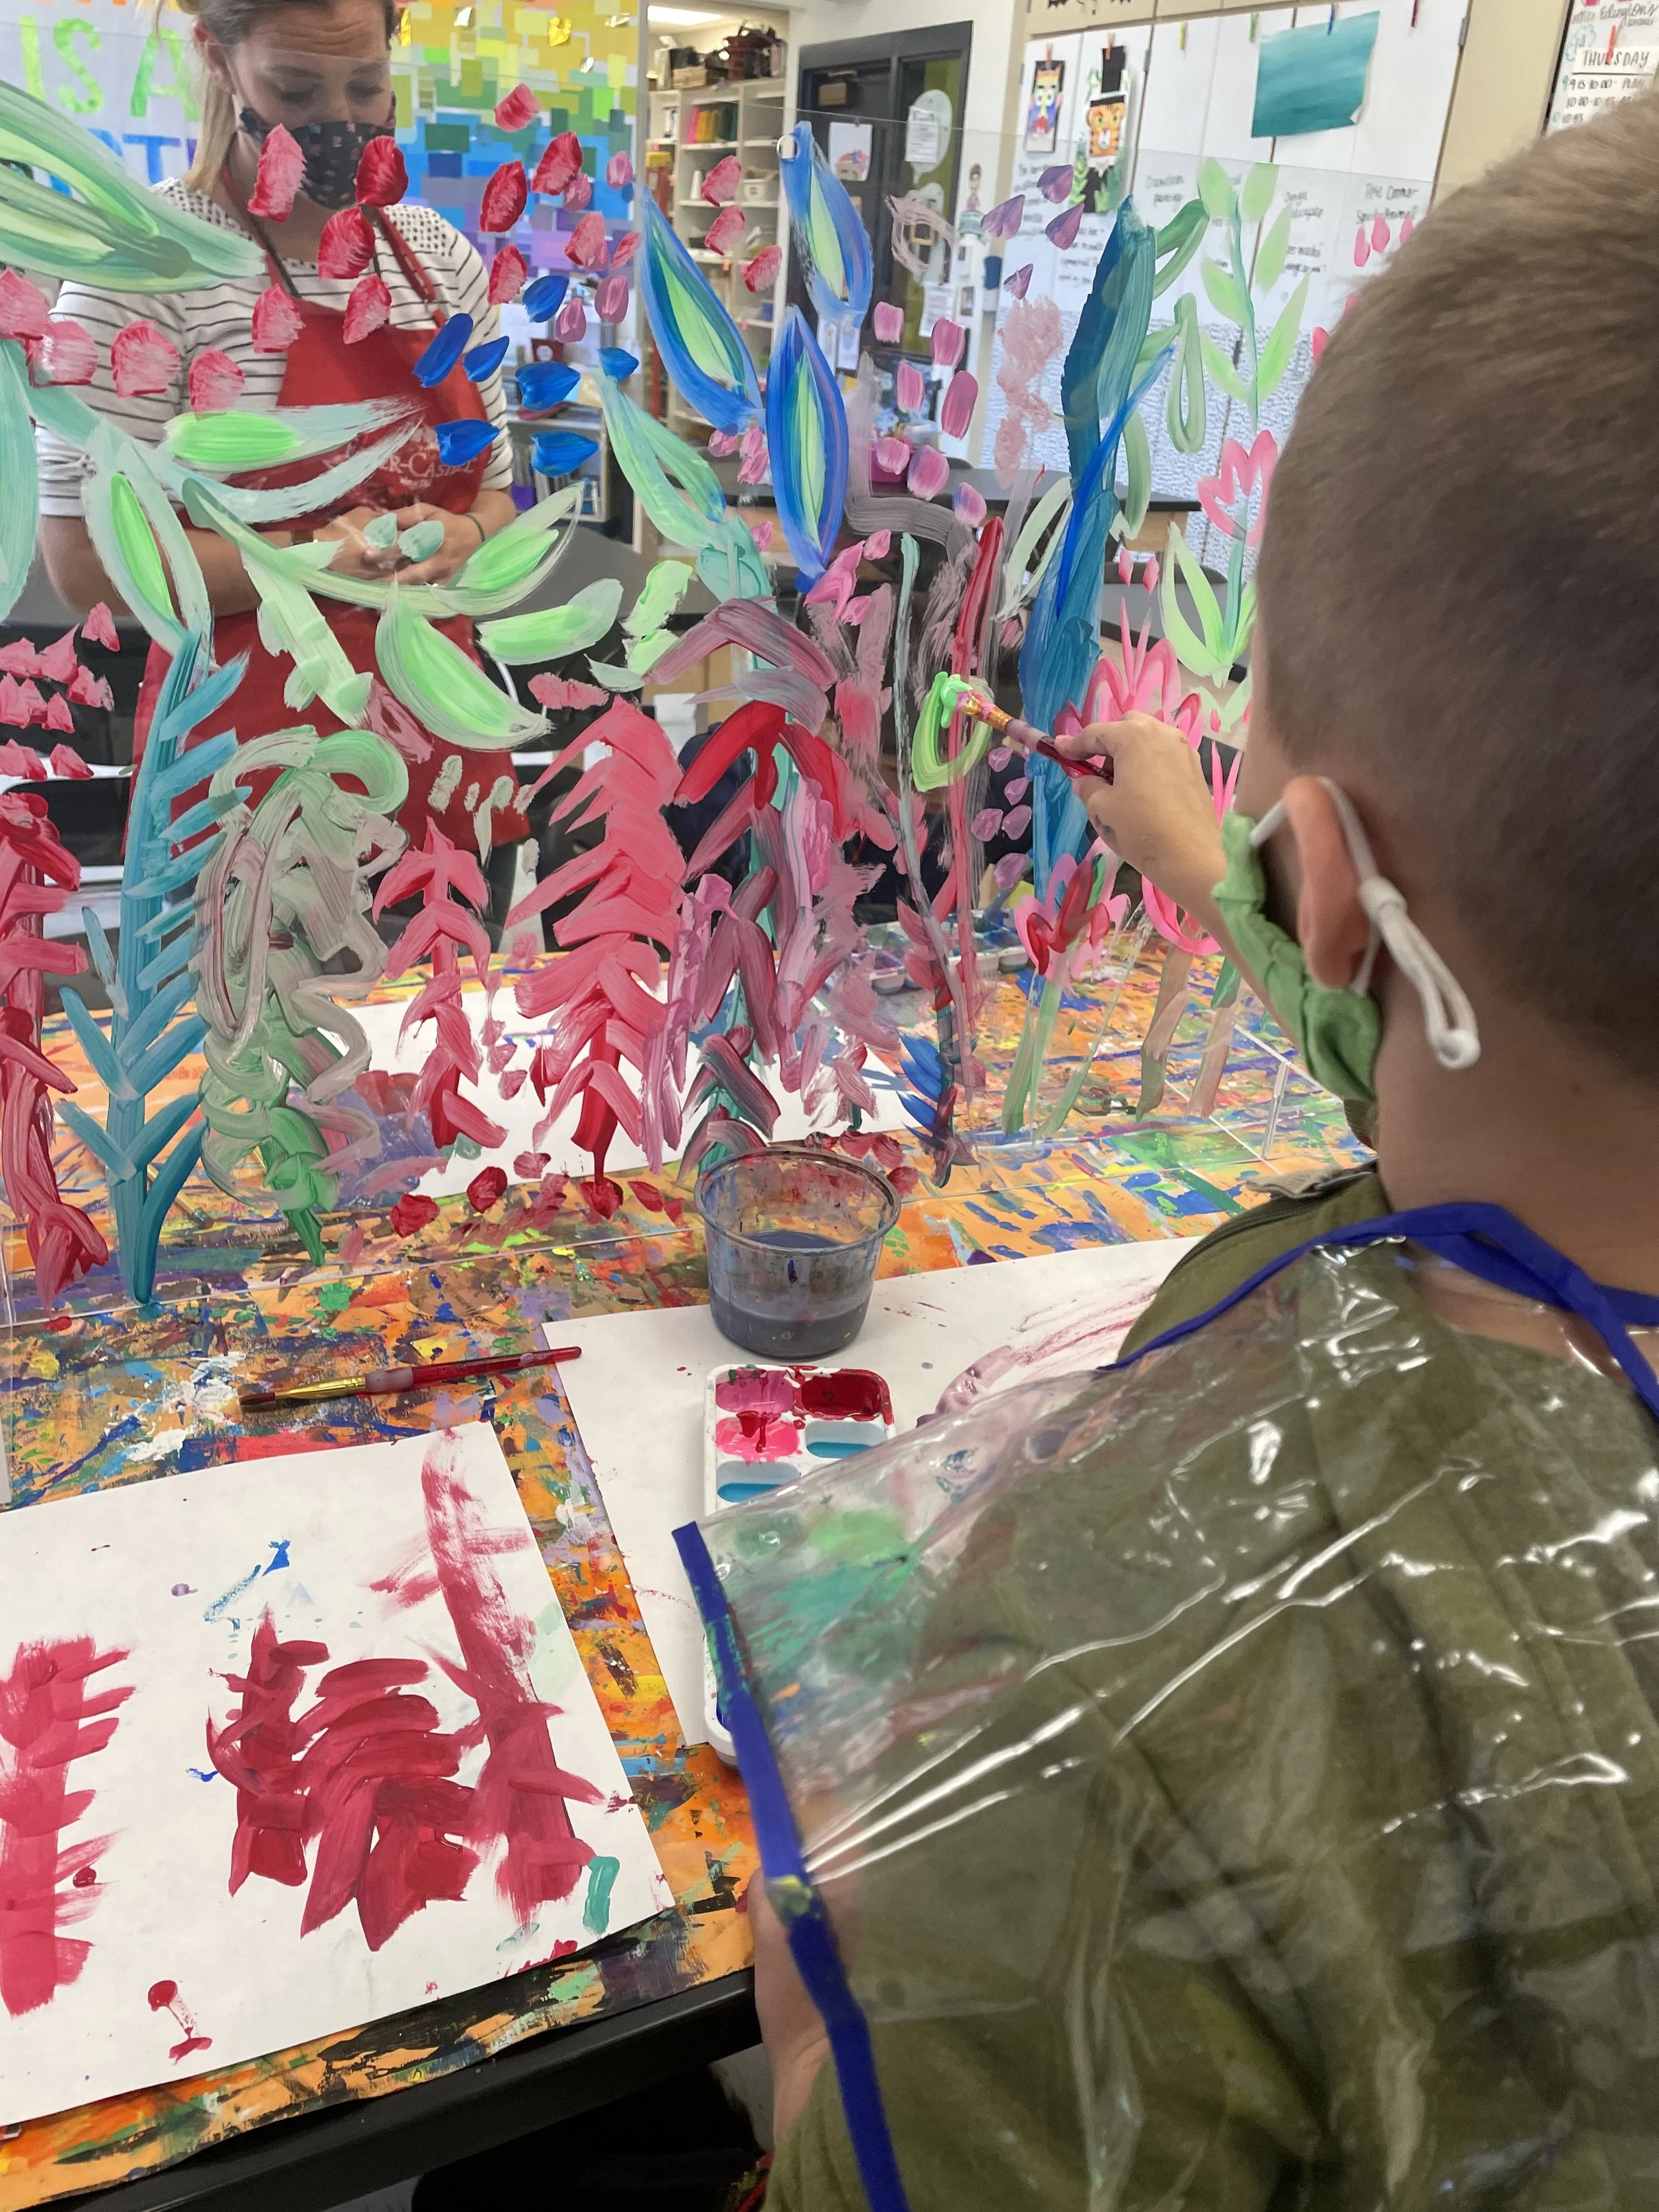
Before my students arrived, I painted a few of the leaves/ botanicals around the edges to show them ahead of time what will be going on the surface. This is also a fun way to invite them into the lesson- when they came in and saw this interesting glass on the table with paint on it, they were ready to jump right in!
3. Demo How to Paint the Leaves then Let Them Do Their Thing!
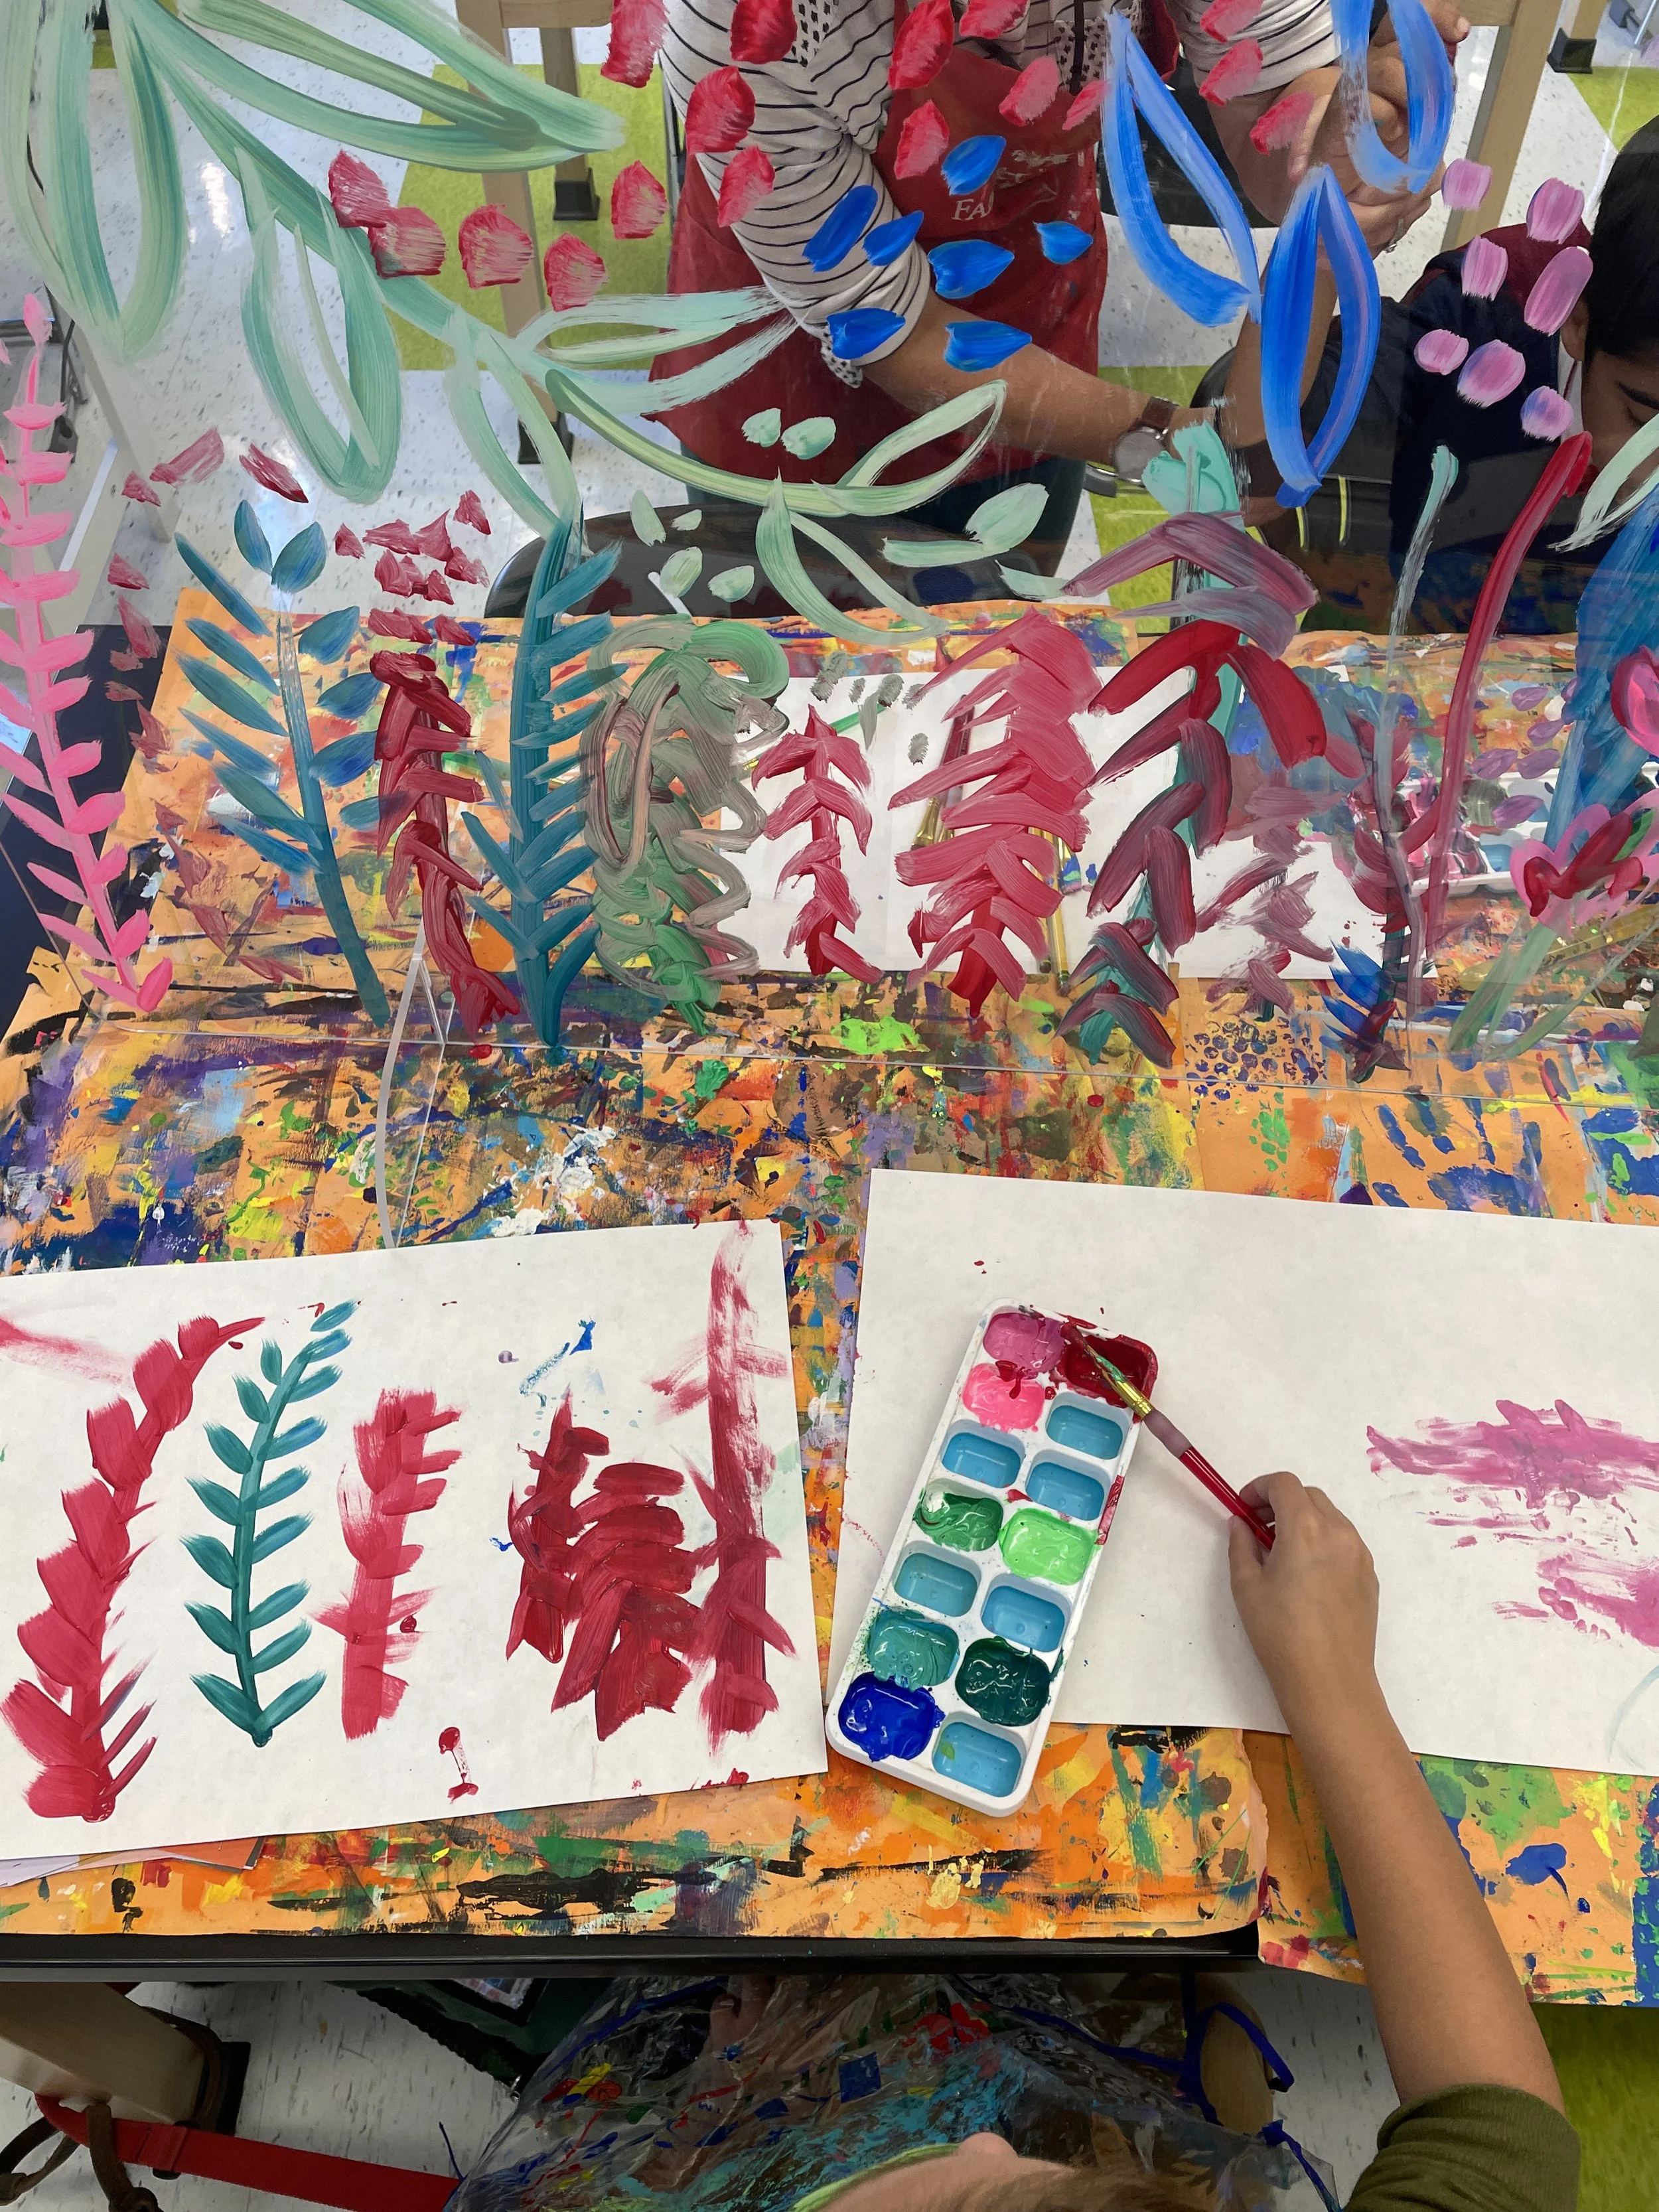
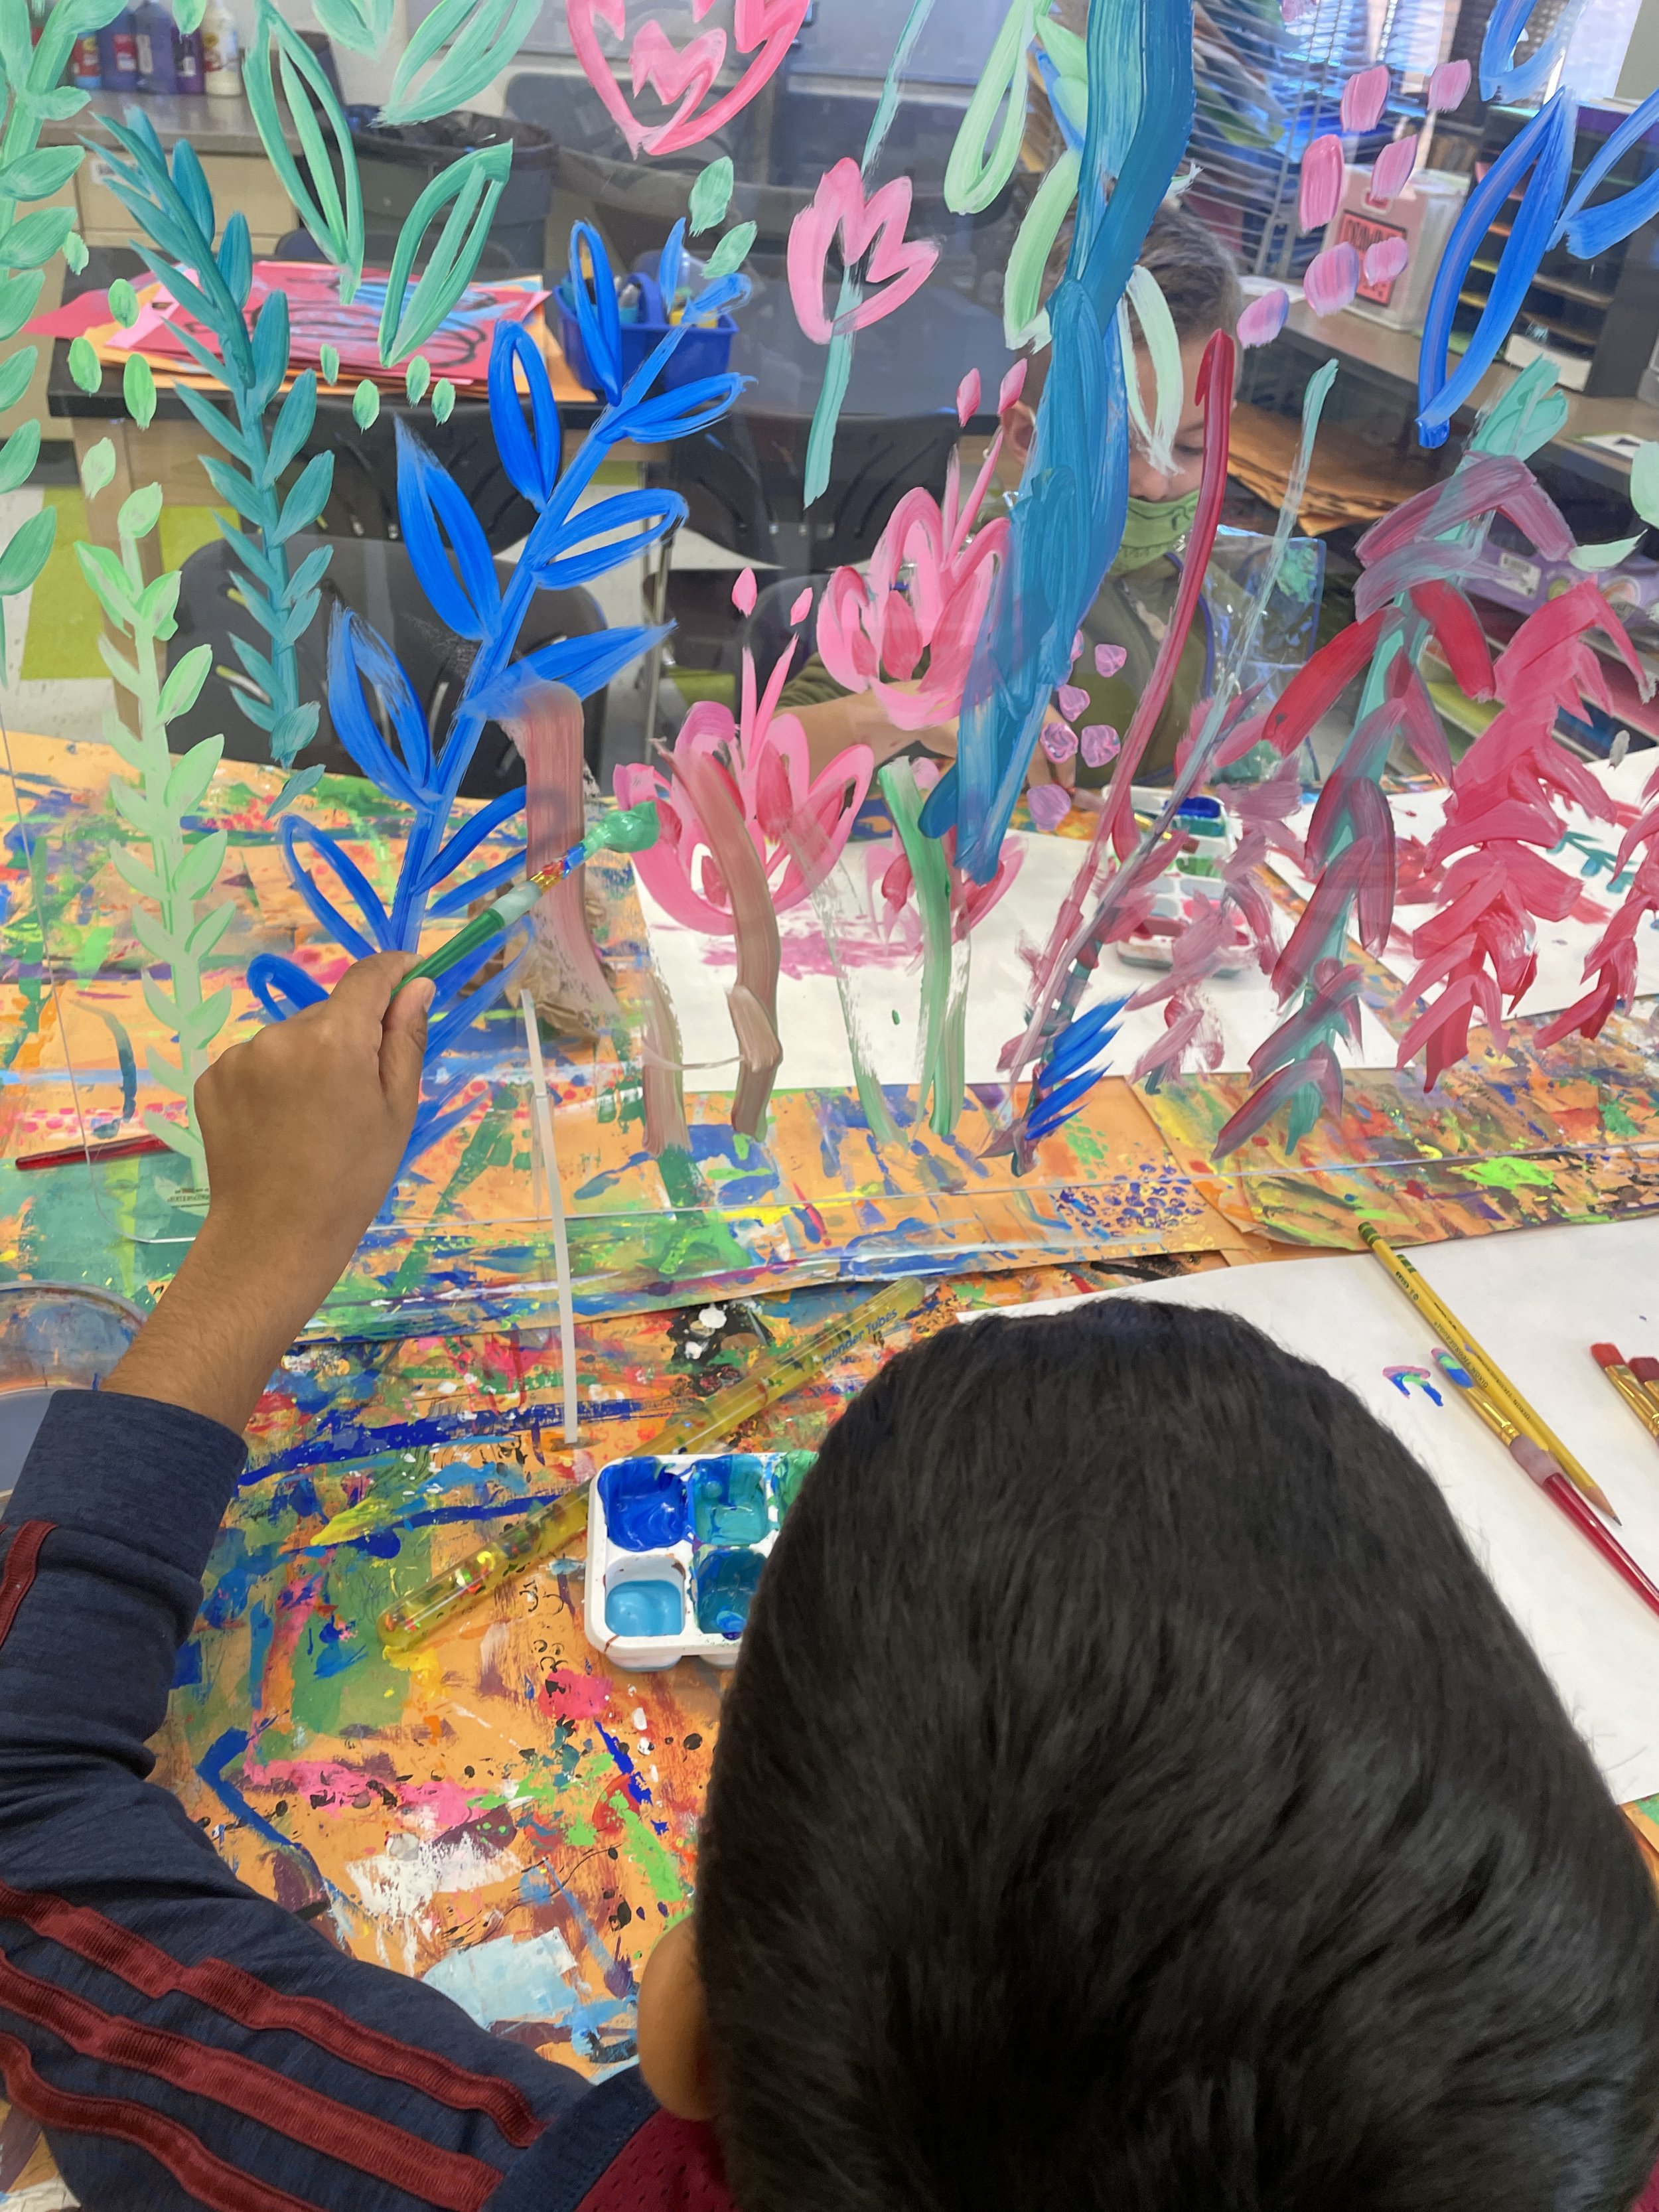
On a piece of scrap paper nearby I showed my students how to paint one long line for the stem and then add short lines on each side for the leaves. Some students really grasped the demo and others decided to paint whatever they wanted- and both were completely fine! As long as your students are safe, engaged, and hopefully having fun then that’s a win in my eyes! If the artwork happens to turn out lovely at the end then that’s a bonus! For my teaching adapted art is so much more about the experience for my students than the final product.
Students sat on each side of the plexiglass which was really fun for them to see their peers across from them also painting the same surface!

4. Display Your Art!

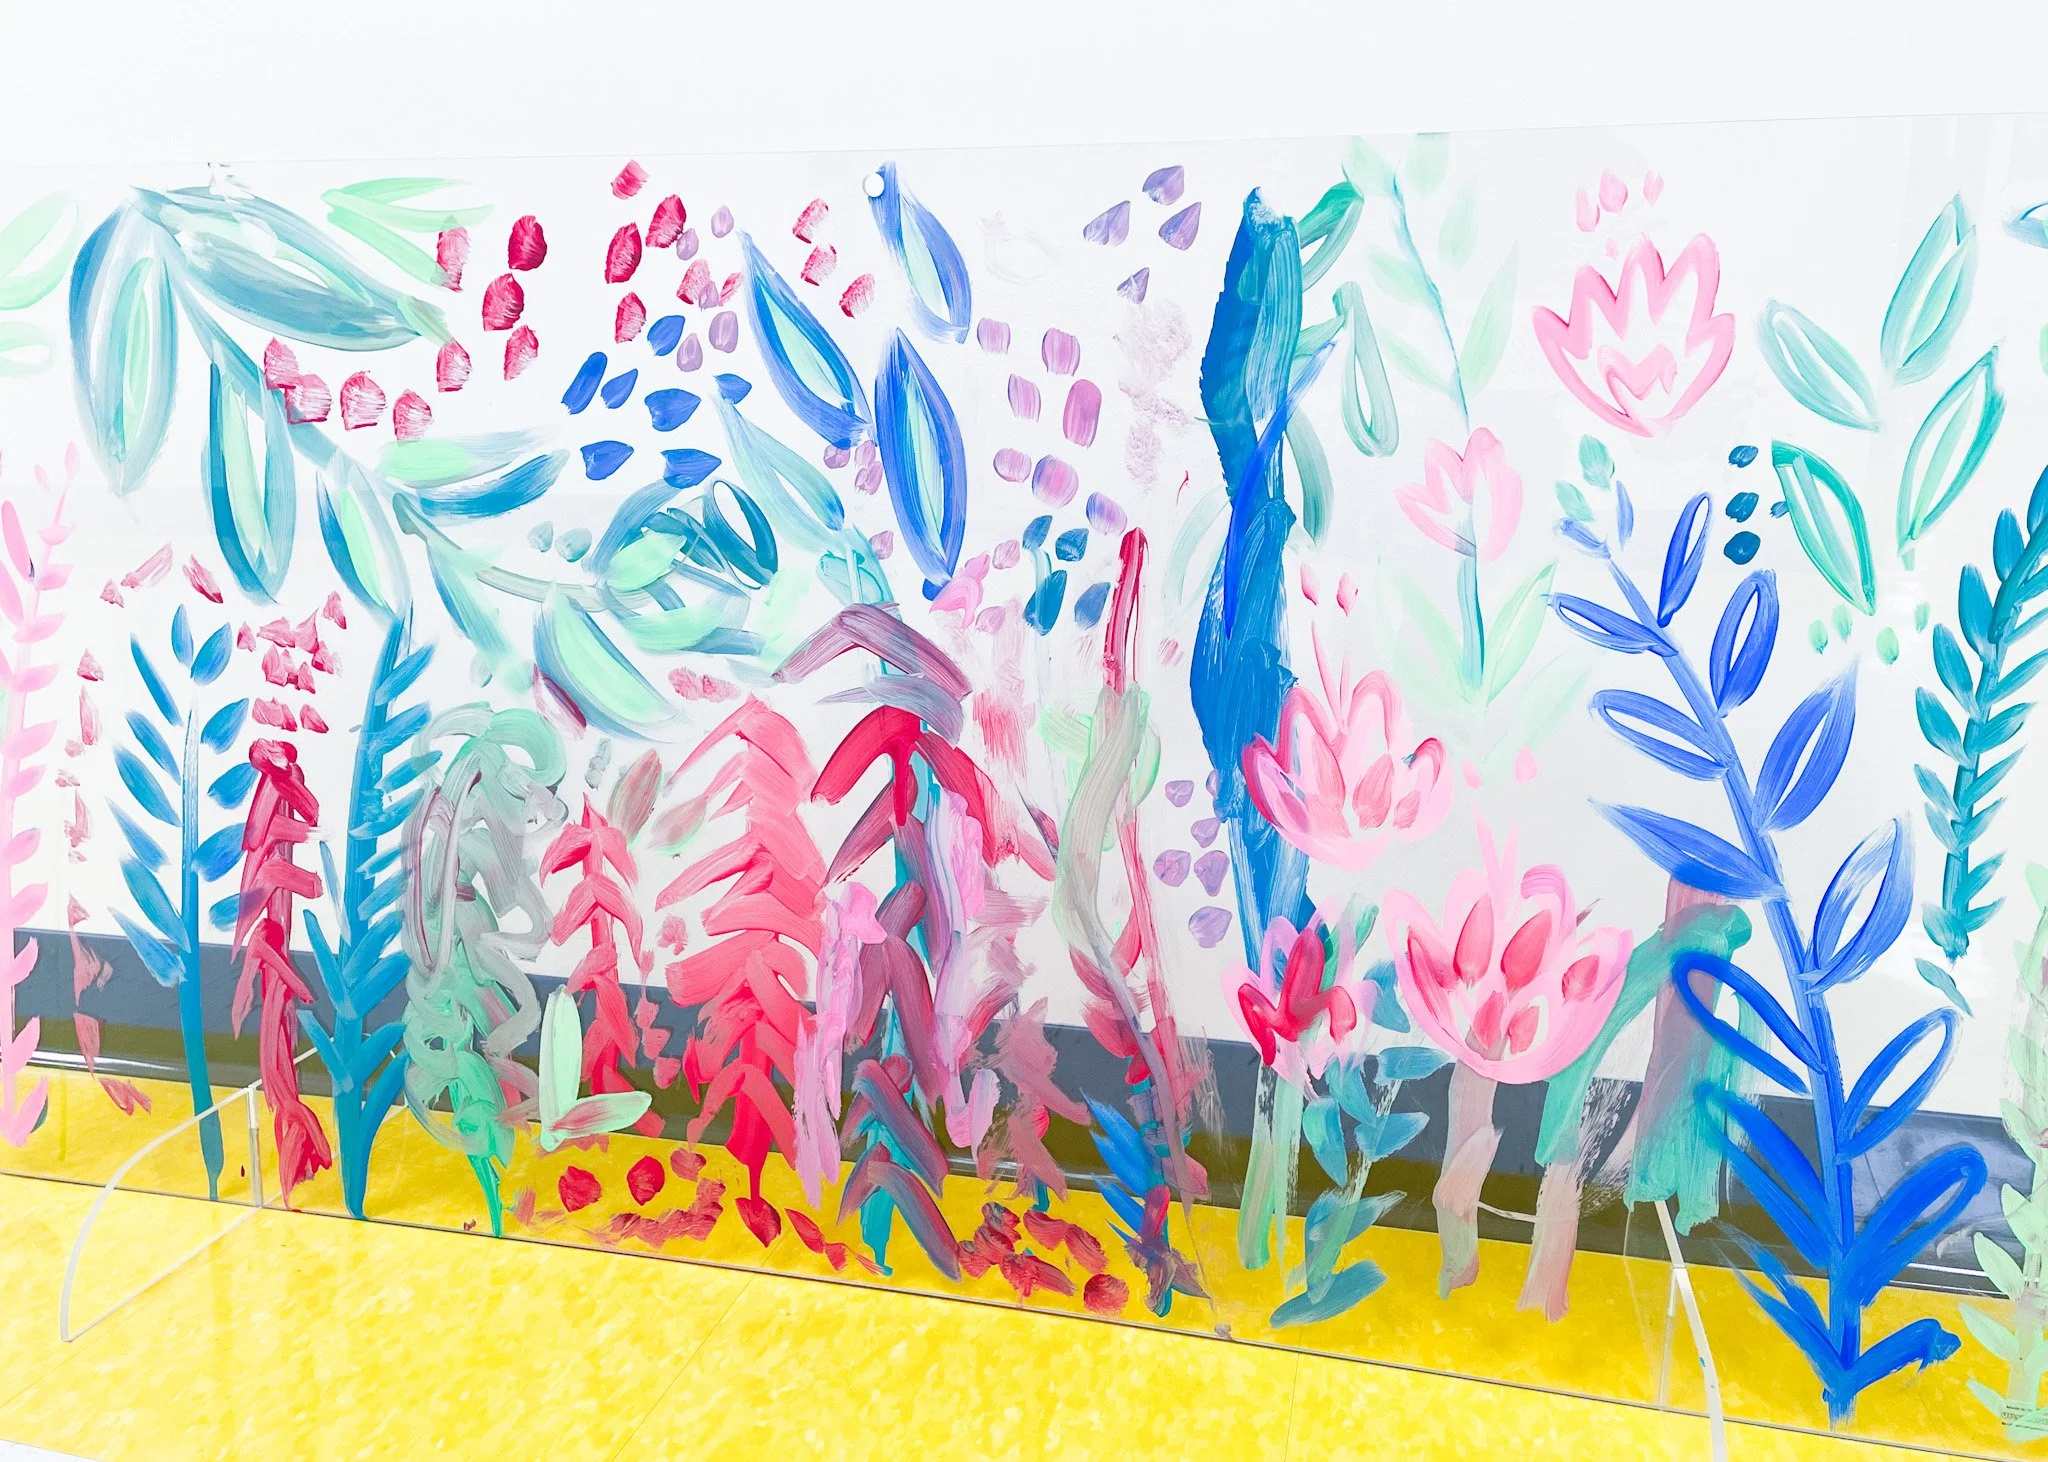
The best part about our plexiglass botanicals was showcasing how beautiful they turned out! Our wonderful librarian suggested we display our work in the windows of the library since we have large bright windows. It turned out to be the perfect space for our display and is enjoyed by every student in the school! Be sure to give plexiglass (or even window painting) a try! Your students are sure to love it!


1 comment
Hello! Love this idea! Did you prep the plexiglass an anyway beforehand? Could one use acrylic paint instead? Thank you!