
I feel like there are two types of art teachers out there. The type that LOVE teaching self portraits and the type that just straight up dread them (or even avoid them all together). Luckily, I am the type that absolutely loves teaching self portraits and I’m excited to share some of my top tips to help guide you and your students to success in the art room!
So let’s get started, shall we?
1. Begin with a Pre-Assessment.

As art teachers, it’s sometimes difficult to assess your students’ work. So instead, focus on their growth in your class. By having students create a self portrait at the start of the lesson or year with limited instruction from you- you will gain a solid understanding of where each students’ baseline of knowledge and skills are. Oftentimes I make sure my students know this is a super low pressure assignment that can just be done in their sketchbooks. Be sure to have your students date their work so you can properly evaluate their growth when the time comes.
2. Use a Standing Mirror (or Photo if No Mirror is Available)

This is a MUST when teaching self portraits. If you do not provide your students with a mirror or photo to work from, you are going to set them up for failure. If you are going to teach your students how to create proper proportions, encourage them to focus on details, then you cannot have your students draw from their head about what they picture themselves looking like. For many years, I have used these standing mirrors for my classroom. They are perfect because they are large enough for each student to see themselves, they are freestanding and they are double-sided which means you only need one for every 2 students. I try to keep my tables limited to 4 students each (if I have the class sizes are reasonable- not always the case) so I usually only need 2 of these mirrors per table. I do have a handful of single sided mirrors for any students who are not sitting directly across from another student. The single sided mirrors can be found here.
If you do not have a class set of standing mirrors, or they simple are not in the budget- I. Have. Been. There. Just head to your local dollar store and pick up a class set of any type of mirror you can find, even if they aren’t large enough or free standing. Any mirror is better than nothing.
Of course, if your students each have their own ipads, they can take a selfie from their shoulders up, and I would recommend against a plain (white or light) wall. I created a little selfie station in my storage room for students to take turns going in one by one to take their selfie. If your students do not have an ipad, then you can go ahead and take a picture of each student using whatever works best for you (ipad, phone, traditional camera) it’s up to you! If students are creating a self portrait with color then we leave their photos as is, but if you are teaching students how to draw self portraits with pencil and adding shading & value, then I would suggest definitely having them convert their photo to black & white.
3. Share a Large Variety of Self Portrait Styles


![Yayoi Kusama | Self Portrait [TWAY] (2010) | Artsy](https://d7hftxdivxxvm.cloudfront.net/?resize_to=fit&width=640&height=800&quality=80&src=https%3A%2F%2Fd32dm0rphc51dk.cloudfront.net%2FSkLtEa0rNDx6DmqWBI-yPw%2Fnormalized.jpg)
As you probably know, students (particularly in the upper grades) can feel a bit self conscious about drawing a self portrait. So it’s important to share a variety of self portraits from artists with very different styles and appearances. That way your students will see from the start that not every artist draws or paints their self portrait in a photo realistic style. Even though an artist is drawing themselves as the subject matter, they can still allow their own style to be expressed in their work. Some of my favorite artists to use when when teaching self portraits are: Vincent Van Gogh, Frida Kahlo, Pablo Picasso, Mary Cassat, Jacob Lawrence, Paul Gauguin, Andy Warhol, Norman Rockwell, Tamara de Lempicka, Yayoi Kusama and Jean-Michel Basquiat.
4. Have Diverse & Inclusive Drawing Guides/ Examples Available


Obviously none of your students look exactly the same, so it’s impossible to teach self portraits in a “one size fits all” manner. So to help assist you in teaching students how to draw themselves, it’s incredibly helpful and important to have a variety of facial features & types of hair styles and textures available to your students. After years of demonstrating individual hair examples for my students (which took so much time out of class) I finally created several self portrait drawing guides and references for my students to use at their tables. These guides not only freed up my time so that I could more fluidly move around the room and assist kids who may need some help, but they also gave my students choices which in turn created more ownership. I have two different self portrait guides available, my Simple Self Portrait Guide which is great for grades k-3, and my Advanced Self Portrait Guide which is best suited for grades 4-8.
5. Celebrate Identity and Individuality by Reading Inspiring Picture Books

Beginning your lesson with a story not only helps build strong literacy skills but it also helps your students to connect more deeply to their project and gain confidence and pride in themselves and their work. Some of my favorite picture books to read while teaching self portraits are:
What I Like About Me by Allia Nolan
You are Enough by Margaret O’Hair,
The Skin You Live In by Michael Tyler
I Like Myself by Karen Beaumont
It’s Ok to Be Different by Todd Parr
Just Like Me by Vanessa Brantley-Newton
Becoming Vanessa by Vanessa Brantley-Newton
6. Use Transparencies as a Way to Practice Drawing Hair

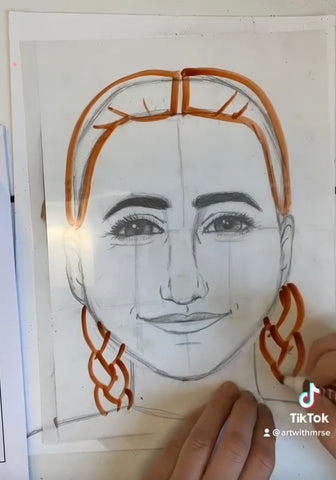
A few years ago I was experimenting with different ways to help students with drawing their hair and discovered that using a transparency for a student to practice is a super hack! Hair is usually one the last things I teach students how to draw (because I always start from the eyes and work our way down to the nose, mouth, neck and ears). So once students are ready to draw their hair- often times they are really nervous because their self portrait is nearly done by that point! However, if you place a clear transparency over top of the drawing, students can use a dry erase marker to practice the hair style that is best suited for them! Be sure to teach your students that their hair starts at their hairline and not the tippy top of their head! I have my students draw their hairline in on their portrait and explain it as a roller coaster that begins and ends at their ears. Once the hairline is drawn in, students can practice drawing their hair on the transparency and then re-draw the hair onto their final paper. For a quick demonstration of how I use the transparencies, check out this reel I created here If you do not have access to transparencies, even just having your students practice drawing their hair on a white board is a low pressure way for them to practice before hand.

7. Lead by Example- Share Your Own Work!


I may be in the minority with this, but thankfully my mom saved many many folders of my artwork over the years. This has been an absolute gold mine for me when introducing self portraits to my students. I love to start by sharing a self portrait I drew when I was in Kindergarten, another from when I was in 4th grade, another from high school and any from college or that are most recent. Seeing my students’ reaction to my improvement is the best way to show by example that with time and practice you will only get better at what you do! As an art teacher I believe in the importance of sharing your own work whenever possible, even if it’s your art from when you were a kid! This helps your students not only relate to you and ultimately gain their respect as an artist. So don’t be afraid, share your art! Let them see and hear about your struggles and let them know that every artist has their ups as downs when learning something new, but the only way to get better is with practice :)
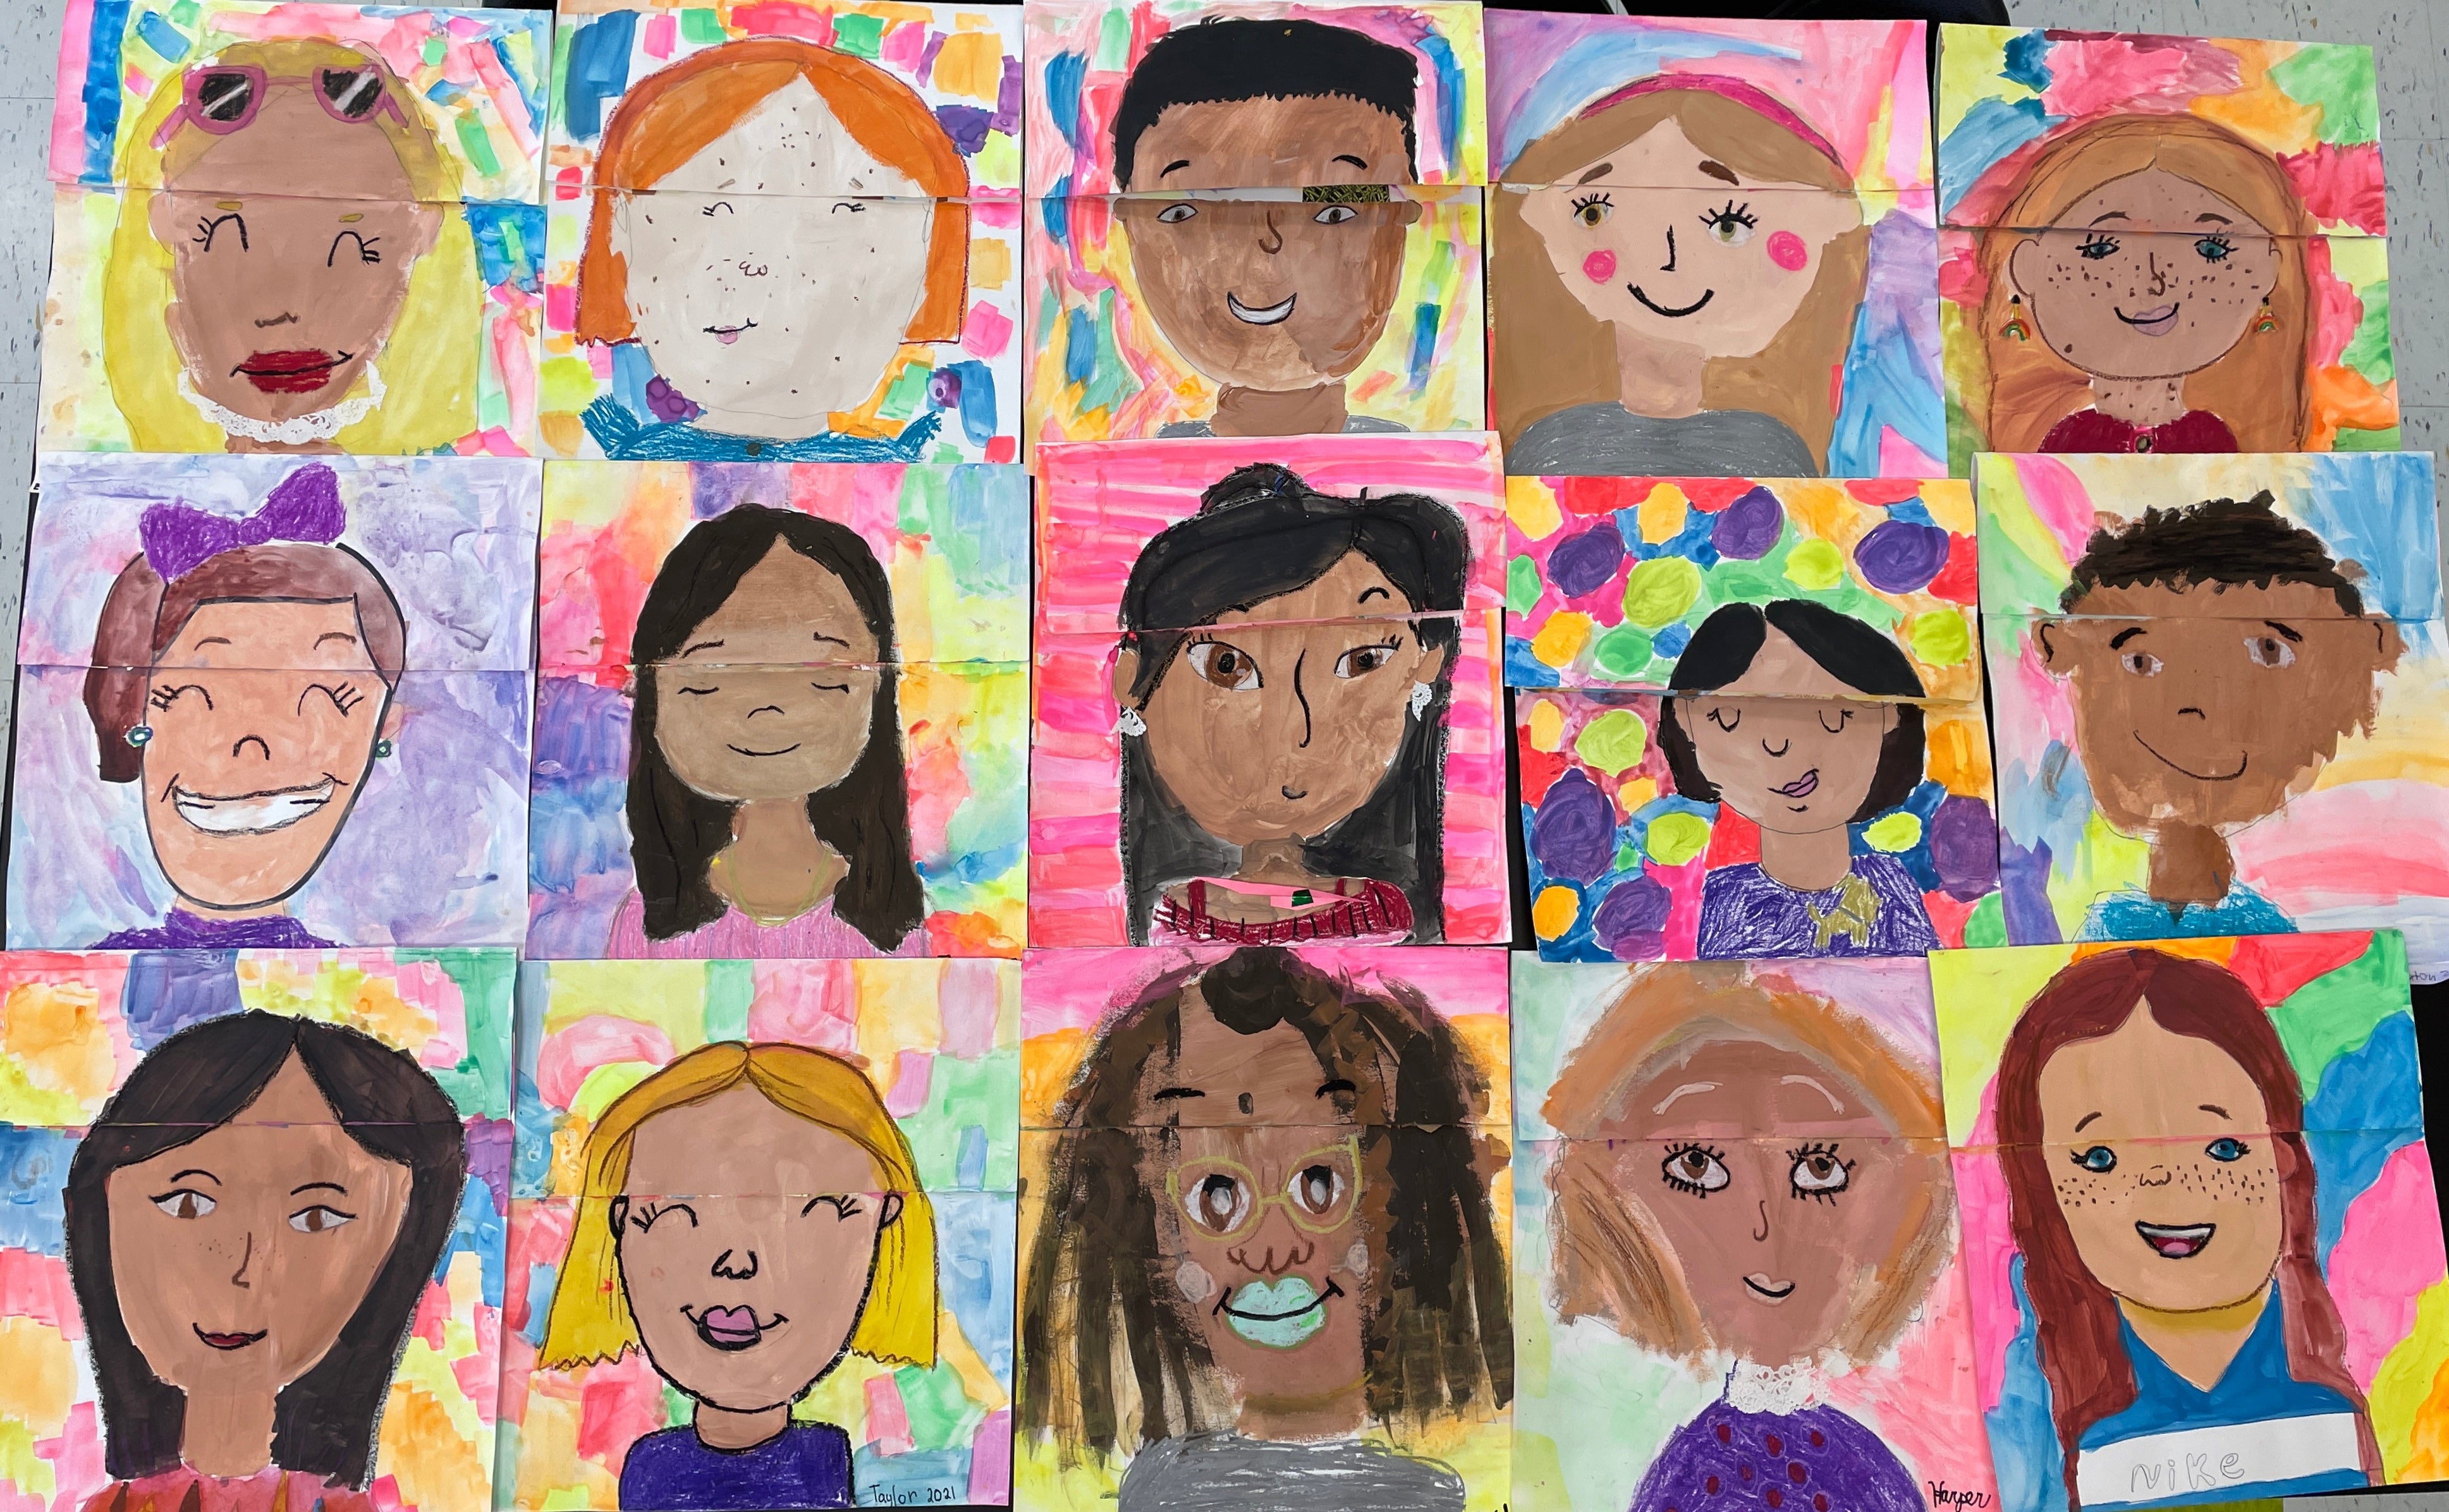
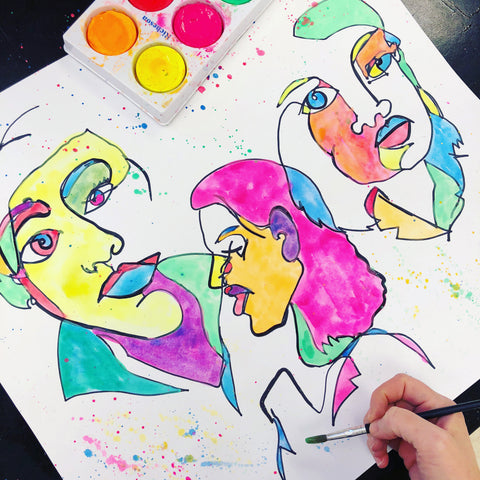
8. Find Creative Ways to Make the Project More Interactive/ Fun or Deeper Connection to Their Lives.

Kids are always way more invested in an art project when it is super engaging or connects directly to their life. Now obviously having your students draw a picture of themselves does connect them, but is there a way you can go a bit deeper with a project so that a student can share more about their identity than just their physical appearance? Is there a way they can express their feelings, interests, or individualized style in their work? Or can you just add an super fun/ interactive element that the students aren't expecting (Like a blind contour self portrait drawing).
One of the projects I created in my early years of teaching was one that I called “The Real Me”. It was an interactive self portrait that not only taught proportions and technical skills, but also allowed my students to share their true selves with me and their peers through an interactive flap on the project. This has been one of my absolute favorite lessons over the years that allow for students to express themselves in a deeper way! What are some creative ways you can help your students connect to their work in a more meaningful way?


5 comments
Nice sharing! Very helpful! Thanks!!!
Thanks for this! My son is a talented artist, but I have no idea how to support him. These resources look amazing!
Great article, full of useful tips and well structured.
Wow! I want to thank you so much for this article. I am a brand new l art teacher (K-6, SDC K2, SDC 3/4, SDC 6/8). I am very excited, but am overwhelmed with what each grade is able to do. This article is a blessing. Thank You!
WOW! SO FRESH! IT CAME OUT GREAT! SCRUMTIOUS!